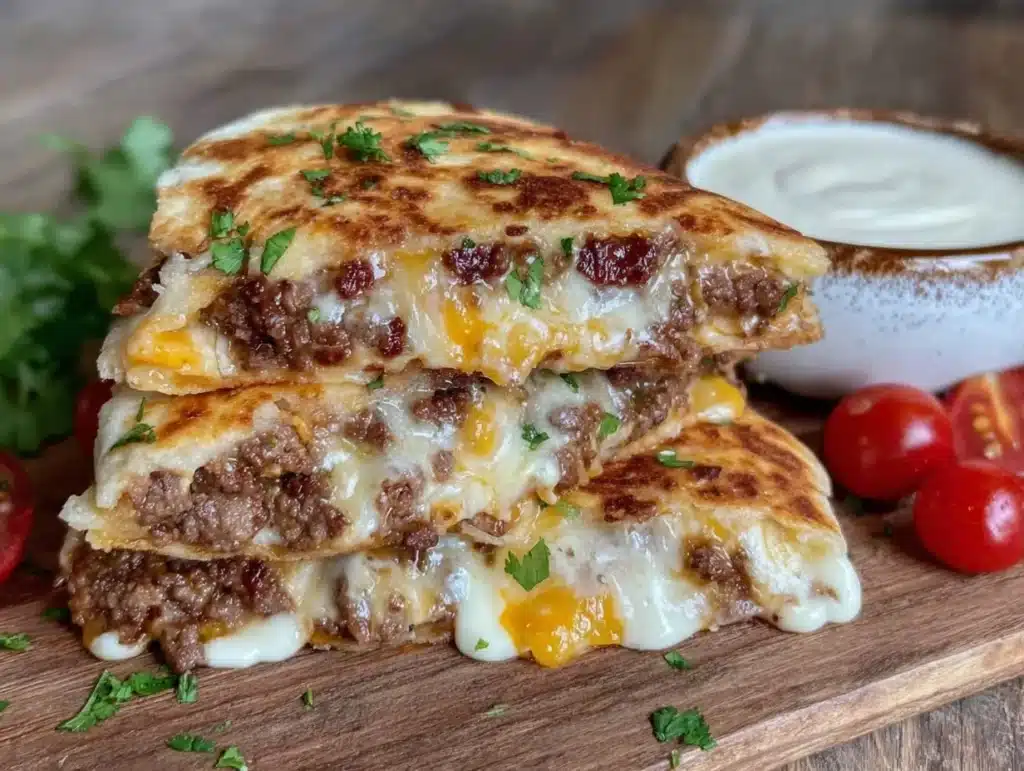
The smell of sizzling beef hitting a screaming hot griddle is instantly nostalgic for me. It takes me back to those long drives with my high school friends, stopping at the first fast-food joint we saw. You know the type. The kind of place where the menu board is huge and the lines are always out the door. I first realized I could recreate that specific, addictive flavor at home when I was trying to save money during a tight budget month. I was craving that salty, cheesy, beefy punch that Smashburger is famous for, but I didn’t want to sit in traffic.
So, I grabbed a cast-iron skillet and some tortillas. The result was so good that I immediately ordered a second round of takeout just to compare. Honestly, the homemade version won. It had better texture and felt less like a heavy meal. This recipe became my go-to for quick lunches that actually keep me full. If you are looking for a meal that fuels you without the afternoon slump, you need to try this.
I have tested this copycat Smashburger quesadilla recipe over a dozen times. Each time, I tweaked the cheese blend and the sear time. The goal was always the same: that perfect crispy edge with a molten center. It is perfect for busy weeknights when you want something comforting but don’t have hours to cook. It is also great for meal prep if you like your lunches with a bit of a kick. Let’s get cooking.
Why You’ll Love This Recipe
There is something deeply satisfying about making a fast-food favorite at home. It feels like you are cheating the system, but you are actually just being smarter with your time and ingredients. This recipe isn’t just about saving a few dollars; it is about controlling what goes into your body while still getting that crave-able taste. I developed this method after noticing that restaurant quesadillas often use processed cheese that doesn’t melt right. By using real, block-shredded cheese, I got a creaminess that is impossible to buy pre-shredded.
Here is why this dish earns a permanent spot in your weekly rotation:
- Quick & Easy: You can have dinner on the table in under 15 minutes. The beef cooks fast, and the quesadillas only need a few minutes per side. This is perfect for busy weeknights or when you are hungry after the gym.
- Simple Ingredients: You likely have most of this in your pantry already. Ground beef, tortillas, cheese, and a few spices. No fancy grocery trips needed for obscure items.
- Perfect for Meal Prep: These freeze well and reheat nicely. I often make a double batch on Sunday to have a solid lunch option for the week.
- Crowd-Pleaser: Kids love the cheesy goodness, and adults appreciate the savory depth. It is always a hit at casual gatherings or game day parties.
- Unbelievably Delicious: The texture contrast between the crisp tortilla and the juicy beef is next-level comfort food. It hits all the right notes.
What makes this different from other quesadilla recipes is the Smashburger influence. We are using a specific blend of cheeses and a technique for the beef that mimics that high-heat sear. It is not just another cheesy pocket; it is a structured, flavorful experience. It is the kind of meal that makes you close your eyes after the first bite. It is comfort food reimagined for people who want to feel good about what they eat. It fuels you without leaving you crashing by 3pm, which is a rare feat for such a savory dish.
What Ingredients You Will Need
This recipe uses simple, wholesome ingredients to deliver bold flavor and satisfying texture without the fuss. The key is quality. Since there are not many components, each one matters. I recommend buying block cheese and shredding it yourself. Pre-shredded cheese has anti-caking agents that prevent it from melting smoothly, which ruins the texture of the quesadilla.
- Ground Beef: 1 pound of 80/20 ground beef. The fat content is crucial for flavor and juiciness. Lean beef will result in a dry quesadilla. I prefer grass-fed if I can find it on sale.
- Tortillas: 4 large flour tortillas. Look for ones that are pliable but sturdy. Large size ensures you get enough filling without the tortilla tearing.
- Cheddar Cheese: 1 cup, shredded sharp cheddar. Sharp cheddar has more flavor than mild. It stands up well to the seasoned beef.
- Monterey Jack Cheese: 1 cup, shredded. This cheese melts beautifully and adds a creamy texture. It balances the sharpness of the cheddar.
- White Onion: 1 medium onion, finely diced. This adds sweetness and crunch. Finely dicing it ensures it cooks quickly and distributes evenly.
- Garlic: 2 cloves, minced. Fresh garlic is much better than powder here. It provides that aromatic base note.
- Smoked Paprika: 1 teaspoon. This gives the beef that slight smoky depth that mimics the grill flavor. It is a secret weapon for this recipe.
- Cumin: 1/2 teaspoon. Adds warmth and earthiness. It complements the beef perfectly.
- Salt and Black Pepper: To taste. Season the beef well; it needs enough salt to pop.
- Olive Oil: 1 tablespoon. For cooking the beef and onions. It helps with the browning process.
- Optional Toppings: Diced tomatoes, fresh cilantro, or a dollop of sour cream. These add freshness and cut through the richness.
For the best texture, I recommend using a specific blend of cheeses. The combination of sharp cheddar and Monterey Jack is standard in many diners, but it works exceptionally well here. If you are dairy-free, you can use a high-quality plant-based cheese shreds, though the melt may vary slightly. I have also used goat cheese for a tangier profile, which is a variation I enjoy when I want something lighter.
Equipment Needed
You do not need fancy gadgets to make these. A standard kitchen setup is all you need. The most important tool is a good skillet. I use a cast-iron skillet because it retains heat well and creates a nice crust on the tortilla. If you do not have cast iron, a heavy-bottomed stainless steel pan works too. Non-stick is okay, but it won’t get as crispy.
You will also need a sharp knife and a cutting board for prepping the onions and garlic. A spatula is essential for flipping the quesadillas without breaking them. I prefer a thin, flexible metal spatula because it slides under the tortilla easily. If you are making a large batch, having two pans can save time. Just make sure they are not overcrowded, or the tortillas will steam instead of fry.
Maintaining your cast iron is easy. Just wash it with hot water and a brush, dry it thoroughly, and rub a tiny bit of oil on it. This keeps it seasoned and prevents rust. For budget-friendly options, any heavy skillet from a thrift store can work wonders. The key is the heat retention, not the brand.
Preparation Method
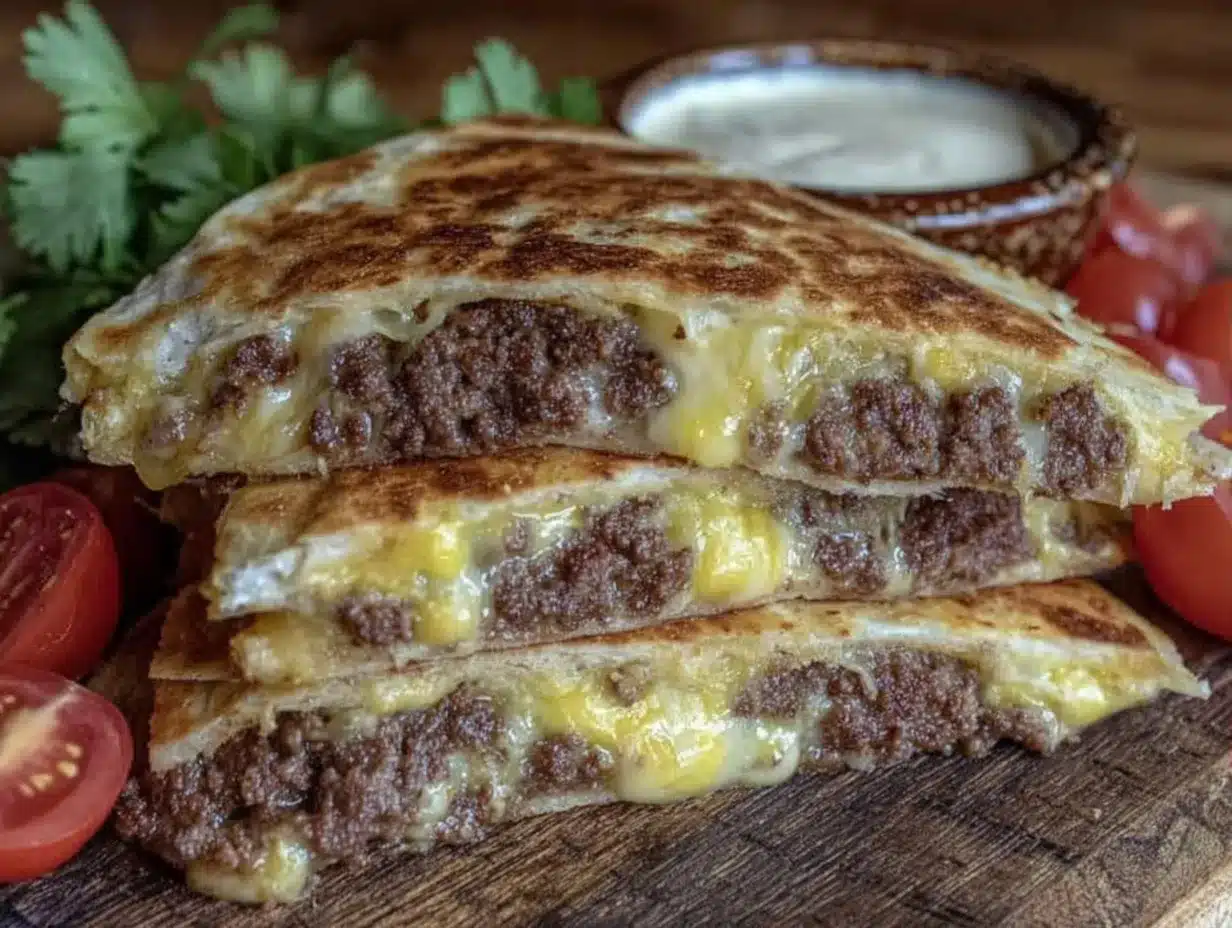
Getting the timing right is the secret to a great quesadilla. You want the beef to be hot and the cheese to be melted at the same time. Here is how I do it, step by step.
- Prep the Veggies: Start by dicing the onion and mincing the garlic. Keep them ready in a bowl. This is called mise en place, and it helps you stay organized while cooking. (Time: 3 minutes)
- Cook the Beef: Heat your skillet over medium-high heat. Add the olive oil. Once the oil shimmers, add the ground beef. Break it up with a spoon as it cooks. You want small crumbles, not large chunks. Cook until browned, about 5-7 minutes. (Time: 7 minutes)
- Add Aromatics: Push the beef to the side of the pan. Add the diced onions to the empty space. Cook them for 2-3 minutes until they start to soften. Then add the minced garlic and cook for another 30 seconds. Be careful not to burn the garlic. (Time: 3 minutes)
- Season the Meat: Sprinkle the smoked paprika, cumin, salt, and black pepper over the beef and onions. Mix everything together. Taste the beef and add more salt if needed. The beef should be heavily seasoned. (Time: 1 minute)
- Assemble the Quesadillas: Lower the heat to medium. Place a tortilla in the pan. Sprinkle half of the cheese blend on one half of the tortilla. Top the cheese with a generous amount of the beef mixture. Add more cheese on top of the beef to act as glue. (Time: 2 minutes per quesadilla)
- Fry the Quesadilla: Fold the tortilla in half. Press down gently with your spatula. Cook for 2-3 minutes until the bottom is golden brown and crispy. Check occasionally to ensure it is not burning. (Time: 3 minutes)
- Flip and Finish: Carefully flip the quesadilla. Cook the other side for another 2-3 minutes. The cheese should be fully melted. If it is not melting, cover the pan with a lid for a minute to trap steam. (Time: 3 minutes)
- Rest and Slice: Remove the quesadilla from the pan and let it rest on a cutting board for 1 minute. This allows the cheese to set slightly so it does not spill out when you cut it. Slice into wedges. (Time: 1 minute)
Repeat with the remaining tortillas. If the pan gets too dry, add a tiny splash of oil. The key is patience. Do not rush the flipping. Let the tortilla get that perfect crunch.
Cooking Tips & Techniques
There are a few tricks I learned the hard way to make these quesadillas perfect. The biggest mistake people make is using too much cheese on the bottom and not enough on top. The top layer of cheese acts as a seal. It keeps the beef from sliding out and helps the tortilla stick together. Always double-layer the cheese.
Another tip is the heat level. If your pan is too hot, the tortilla will burn before the cheese melts. If it is too low, the tortilla will get soggy. Medium heat is the sweet spot. I also recommend not overcrowding the pan. Cook one or two at a time. This ensures even cooking and better browning.
I once tried to make these in the microwave to save time. It was a disaster. The tortilla became chewy and tough. Always use a stovetop or an air fryer for the best texture. If you use an air fryer, cook at 375°F for 6-8 minutes, flipping halfway. It gets surprisingly crispy.
Multitasking is key here. While one quesadilla is cooking, start assembling the next one in a separate bowl. This keeps the workflow smooth. Also, keep your beef warm in the pan while you cook the tortillas. Cold beef will cool down the cheese and make it harder to melt.
For consistency, use a kitchen scale to measure the beef and cheese. This ensures each quesadilla has the same ratio of filling to dough. It sounds precise, but it makes a huge difference in the eating experience. You want every bite to have that perfect balance of crunch, cheese, and meat.
Variations & Adaptations
While the classic version is my favorite, this recipe is very flexible. You can adapt it to fit your dietary needs or taste preferences. Here are a few variations I have tried.
- Spicy Kick: Add diced jalapeños to the beef mixture. You can also use pepper jack cheese instead of Monterey Jack. This adds a nice heat that cuts through the fat.
- Veggie Boost: Sauté bell peppers and mushrooms with the onions. This adds volume and nutrients without adding too many calories. It makes the quesadilla heartier.
- Chicken Option: Swap the beef for grilled chicken strips. Season the chicken with the same spices. This is a lighter option that still feels indulgent.
- Gluten-Free: Use corn tortillas or gluten-free flour tortillas. Just be careful, as corn tortillas are more fragile. Handle them gently when flipping.
- Breakfast Style: Add scrambled eggs and bacon bits. This turns the quesadilla into a powerful breakfast fuel. It is great for morning energy.
I also tried adding a layer of refried beans for extra fiber. It changed the texture significantly, making it denser. Some people love it, while others prefer the lighter version. It depends on your preference. The beauty of this recipe is that you can make it your own.
Serving & Storage Suggestions
Serving these warm is best. I like to garnish with fresh cilantro and a squeeze of lime juice. The acidity from the lime brightens up the rich flavors. You can also serve them with a side of guacamole or a simple green salad. For beverages, a cold beer or a sparkling water with lemon works well.
Leftovers can be stored in an airtight container in the refrigerator for up to 3 days. To reheat, use a skillet or an air fryer. Avoid the microwave if you want to keep the crunch. Reheating in a pan over medium heat for 2 minutes per side restores the texture beautifully.
These also freeze well. Let them cool completely before wrapping them in plastic wrap and foil. They can be frozen for up to 2 months. To reheat from frozen, bake them in the oven at 350°F for 15-20 minutes. The flavors actually meld together nicely after a day or two in the fridge.
For presentation, cut them into neat triangles and arrange them on a platter. Add some dipping sauces on the side. This makes them look like a restaurant appetizer. It is a great way to impress guests without much effort.
Nutritional Information & Benefits
While this is a comfort food, it can be part of a balanced diet. Ground beef provides high-quality protein and iron, which are essential for energy. The cheese adds calcium and fat, which helps you feel full. The tortillas provide carbohydrates for fuel. Overall, this meal offers a good balance of macros.
One serving (one quesadilla) contains approximately 450-500 calories, depending on the size of the tortilla and the amount of cheese. It has about 25g of protein, 30g of fat, and 30g of carbohydrates. The fiber content is moderate, so adding veggies can boost that. It is not a low-carb meal, but it is nutrient-dense.
For those watching sodium, be mindful of the salt in the beef and cheese. You can reduce added salt and rely on the natural saltiness of the cheese. The smoked paprika adds flavor without extra sodium. This recipe is suitable for omnivores and can be adapted for vegetarians. It is a great option for post-workout meals due to the protein content.
I find that eating this meal keeps me satisfied for hours. The combination of fat and protein stabilizes blood sugar levels. It does not cause a spike and crash like sugary snacks do. That is why I call it fuel that doesn’t leave you crashing by 3pm. It is honest, nourishing food.
Conclusion
Making copycat Smashburger quesadillas at home is easier than you think. It brings the flavor of your favorite spot into your kitchen with just a few simple steps. You get to control the ingredients and make it as healthy or indulgent as you want. I hope you try this recipe and enjoy it as much as I do.
Feel free to customize it with your favorite toppings or spices. Cooking should be fun and adaptable. If you make this, I would love to hear how it turned out. Leave a comment below with your favorite variation. Share your photos on social media and tag me. Let’s keep the conversation going about good food.
Remember, the best meals are the ones you enjoy without guilt. This recipe is about balance and satisfaction. So grab your skillet and get cooking. Your taste buds will thank you.
Frequently Asked Questions
Can I use lean ground beef for this recipe?
Yes, you can use lean ground beef, but the result will be less juicy. I recommend adding a little extra olive oil or a bit of butter to the pan to compensate for the lack of fat. The flavor might be slightly less rich, but it is still delicious.
How do I prevent the quesadilla from falling apart?
Make sure to use enough cheese as a glue. Layer the cheese on both the bottom and top of the beef filling. Also, let the quesadilla rest for a minute after cooking before cutting it. This allows the cheese to set and hold everything together.
Can I make these in the oven?
Absolutely. Preheat your oven to 400°F. Place the assembled quesadillas on a baking sheet. Brush the tops with a little oil or butter. Bake for 10-12 minutes, flipping halfway through, until the tortilla is crispy and golden. It is a good option for making large batches.
What kind of tortillas work best?
Large flour tortillas are the standard choice because they are pliable and crisp up nicely. Corn tortillas can be used for a gluten-free option, but they are more brittle. You may need to use two corn tortillas per quesadilla for structural support.
How long do the leftovers last in the fridge?
Leftovers will last for up to 3 days in an airtight container. For the best texture, reheat them in a skillet or air fryer. The microwave will make the tortillas soft and chewy, so avoid it if you want that crispy bite.
Pin This Recipe!
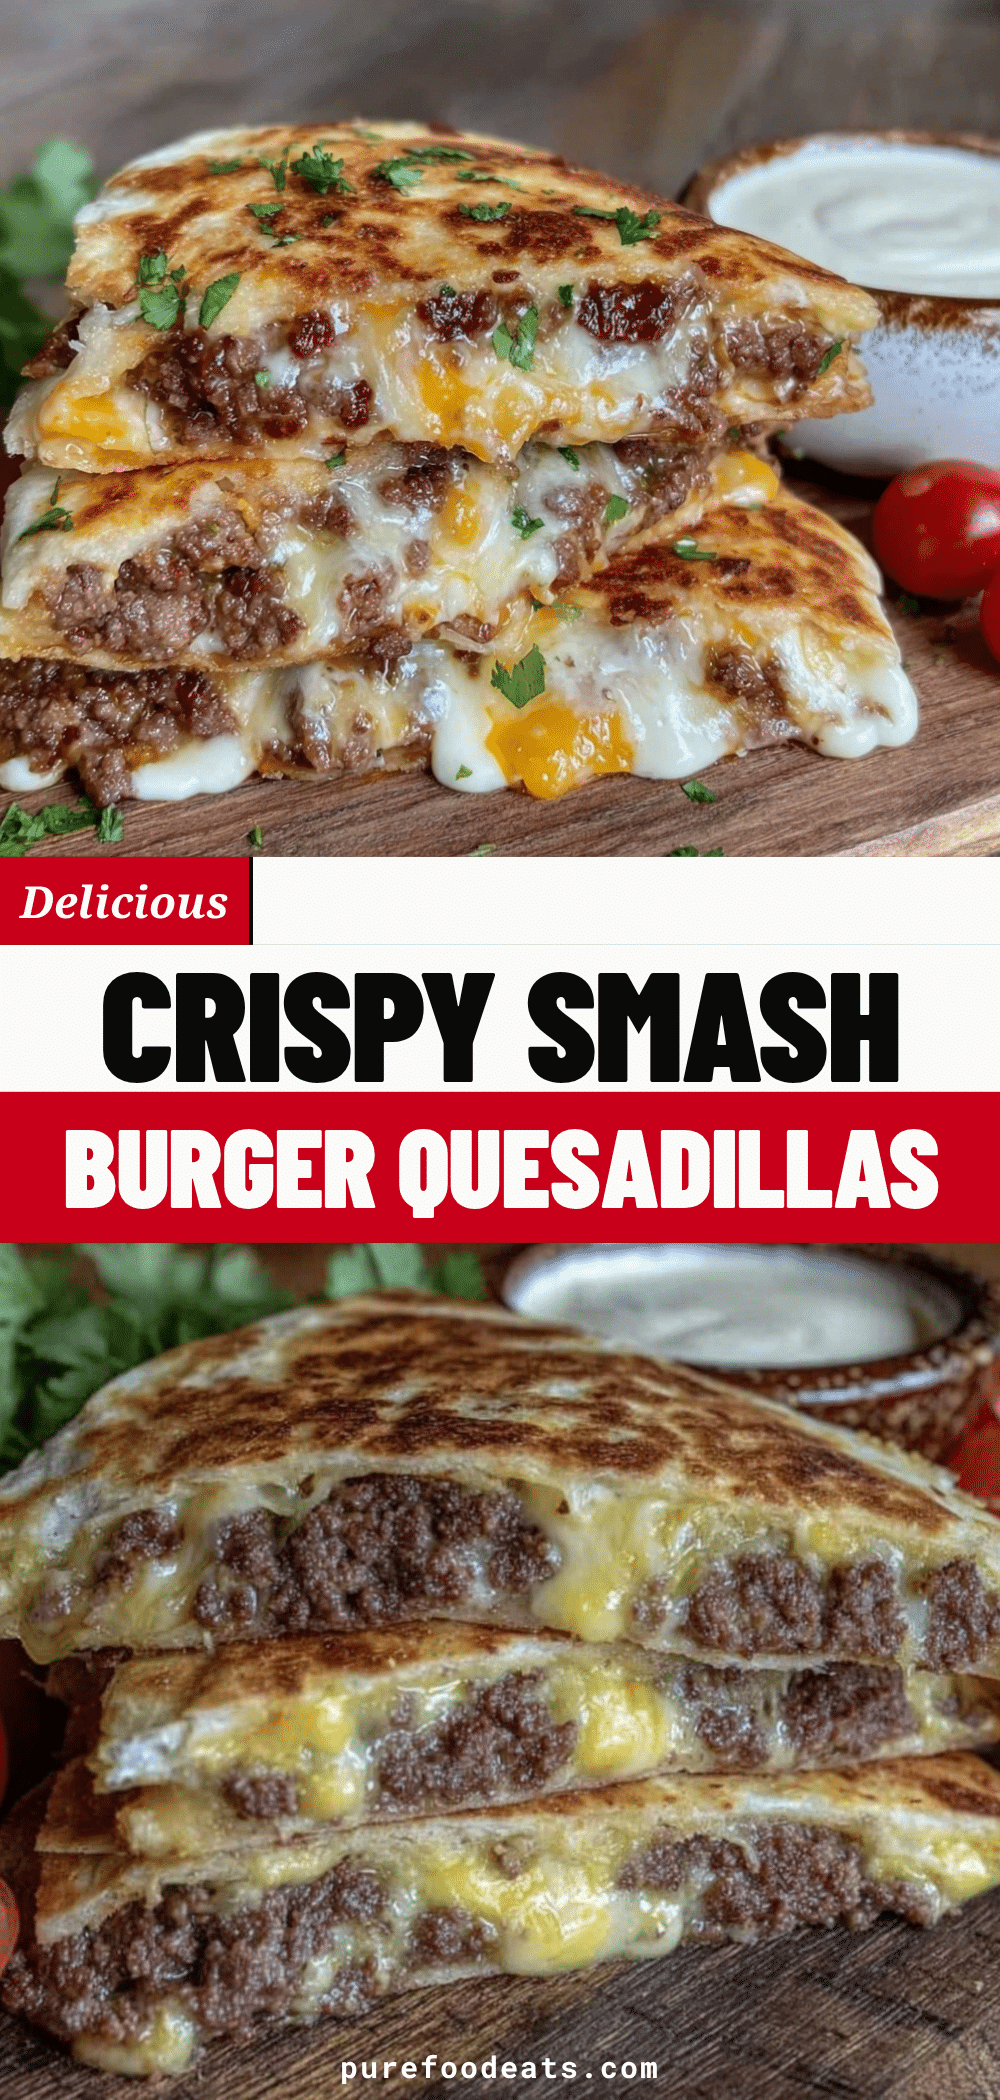

Copycat Smashburger Quesadillas: 15-Min Fuel That Doesn’t Leave You Crashing by 3pm
- Total Time: 15 minutes
- Yield: 4 servings 1x
Description
A quick, 15-minute homemade quesadilla recipe that mimics the savory, cheesy flavor of Smashburger. Using a specific cheese blend and high-heat searing technique, this dish provides a satisfying meal that fuels you without the afternoon slump.
Ingredients
- 1 pound 80/20 ground beef
- 4 large flour tortillas
- 1 cup sharp cheddar cheese, shredded
- 1 cup Monterey Jack cheese, shredded
- 1 medium white onion, finely diced
- 2 cloves garlic, minced
- 1 teaspoon smoked paprika
- 1/2 teaspoon cumin
- Salt and black pepper to taste
- 1 tablespoon olive oil
- Optional toppings: diced tomatoes, fresh cilantro, sour cream
Instructions
- Dice the onion and mince the garlic, keeping them ready in a bowl.
- Heat a skillet over medium-high heat and add olive oil. Once shimmering, add the ground beef and break it into small crumbles. Cook until browned, about 5-7 minutes.
- Push the beef to the side of the pan and add the diced onions. Cook for 2-3 minutes until softened, then add the minced garlic and cook for 30 seconds.
- Sprinkle smoked paprika, cumin, salt, and black pepper over the beef and onions. Mix well and taste to adjust seasoning.
- Lower heat to medium. Place a tortilla in the pan and sprinkle half the cheese blend on one half. Top with beef mixture, then add more cheese on top to act as glue.
- Fold the tortilla in half and press gently. Cook for 2-3 minutes until the bottom is golden brown and crispy.
- Carefully flip the quesadilla and cook the other side for 2-3 minutes until cheese is melted. If needed, cover with a lid for a minute to trap steam.
- Remove from pan and let rest for 1 minute before slicing into wedges. Repeat with remaining tortillas.
Notes
For best texture, shred block cheese yourself as pre-shredded cheese contains anti-caking agents. Use medium heat to prevent burning the tortilla before the cheese melts. Let the quesadilla rest for 1 minute before cutting to allow cheese to set. Can be made in an air fryer at 375°F for 6-8 minutes or in an oven at 400°F for 10-12 minutes.
- Prep Time: 3 minutes
- Cook Time: 12 minutes
- Category: Main Course
- Cuisine: American
Nutrition
- Serving Size: 1 quesadilla
- Calories: 475
- Sugar: 2
- Sodium: 600
- Fat: 30
- Saturated Fat: 12
- Carbohydrates: 30
- Fiber: 2
- Protein: 25
Keywords: smashburger copycat, quesadilla recipe, quick dinner, meal prep, ground beef recipes, cheesy quesadilla, 15 minute meals