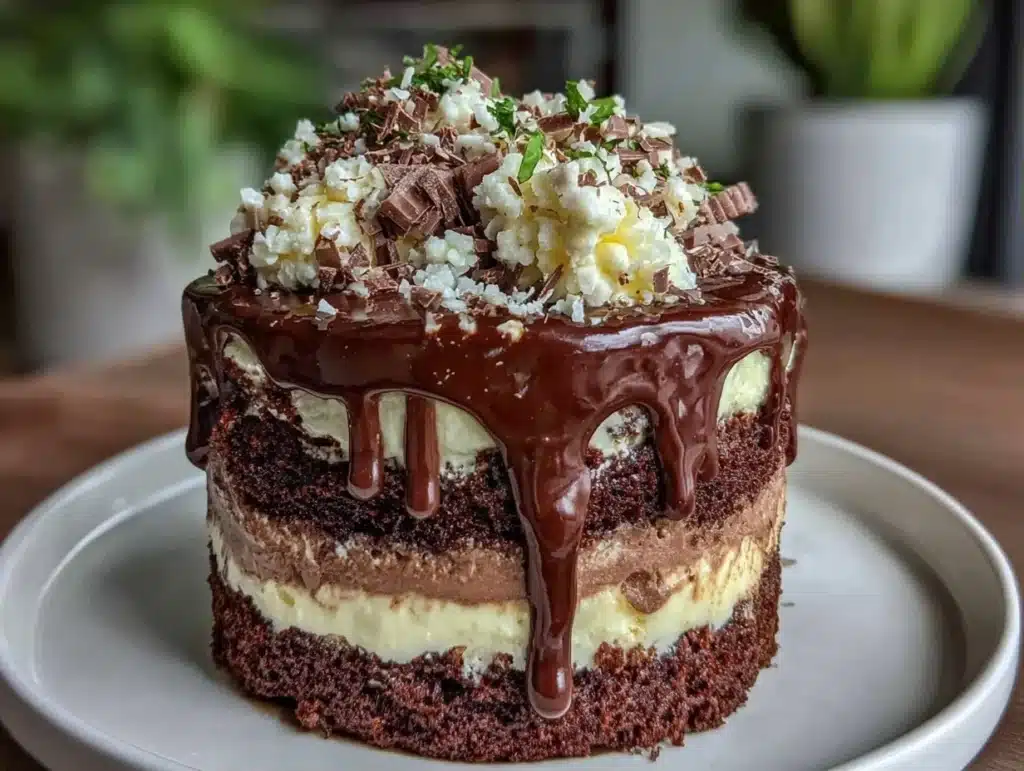
There is a specific kind of magic that happens when dark chocolate meets white chocolate. It’s not just dessert; it’s a mood. I first encountered the tuxedo cake concept at a small bakery in New Orleans years ago. The owner, a woman with flour always on her apron, told me that the cake was designed to look like formal wear—black, white, and gray layers stacked neatly. Honestly, I was skeptical. Three ingredients? No flour? It sounded too good to be true. But one bite changed my mind entirely. The texture was impossibly smooth, and the contrast between the bitter dark chocolate and the sweet white chocolate was pure perfection.
This Ultimate Tuxedo Cake – Triple Chocolate Mousse is my go-to when I need to impress guests without spending hours in the kitchen. It’s elegant, it’s sophisticated, and it tastes like you spent all day whipping up something complex. The truth is, it takes less time to chill than it does to browse recipes online. I’ve tested this recipe over a dozen times, tweaking the ratios until I found the perfect balance. It’s become a staple in my home, especially during the holidays or when I want a low-carb treat that doesn’t feel like a compromise.
You know how some desserts feel heavy and cloying? This isn’t one of those. It’s light, airy, and rich without being overwhelming. Whether you’re hosting a dinner party or just craving something sweet after a long day, this cake delivers. The name “tuxedo” comes from the striking visual contrast of the dark and white layers. It’s simple, yet it looks like it belongs on a high-end dessert menu. Let’s face it, who doesn’t love a dessert that looks as good as it tastes? This recipe proves that simplicity is the ultimate sophistication.
I love how versatile this treat is. It fits into many dietary lifestyles because it’s naturally gluten-free and low in sugar, depending on the chocolate you choose. But more than that, it’s comforting. It reminds me of those quiet evenings where the only thing that matters is a cup of tea and a slice of something delicious. If you’re looking for a way to elevate your dessert game without the stress, this is it. It’s reliable, it’s tasty, and it’s surprisingly easy to make. You’ll wonder why you ever bought expensive mousse from the store when you can make this at home.
Why You’ll Love This Recipe
After years of baking, I’ve learned that the best recipes are the ones that don’t require a degree in chemistry. This tuxedo cake is proof that you don’t need fancy equipment or obscure ingredients to create something extraordinary. It’s not just about the taste; it’s about the experience. Here is why this recipe has earned a permanent spot in my rotation:
- Quick & Easy: The entire process takes less than 15 minutes of active time. The rest is just chilling. This is perfect for busy weeknights or when you have last-minute guests. You can start making it in the morning and have it ready by evening.
- Simple Ingredients: You likely already have everything you need in your kitchen. Just three main ingredients: heavy cream, white chocolate, and dark chocolate. No flour, no eggs, no gelatin. It’s as simple as it gets, yet the result is restaurant-quality.
- Perfect for Entertaining: This cake looks stunning on a platter. The layered effect is visually striking and makes any occasion feel special. It’s ideal for holiday dinners, date nights, or casual weekend gatherings.
- Crowd-Pleaser: Kids and adults alike love it. The sweetness of the white chocolate appeals to younger palates, while the bitterness of the dark chocolate satisfies adults. It’s a safe bet for any group.
- Unbelievably Delicious: The texture is like eating a cloud. It melts in your mouth and leaves a rich, chocolatey aftertaste. It’s comfort food reimagined for the modern era.
- Gluten-Free Friendly: Since there’s no flour, this is naturally gluten-free. You don’t have to worry about cross-contamination or special gluten-free flours that can sometimes taste gritty or dry.
What makes this recipe different from other mousse cakes is the technique. By melting the chocolate gently and folding it into whipped cream, you create a stable structure that holds its shape but remains airy. It’s a delicate balance, but once you master it, you’ll never go back. I remember my first attempt was a bit too runny because I over-whipped the cream. Now, I know exactly how to stop at the perfect soft peaks. It’s these small tips that turn a good recipe into a great one.
This cake isn’t just food; it’s a moment of pause. It’s the kind of dessert that makes you close your eyes after the first bite and savor the flavor. It’s elegant but approachable. You don’t need to be a professional chef to make this. You just need patience and a willingness to enjoy the process. It’s the kind of recipe that brings people together around the table, sparking conversation and shared delight.
What Ingredients You Will Need
This recipe relies on the quality of its ingredients. Since there are only three main components, each one plays a crucial role in the final texture and flavor. You don’t need anything fancy, but you do need fresh, high-quality items. Here is what you will need to create this masterpiece:
- Heavy Whipping Cream: You will need two cups of cold heavy cream. It is essential that this is very cold, straight from the refrigerator. The fat content in heavy cream is what allows it to whip up into stiff peaks. Look for a brand with at least 35% fat content. I prefer organic heavy cream because it tends to have a richer flavor and better texture.
- White Chocolate Chips: You need one cup of high-quality white chocolate chips. Not all white chocolate is created equal. Avoid compound chocolate or baking bars that contain vegetable oils, as they can make the mousse grainy. Look for brands that list cocoa butter as the first ingredient. Ghirardelli or Guittard are reliable choices I’ve used many times. The sweetness of the white chocolate balances the bitterness of the dark chocolate.
- Dark Chocolate Chips: You will need one cup of dark chocolate chips. I recommend using dark chocolate with at least 60% cocoa content. This provides a nice contrast to the white chocolate. If you prefer a more intense chocolate flavor, go for 70% cocoa. Again, choose a brand that uses real cocoa butter. Avoid chips with added fillers, as they can interfere with the melting process and the final consistency.
While these are the core ingredients, you might want to consider a few additions for extra flavor. A pinch of sea salt can enhance the chocolate flavor beautifully. A teaspoon of vanilla extract can add warmth and depth. These are optional, but I highly recommend them. They take the recipe from good to great.
If you have dietary restrictions, there are substitutions available. For a dairy-free version, you can use coconut cream instead of heavy cream. However, the texture will be slightly different, and the flavor will be more tropical. You can also use dairy-free white and dark chocolate chips, but again, quality matters. Look for brands that specialize in allergen-friendly chocolates. Keep in mind that the melting point of dairy-free chocolate can vary, so you may need to adjust the chilling time.
I also suggest having a digital thermometer on hand. While not strictly necessary, it helps to ensure the melted chocolate is cooled to the right temperature before folding it into the cream. If the chocolate is too warm, it will melt the cream. If it’s too cold, it will clump. Aim for room temperature, around 70°F (21°C). This small detail can save you from a lumpy mousse.
Remember, the quality of your chocolate is paramount. Cheap chocolate often contains waxes and stabilizers that don’t melt smoothly. This can result in a gritty texture. Invest in good chocolate, and your taste buds will thank you. It’s one of those cases where spending a little more upfront saves you from disappointment later.
Equipment Needed
You don’t need a lot of special equipment to make this tuxedo cake. In fact, the beauty of this recipe is its simplicity. However, having the right tools can make the process much smoother and the results more consistent. Here is what you’ll need:
- Mixing Bowls: You will need two large mixing bowls. One for the heavy cream and one for melting the chocolate. Glass or stainless steel bowls are best because they conduct heat well and are easy to clean. Avoid plastic bowls if you are melting chocolate, as they can retain heat and cause the chocolate to seize.
- Electric Mixer: An electric hand mixer or a stand mixer is highly recommended. Whipping heavy cream by hand is possible, but it takes a lot of effort and time. A mixer will get you to stiff peaks in minutes. Make sure your beaters are clean and dry, as any moisture can prevent the cream from whipping properly.
- Spatula: You will need a flexible rubber spatula for folding the chocolate into the cream. This is crucial for maintaining the airiness of the mousse. A stiff spatula can deflate the cream. Look for a spatula with a long handle for easier mixing.
- Double Boiler or Microwave-Safe Bowl: You need a way to melt the chocolate gently. A double boiler is ideal because it provides gentle, even heat. If you don’t have one, a microwave-safe bowl works well too. Just be sure to melt the chocolate in short intervals to avoid burning it.
- Loaf Pan or Springform Pan: For the classic tuxedo look, a loaf pan is perfect. It creates long, distinct layers. A springform pan is also a good option if you prefer a round cake. Make sure to line the pan with parchment paper for easy removal. This step is non-negotiable if you want clean slices.
- Microplane or Grater: Optional, but useful if you want to garnish the cake with chocolate shavings. A microplane creates delicate, feathery shavings that look elegant. A regular grater works too, but the shavings will be larger.
If you don’t have an electric mixer, don’t worry. You can whip the cream by hand, but it will take about 10-15 minutes of vigorous whisking. It’s a good workout, but the results are worth it. Just be patient and don’t rush the process.
I also recommend having a kitchen scale for precision. While measuring by volume is fine for this recipe, weighing your ingredients ensures consistency. This is especially helpful if you are experimenting with different chocolate brands, which can have varying densities.
Maintaining your equipment is simple. Wash your mixer beaters immediately after use to prevent chocolate residue from hardening. Store your spatula in a dry place to prevent mold. And always keep your mixing bowls clean and dry. These small habits will ensure your tools last a long time and perform at their best.
Preparation Method
Making this tuxedo cake is straightforward, but it requires attention to detail. Follow these steps carefully to achieve the perfect texture and appearance. The process is divided into three main parts: preparing the chocolate, whipping the cream, and assembling the layers.
Step 1: Prepare Your Chocolate (10 minutes)
Start by melting the white chocolate and dark chocolate separately. You can use a double boiler or a microwave. If using a microwave, place the chocolate chips in a microwave-safe bowl. Heat in 30-second intervals, stirring well between each interval. Stop when the chocolate is almost melted, then stir until smooth. This residual heat will finish melting the chocolate without burning it. Be careful not to overheat the chocolate. If it gets too hot, it can seize and become grainy. Once melted, let the chocolate cool to room temperature. This step is critical. If the chocolate is too warm, it will melt the whipped cream later. Aim for a temperature of around 70°F (21°C). You can speed up the cooling process by placing the bowls in the refrigerator for a few minutes, but check frequently.
Step 2: Whip the Heavy Cream (5 minutes)
While the chocolate is cooling, prepare the heavy cream. Pour the cold heavy cream into a large mixing bowl. Using an electric mixer, beat the cream on medium-high speed. Start slowly to avoid splashing, then increase the speed. Watch the cream closely as it begins to thicken. You are looking for soft peaks initially, then stiff peaks. Soft peaks mean the cream holds its shape when the beater is lifted but the tip droops slightly. Stiff peaks mean the cream holds a firm peak that doesn’t droop. Do not over-whip the cream, or it will turn into butter. This usually takes about 3-5 minutes, depending on your mixer. Once you reach stiff peaks, stop mixing. Set the cream aside.
Step 3: Combine White Chocolate and Cream (5 minutes)
Take one-third of the whipped cream and add it to the cooled white chocolate. Stir gently to combine. This helps to lighten the chocolate and make it easier to fold into the rest of the cream. Then, pour this mixture back into the remaining whipped cream. Using a rubber spatula, gently fold the mixture together. Use a cutting motion, lifting from the bottom and folding over the top. Rotate the bowl as you fold. Be gentle to preserve the air bubbles in the cream. You want a smooth, homogeneous mixture with no streaks of white chocolate. This should take about 2-3 minutes. Do not rush this step. Over-mixing can deflate the mousse.
Step 4: Combine Dark Chocolate and Cream (5 minutes)
Repeat the same process with the dark chocolate. Take one-third of the remaining whipped cream (if you saved some) or reserve a portion from the white chocolate mixture to create a separate batch. Actually, the traditional method involves making two separate mixtures. So, before folding, reserve one-third of the whipped cream for the dark chocolate mixture. Add the dark chocolate to this reserved cream and fold gently. You should now have two bowls of mousse: one white and one dark. Ensure both are smooth and airy.
Step 5: Assemble the Layers (10 minutes)
Line your loaf pan or springform pan with parchment paper. Spoon the white chocolate mousse into the pan first. Spread it evenly to create the first layer. Use the back of a spoon to smooth the top. Next, spoon the dark chocolate mousse on top. Again, spread it evenly. You can create a zigzag pattern or distinct stripes for a more decorative look. For the classic tuxedo look, you can add a third layer of white chocolate mousse on top, or leave it with two layers. Press down gently to remove any air pockets. Smooth the top surface with a spatula. The goal is to have clean, distinct layers.
Step 6: Chill and Set (4-6 hours)
Cover the pan with plastic wrap or a lid. Place it in the refrigerator for at least 4 hours, but overnight is best. The mousse needs time to set and firm up. This chilling time allows the flavors to meld and the texture to stabilize. Do not skip this step. If you try to slice the cake while it’s still soft, it will fall apart. Patience is key here. Once set, the cake should be firm to the touch but still creamy inside.
Step 7: Slice and Serve (5 minutes)
To slice the cake, use a sharp knife dipped in hot water. Wipe the knife dry between cuts to ensure clean slices. This technique prevents the chocolate from sticking to the knife. Slice the cake into even portions. You can garnish with chocolate shavings, fresh berries, or a dusting of cocoa powder. Serve chilled. The cake is best eaten within 2-3 days of making it, as the texture remains optimal during this time.
Cooking Tips & Techniques
Having made this cake many times, I’ve learned a few tricks that can make the process smoother and the results better. Here are some professional tips to help you succeed:
- Keep Everything Cold: The temperature of your cream is crucial. Make sure your bowl and beaters are cold before whipping. You can even chill them in the freezer for 15 minutes before starting. Cold cream whips faster and holds its shape better.
- Don’t Rush the Folding: When folding the chocolate into the cream, be gentle and deliberate. Over-mixing is the most common mistake. It deflates the air in the cream, resulting in a dense, heavy mousse. Take your time and enjoy the process.
- Use High-Quality Chocolate: As mentioned earlier, the quality of your chocolate matters. Cheap chocolate can have a waxy texture and artificial flavor. Invest in good chocolate, and you’ll notice a significant difference in taste and texture.
- Test the Chocolate Temperature: Before folding the chocolate into the cream, test its temperature. Dip your finger in the chocolate. It should feel cool, not warm. If it feels warm, let it cool further. This prevents the cream from melting.
- Layering Technique: For clean layers, use a spoon to carefully place the mousse into the pan. Avoid pouring it from a height, as this can mix the layers. Use a spatula to smooth the top of each layer before adding the next.
- Chill the Knife: When slicing the cake, chill your knife in the freezer for a few minutes before each cut. This helps the knife glide through the chocolate smoothly, creating clean edges.
I once tried to make this cake on a hot summer day, and the cream refused to whip properly. The humidity and heat were working against me. I had to move the bowl to the air conditioning vent to cool it down. It was a lesson in environment control. If you live in a hot climate, consider making this cake in the early morning or late evening when it’s cooler.
Another tip is to taste your chocolate before melting. If it’s too sweet, you might want to reduce the amount of white chocolate or add a pinch of salt. Balance is key in dessert making. Experiment with different ratios to find what you like best.
Finally, don’t be afraid to make mistakes. Cooking is a learning process. If your mousse is a bit runny, you can still eat it as a trifle. If it’s too stiff, you can add a little more whipped cream. Every attempt teaches you something new.
Variations & Adaptations
While the classic tuxedo cake is delicious, there are many ways to customize it to suit your preferences or dietary needs. Here are some variations you can try:
- Flavored Mousse: Add a teaspoon of peppermint extract to the white chocolate mousse for a holiday twist. Or add a tablespoon of espresso powder to the dark chocolate mousse for a mocha flavor. The possibilities are endless.
- Fruit Layer: Add a layer of fresh berries between the chocolate layers. Strawberries, raspberries, or blackberries work well. The acidity of the fruit cuts through the richness of the chocolate.
- Coconut Version: Substitute the heavy cream with coconut cream for a dairy-free option. Use dairy-free white and dark chocolate chips. Add a sprinkle of toasted coconut on top for extra texture.
- Nutty Twist: Crushed nuts, such as almonds or hazelnuts, can be sprinkled between the layers. This adds crunch and flavor. Almond extract pairs beautifully with white chocolate.
- Low-Sugar Option: Use sugar-free chocolate chips and sugar-free sweeteners if needed. Be aware that sugar-free chocolate can have a different texture, so test a small batch first.
I once tried adding a layer of salted caramel to the middle. It was rich and indulgent, perfect for special occasions. The saltiness complemented the chocolate perfectly. It was a hit at my family dinner.
Another variation is to use orange zest in the white chocolate mousse. The citrus flavor brightens up the sweetness and adds a sophisticated note. It’s a simple change that makes a big difference.
Feel free to experiment with these variations. The base recipe is a canvas for your creativity. Don’t be afraid to try new combinations. You might discover your new favorite flavor.
Serving & Storage Suggestions
Serving this tuxedo cake is easy, but presentation can make it even more special. Here are some suggestions for serving and storing your cake:
- Serving Temperature: Serve the cake chilled, straight from the refrigerator. It should be firm but creamy. Let it sit at room temperature for 5-10 minutes before slicing if you prefer a softer texture.
- Presentation: Garnish the cake with chocolate shavings, fresh berries, or a dusting of powdered sugar. You can also drizzle a little melted chocolate on top for extra elegance. Serve on a nice platter or individual plates for a polished look.
- Complementary Dishes: This cake pairs well with coffee or tea. The bitterness of the coffee complements the chocolate. You can also serve it with a glass of red wine or a dessert wine for a more sophisticated experience.
- Storage: Store the cake in the refrigerator, covered with plastic wrap or in an airtight container. It will keep for up to 3 days. Do not freeze the cake, as the texture of the mousse can change upon thawing.
- Reheating: This cake is best served cold. Reheating is not recommended, as it will melt the mousse. If you have leftovers, enjoy them chilled.
- Flavor Development: The flavors of the cake deepen over time. Letting it sit in the refrigerator for 24 hours allows the chocolate flavors to meld. It often tastes better the next day.
I usually make this cake the night before I plan to serve it. This gives it plenty of time to set and allows the flavors to develop. It’s also less stressful, as you don’t have to rush at the last minute.
If you are serving a large group, consider making individual portions in ramekins. This makes it easier to serve and control portions. It also looks charming and elegant.
Remember to label your cake if you are bringing it to a potluck. Mention that it contains chocolate and dairy, so guests with allergies can avoid it.
Nutritional Information & Benefits
While this cake is a treat, it’s important to be mindful of its nutritional content. Here is an approximate breakdown per serving (assuming 8 servings):
- Calories: Approximately 400-500 calories per slice, depending on the chocolate used.
- Fat: High in fat due to the cream and chocolate. Mostly saturated fat.
- Carbohydrates: Low in carbohydrates if using sugar-free chocolate. Otherwise, moderate sugar content.
- Protein: Minimal protein content.
The benefits of this cake are mostly sensory. It provides comfort and satisfaction. Dark chocolate, in particular, has antioxidant properties and can improve mood. White chocolate provides calcium from the dairy.
If you are watching your sugar intake, use sugar-free chocolate chips. This can significantly reduce the carbohydrate content. However, be aware that sugar-free chocolate can have a laxative effect in large amounts.
This cake is naturally gluten-free, making it suitable for those with celiac disease or gluten sensitivity. However, always check the labels of your chocolate chips to ensure they are processed in a gluten-free facility.
I enjoy this cake as an occasional treat. It’s not a daily food, but it’s a wonderful way to indulge without feeling guilty. Balance is key in a healthy lifestyle.
Conclusion
The Ultimate Tuxedo Cake – Triple Chocolate Mousse is more than just a dessert; it’s an experience. It’s elegant, simple, and utterly delicious. I hope this recipe inspires you to try something new and impressive. Whether you are a seasoned baker or a beginner, this cake is achievable and rewarding. Don’t be afraid to experiment with variations and make it your own. Share your creations with friends and family, and enjoy the compliments. I’d love to hear how your tuxedo cake turns out. Leave a comment below with your thoughts or photos of your creation. Happy baking!
FAQs
Can I make this cake ahead of time?
Yes, this cake is best made ahead of time. It needs at least 4 hours to set, but overnight is ideal. This allows the flavors to meld and the texture to firm up. You can make it up to 3 days in advance.
Can I freeze the tuxedo cake?
Freezing is not recommended. The whipped cream structure can become grainy or watery upon thawing. It’s best to store the cake in the refrigerator for up to 3 days.
What type of chocolate should I use?
Use high-quality chocolate chips with real cocoa butter. Avoid compound chocolate or baking bars with vegetable oils. Good brands include Ghirardelli, Guittard, and Lindt.
Can I use coconut cream instead of heavy cream?
Yes, you can use full-fat coconut cream for a dairy-free version. The texture will be slightly different, and the flavor will be more tropical. You will also need to use dairy-free chocolate chips.
How do I get clean slices?
Use a sharp knife dipped in hot water. Wipe the knife dry between cuts. This helps the knife glide through the chocolate smoothly, creating clean edges. Chill the knife in the freezer for extra effectiveness.
Pin This Recipe!
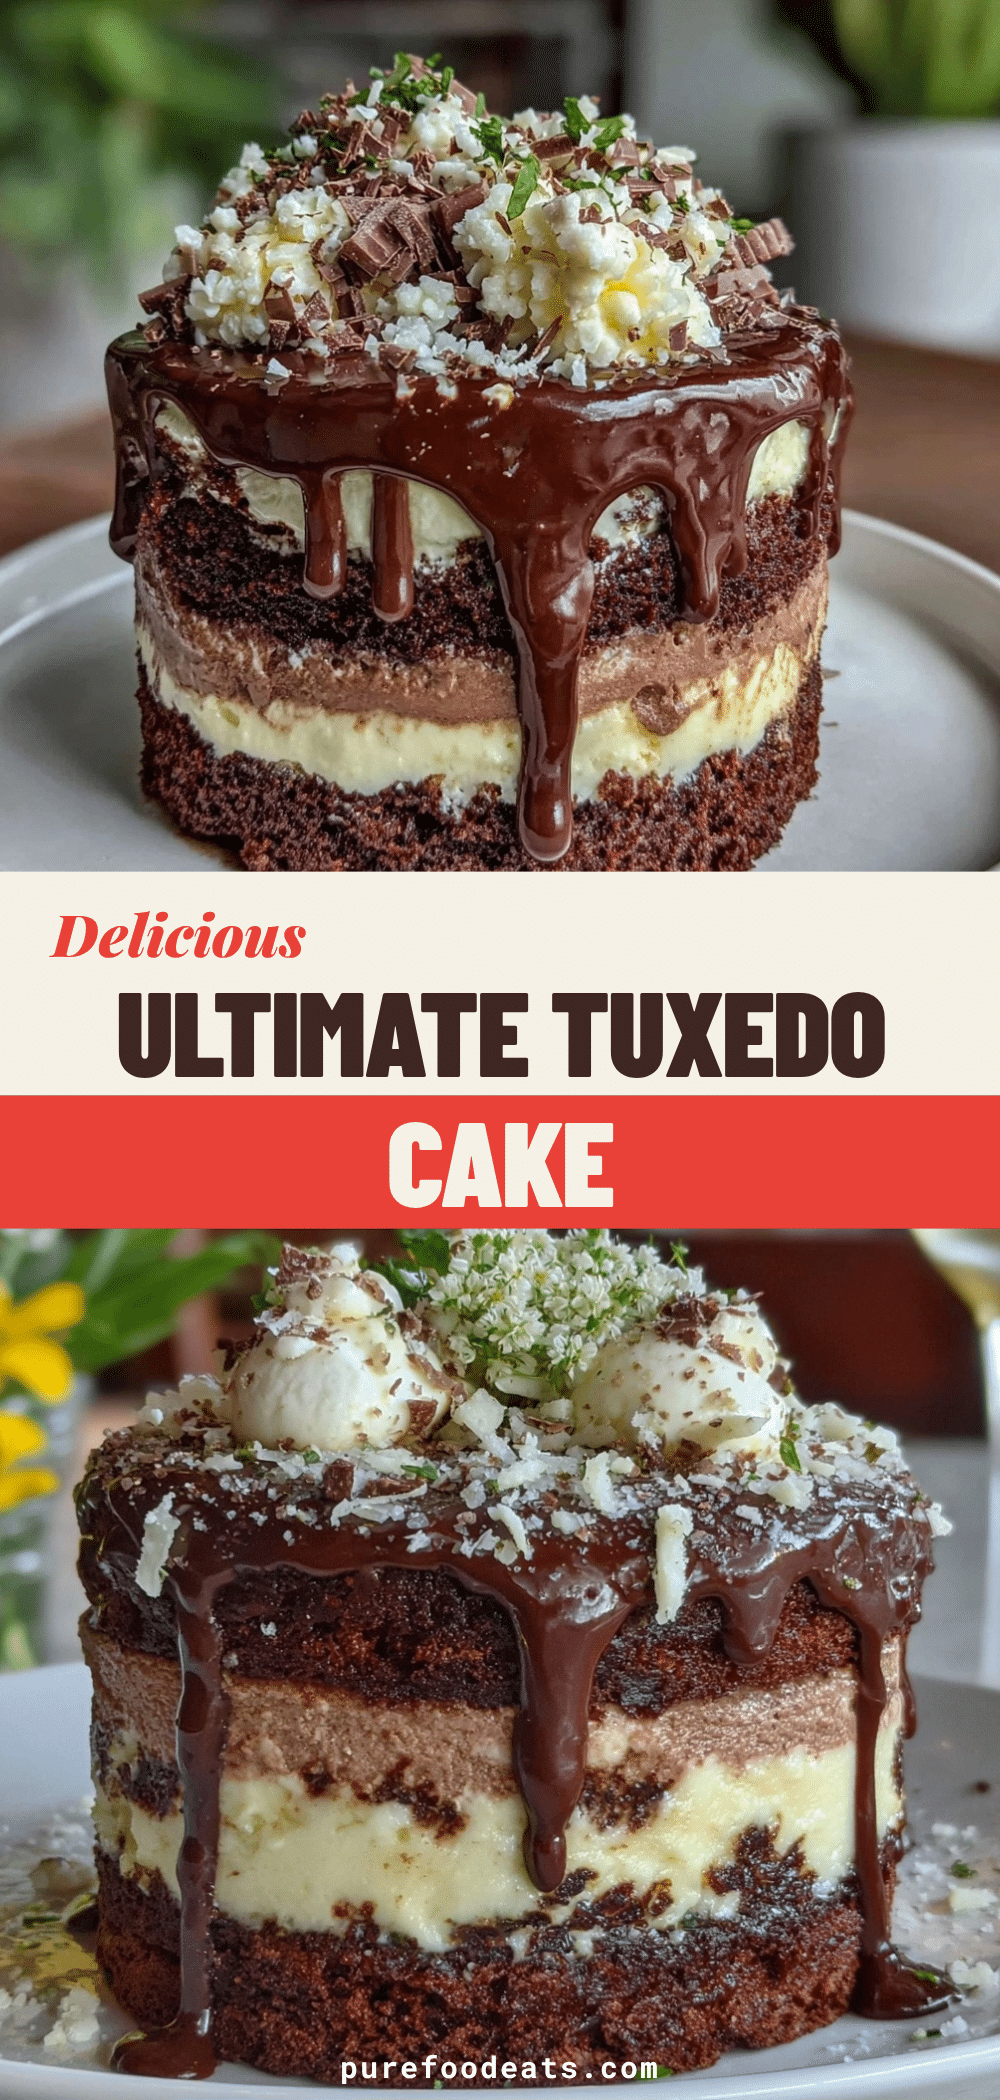

Ultimate Tuxedo Cake: Best 3-Ingredient Chocolate Mousse
- Total Time: 4 hours 15 minutes
- Yield: 8 servings 1x
Description
An elegant, gluten-free triple chocolate mousse cake featuring distinct layers of dark and white chocolate. This simple yet sophisticated dessert requires only three main ingredients and minimal active time, making it perfect for impressing guests.
Ingredients
- 2 cups cold heavy whipping cream (at least 35% fat)
- 1 cup high-quality white chocolate chips
- 1 cup high-quality dark chocolate chips (at least 60% cocoa)
- Pinch of sea salt (optional)
- 1 teaspoon vanilla extract (optional)
Instructions
- Melt the white chocolate and dark chocolate separately using a double boiler or microwave in 30-second intervals. Stir until smooth and let cool to room temperature (approx. 70°F/21°C).
- Pour cold heavy cream into a large mixing bowl. Using an electric mixer, beat on medium-high speed until stiff peaks form (about 3-5 minutes). Do not over-whip.
- Take one-third of the whipped cream and stir it into the cooled white chocolate to lighten it. Then, gently fold this mixture back into the remaining whipped cream using a rubber spatula until smooth.
- Reserve one-third of the remaining whipped cream (or a portion from the white mixture) for the dark chocolate. Fold the cooled dark chocolate into this reserved cream until smooth and airy.
- Line a loaf pan or springform pan with parchment paper. Spoon the white chocolate mousse into the pan as the first layer and smooth the top.
- Spoon the dark chocolate mousse on top of the white layer. For a classic look, add a third layer of white mousse on top. Smooth the surface gently.
- Cover the pan with plastic wrap and refrigerate for at least 4 hours, or overnight, until firm.
- To serve, dip a sharp knife in hot water and wipe dry between cuts. Slice into portions and garnish with chocolate shavings or berries if desired.
Notes
Ensure all equipment (bowls, beaters) is cold to help the cream whip properly. Do not over-whip the cream or it will turn to butter. The chocolate must be cooled to room temperature before folding into the cream to prevent melting. This cake is best made ahead of time to allow flavors to meld.
- Prep Time: 15 minutes
- Cook Time: 0 minutes
- Category: Dessert
- Cuisine: American
Nutrition
- Serving Size: 1 slice
- Calories: 450
- Sugar: 20
- Sodium: 15
- Fat: 35
- Saturated Fat: 20
- Carbohydrates: 25
- Fiber: 2
- Protein: 5
Keywords: tuxedo cake, chocolate mousse, gluten-free dessert, 3-ingredient recipe, dark chocolate, white chocolate, easy dessert, holiday baking