Let’s be honest, campfire desserts usually fall into two categories: burnt marshmallows or store-bought cookie dough. I used to think I had to settle for the latter until one chilly October night in the woods changed everything. The smell of cinnamon and caramelized sugar drifted through the trees, cutting through the woodsmoke, and suddenly, I wasn’t just eating sugar; I was tasting comfort. That was the first time I made grilled bananas, and honestly, it felt like magic.
There is something almost primal about cooking fruit over an open flame. It strips away the fancy plating and brings you back to the basics of flavor. You know that moment when the heat hits the sugar and it starts to bubble and turn golden? It’s hypnotic. I remember staring at that banana as it softened in its peel, wondering why I hadn’t tried this years ago. It wasn’t just a snack; it was a full-blown dessert experience that required zero prep and zero cleanup.
Since then, I’ve made this recipe dozens of times. Whether I’m at a crowded campground, on a backcountry hike, or just stuck on a power outage night at home, Perfect Grilled Bananas has become my go-to. It’s simple, it’s healthy-ish, and it tastes like you spent hours in a professional kitchen. Plus, it’s naturally gluten-free and vegan, which means everyone at the table gets to enjoy it without asking for substitutions.
I’ve tested different methods, from foil packets to direct flame, and I’ve learned a few tricks along the way. You don’t need fancy gear or a degree in culinary arts. You just need a banana, a little heat, and maybe some ice cream. If you’re looking for a dessert that brings people together without the stress, this is it. Let’s get grilling.
Why You’ll Love This Recipe
After years of testing recipes in various kitchens and over countless campfires, I can tell you that few things deliver as much satisfaction with so little effort. This isn’t just about throwing a piece of fruit on a fire; it’s about understanding how heat transforms simple ingredients into something extraordinary. As someone who has spent a lot of time cooking outdoors, I’ve learned that the best recipes are often the ones that let the ingredients speak for themselves.
- Quick & Easy: You don’t need to wake up at dawn to prep this. It comes together in under 10 minutes, making it perfect for those lazy Sunday mornings or last-minute cravings after a long day of hiking.
- Simple Ingredients: No fancy grocery trips needed. You likely already have bananas, brown sugar, and cinnamon in your pantry. It’s the ultimate “use what you have” recipe that never fails.
- Perfect for Outdoor Cooking: Whether you’re using a cast-iron skillet over coals or a simple grate over flames, this recipe adapts to any setup. It’s ideal for camping, picnics, or even a summer BBQ.
- Crowd-Pleaser: Kids love the sweetness, and adults appreciate the subtle smokiness. It always gets rave reviews from everyone, from picky eaters to gourmet foodies.
- Unbelievably Delicious: The texture is silky and warm, contrasting beautifully with the crispness of a toasted nut topping or the coldness of a scoop of ice cream. It’s next-level comfort food.
What makes this recipe different from the rest is the technique. Many people just peel the banana and throw it on the fire, which often leads to mushy, bitter results. By keeping the peel on or using a specific wrapping method, you steam the fruit inside while charing the outside. This creates that perfect balance of tender, caramelized banana and a hint of smoke. It’s not just good; it’s the kind of dessert that makes you close your eyes after the first bite. It’s comfort food reimagined—healthier, faster, but with the same soul-soothing satisfaction. Plus, it’s a fantastic way to impress guests without stressing about complex plating.
What Ingredients You Will Need
This recipe relies on the quality of your fruit and the simplicity of your seasonings. The magic happens when the natural sugars in the banana caramelize, so starting with ripe fruit is non-negotiable. You want bananas that have spots on the peel, indicating peak sweetness. If they are too green, they won’t soften properly. If they are too brown and mushy, they might fall apart in the heat. Here is what you need to create this campfire classic.
- Ripe Bananas: Choose medium-sized bananas that are yellow with brown speckles. They should be firm enough to handle but soft enough to yield slightly to pressure. (I prefer Cavendish bananas for their sturdy skin, which protects the fruit well.)
- Unsalted Butter: Softened butter adds richness and helps the sugar adhere to the fruit. It also contributes to that luxurious mouthfeel. (Use dairy-free coconut oil if you need a vegan option.)
- Dark Brown Sugar: This is the star of the show. Dark brown sugar has more molasses than light brown sugar, giving the dessert a deeper, toffee-like flavor. (I recommend using a brand like Domino for consistent moisture.)
- Cinnamon: Ground cinnamon adds warmth and complexity. It pairs perfectly with the caramel notes. (You can also use pumpkin pie spice for a fall twist.)
- Nutmeg (Optional): A tiny pinch of freshly grated nutmeg adds a sophisticated depth. It’s subtle but worth the extra step if you have it.
- Salt: A small pinch of sea salt balances the sweetness and highlights the banana flavor. It prevents the dessert from being cloyingly sweet.
- Vanilla Extract: A few drops add aroma and round out the flavor profile. (Pure vanilla is best; avoid imitation if you can.)
- Crushed Nuts (Optional): Walnuts or pecans add crunch and visual appeal. Toasting them lightly before adding them enhances their flavor.
If you can’t find brown sugar, you can make a quick substitute by mixing white sugar with a tablespoon of molasses. For the nuts, almonds or pistachios work well too, though walnuts are traditional. The key is to keep the ingredient list short so the flavor of the banana remains the hero. Sourcing ripe bananas locally when possible often yields better flavor, but standard supermarket bananas work perfectly fine if you let them ripen for a day or two before cooking.
Equipment Needed
You don’t need a lot of fancy gear to make this work, but having the right tools makes a huge difference in the final texture. The most important item is your heat source. Whether it’s a campfire, a charcoal grill, or a stovetop burner, you need consistent, medium heat. Direct high heat will burn the sugar before the inside is warm.
A cast-iron skillet is my personal favorite tool for this. It holds heat incredibly well and allows you to press down on the bananas gently. It also makes cleanup a breeze since you can just wipe it out with a paper towel. If you don’t have a skillet, a heavy-bottomed stainless steel pan works too. Avoid non-stick pans if you’re using direct flame, as the coating can degrade.
For outdoor cooking, heavy-duty aluminum foil is essential. You can wrap the bananas in foil packets to steam them gently, which is great if you’re worried about them falling apart. Tongs are necessary for flipping the bananas safely. Make sure they have a good grip so you don’t drop them in the coals. A small paring knife is useful for slicing the bananas lengthwise without cutting all the way through.
If you’re camping, consider bringing a small, portable camp stove with a skillet attachment. It’s more reliable than an open fire, which can be windy and unpredictable. For budget-friendly options, a simple metal skewer can work if you’re grilling the bananas whole, but it’s trickier to manage. Keep your equipment clean and dry to ensure the best cooking experience.
How to Make Perfect Grilled Bananas
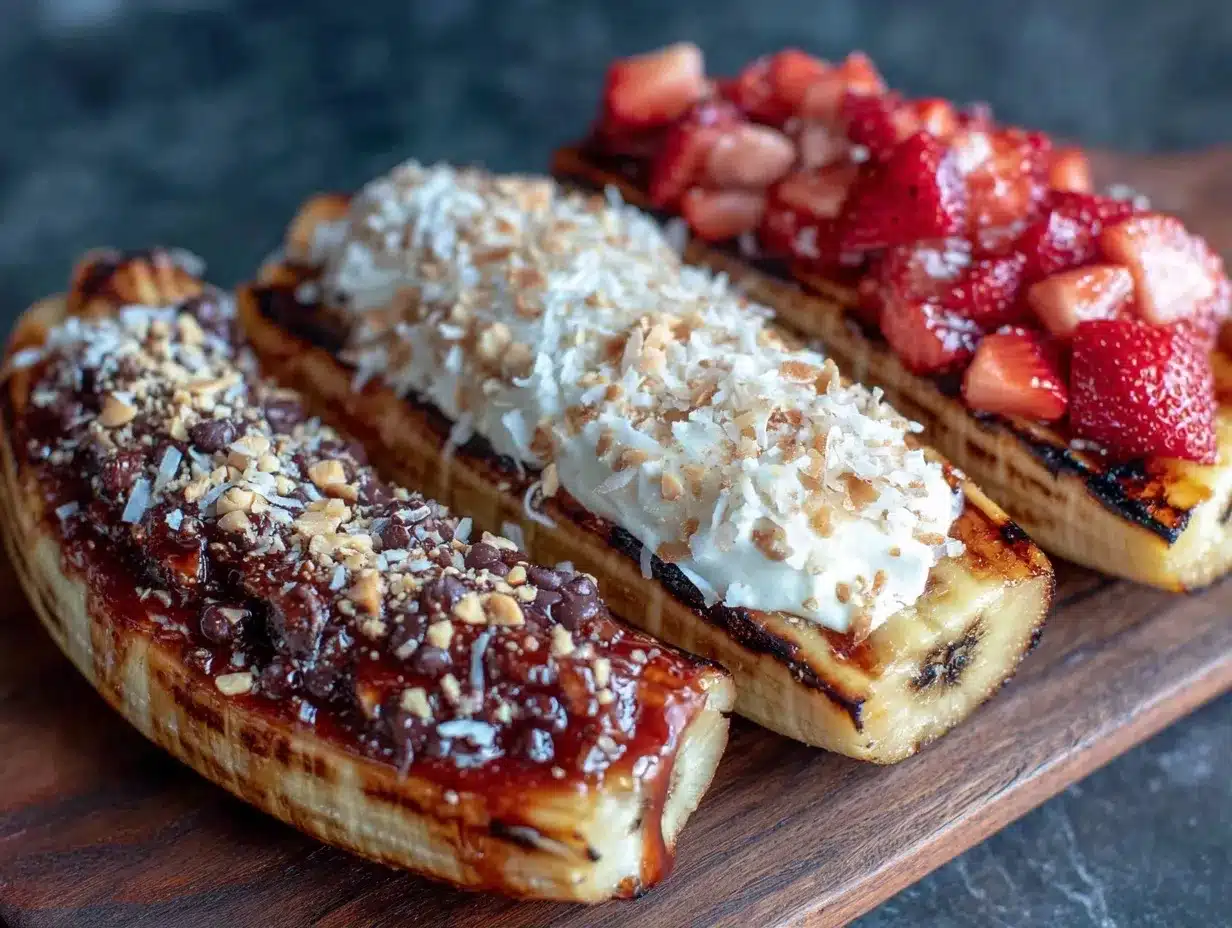
Making grilled bananas is straightforward, but attention to detail ensures they turn out perfectly every time. Follow these steps carefully, and you’ll have a dessert that rivals any restaurant offering.
- Prepare the Bananas: Start by washing your bananas thoroughly. You don’t need to peel them if you are using the foil method, but if you are grilling them in a skillet, you should peel them. Slice the peeled bananas in half lengthwise. Be careful not to cut all the way through; you want them to stay connected at the base. This helps them hold their shape on the heat. (Time estimate: 2 minutes)
- Make the Topping Mixture: In a small bowl, combine the softened butter, brown sugar, cinnamon, nutmeg, salt, and vanilla extract. Mix it until it forms a thick, fragrant paste. The consistency should be spreadable but not runny. If it’s too dry, add a teaspoon more of melted butter. (Time estimate: 1 minute)
- Coat the Bananas: Using a spoon or your fingers, generously spread the sugar mixture over the cut sides of the banana halves. Make sure to get into the crevices. Don’t be shy with the topping; you want a good caramel layer. (Time estimate: 2 minutes)
- Heat the Pan: Place your cast-iron skillet over medium heat. Let it warm up for about 2 minutes. You can test the heat by sprinkling a few drops of water on the surface; they should sizzle and evaporate quickly. Add a tiny bit of butter to the pan to prevent sticking. (Time estimate: 2 minutes)
- Grill the Bananas: Place the bananas cut-side down in the hot skillet. Press them down gently with a spatula to ensure full contact with the pan. Cook for 3-4 minutes until the sugar melts and bubbles, and the bottom is golden brown. You should smell a rich, caramel aroma. (Time estimate: 4 minutes)
- Flip and Finish: Carefully flip the bananas over. Cook the other side for just 1-2 minutes to warm them through. You don’t want to overcook them, or they will become mushy. The inside should be soft and hot. (Time estimate: 2 minutes)
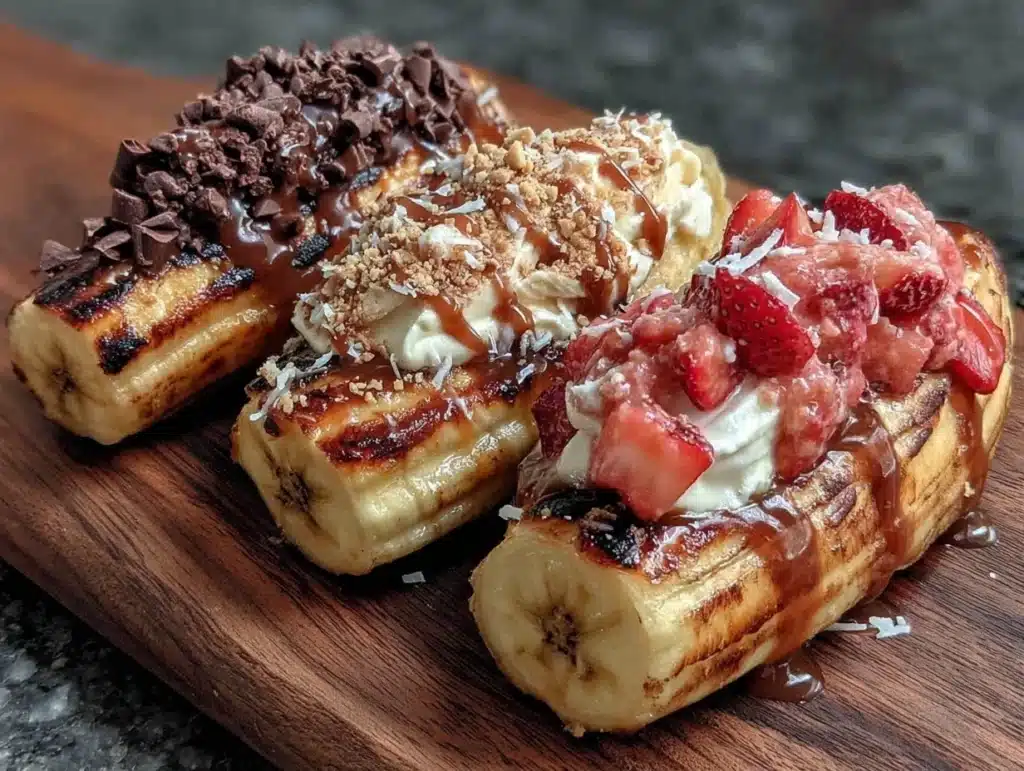
- Plate and Serve: Transfer the bananas to plates. Spoon any remaining caramelized sauce from the pan over the top. Add a scoop of ice cream or a dollop of whipped cream. Sprinkle with crushed nuts if desired. Serve immediately while hot. (Time estimate: 1 minute)
If you are using the foil method, place the unpeeled bananas on a sheet of heavy-duty foil. Add the topping mixture on top of the peel. Wrap the foil tightly into a packet. Place the packet on the grill or directly on the campfire coals for 10-15 minutes. Check for softness by squeezing the packet gently with tongs. Be careful when opening the foil as the steam will be hot.
Why does my banana turn out mushy?
This usually happens if you cook it for too long or if the banana was overripe to begin with. Stick to the time limits and use bananas that are just starting to brown.
Can I use frozen bananas?
It’s not recommended. Frozen bananas release too much water and will steam rather than caramelize. Always use fresh bananas for the best texture.
Cooking Tips & Techniques
Having cooked over fires for years, I’ve made my share of mistakes. One of the biggest is assuming all heat sources are equal. A roaring fire with bright orange flames is too hot. You want the red coals or a steady, low flame. High heat burns the sugar instantly, leaving a bitter char before the inside warms up. Patience is key here.
Another common mistake is using green bananas. They lack the natural sugars needed for caramelization. If your bananas are still too green, leave them on the counter for a day. The peels will turn brown, which is a sign they are ready. Also, don’t skip the salt. It seems counterintuitive to add salt to a sweet dish, but it amplifies the banana flavor and cuts through the richness of the butter.
Multitasking is easier with this recipe because the prep is so fast. While the bananas are grilling, you can prepare the toppings or clean up your workspace. Keep a bowl of water nearby to cool your hands if you’re handling the hot topping mixture. And always have a plate ready before you take the bananas off the heat, as they cool quickly and lose their magical texture.
If you’re cooking for a crowd, use a larger skillet or cook in batches. Don’t overcrowd the pan, or the temperature will drop, and the bananas will steam instead of grill. Consistency comes with practice. Once you get the hang of the timing, you can make this in your sleep.
Variations & Adaptations
One of the best things about this recipe is how adaptable it is. You can tweak it to suit different dietary needs or flavor preferences without losing the core appeal.
- Vegan Option: Swap the butter for coconut oil or a plant-based butter alternative. Use maple syrup instead of brown sugar for a whole-food sweetener. Serve with coconut whipped cream.
- Gluten-Free: This recipe is naturally gluten-free, but always check your oats or nut toppings to ensure they are certified gluten-free if cross-contamination is a concern.
- Chocolate Lovers: After grilling, top the bananas with chocolate chips or a drizzle of dark chocolate sauce. The heat will melt the chocolate slightly for a gooey finish.
- Spicy Kick: Add a pinch of cayenne pepper or chili powder to the sugar mixture. The heat contrasts beautifully with the sweet fruit, creating a complex flavor profile.
- Tropical Twist: Swap the cinnamon for lime zest and coconut flakes. Serve with a side of pineapple chunks for a Hawaiian-inspired dessert.
I once tried adding a splash of bourbon to the sugar mixture, and it was incredible. The alcohol burns off quickly, leaving a deep, oakiness that pairs well with the banana. It’s a great variation for adult-only gatherings. Don’t be afraid to experiment; the base recipe is forgiving.
Serving & Storage Suggestions
Grilled bananas are best served immediately while they are warm and the caramel is still glossy. Present them on simple ceramic plates to let the food shine. A scoop of vanilla bean ice cream is the classic pairing, but frozen yogurt or a creamy panna cotta also works well. Drizzle the pan juices over the top for extra shine and flavor.
If you have leftovers, store them in an airtight container in the refrigerator for up to two days. The bananas will soften further, so they might not have the same texture. To reheat, microwave them for 30 seconds or warm them in a skillet over low heat. The caramel will re-liquefy, restoring the saucy texture.
You can also freeze the cooked bananas, though the texture will change significantly. They are best used in smoothies or baked goods if frozen. For the best experience, eat them fresh. The flavors develop and meld together as they cool slightly, so let them sit for a minute before digging in. Pair with a hot cup of coffee or tea for a cozy evening treat.
Nutritional Information & Benefits
While this is a dessert, it’s relatively balanced compared to other sweet treats. Bananas are a great source of potassium, vitamin B6, and fiber, which support heart health and digestion. The natural sugars provide a quick energy boost, making it a good post-hike snack.
The brown sugar and butter add calories and fat, so portion control is wise. However, the fiber in the banana helps slow sugar absorption. For a lighter option, reduce the sugar by half and use less butter. This recipe is naturally dairy-free if you use oil, and gluten-free, making it accessible for many dietary restrictions. It’s a guilt-free indulgence that satisfies your sweet tooth while providing some nutritional value. Just remember, it’s still a treat, so enjoy it mindfully.
Conclusion
Perfect Grilled Bananas are more than just a campfire dessert; they are a testament to the power of simple ingredients and heat. I’ve made this recipe in every setting imaginable, and it never fails to delight. It’s easy, it’s delicious, and it brings a sense of warmth to any gathering. I encourage you to try it your next time you’re outdoors or even on a rainy day at home.
Feel free to customize it with your favorite toppings and spices. The beauty of this recipe is its flexibility. Once you try it, you’ll see why it has become a staple in my cooking repertoire. Share your creations with friends and family, and don’t forget to leave a comment below with your own variations. Happy grilling!
Frequently Asked Questions
Can I grill bananas without peeling them?
Yes, you can grill bananas in their peel. This method steams the fruit inside, making it very soft. Simply place the unpeeled banana on the grill for 10-15 minutes until the peel is blackened. Let it cool, then peel and eat. This is great for campfires.
What kind of bananas work best for grilling?
Ripe bananas with brown spots on the peel are best. They are sweeter and softer, which caramelizes nicely. Avoid green or very hard bananas as they won’t cook evenly.
Can I use a gas grill instead of a campfire?
Absolutely. A gas grill works perfectly. Just set it to medium heat and use a skillet or grill grate. The control over temperature is often easier with gas, reducing the risk of burning.
How do I prevent the sugar from burning?
Keep the heat at medium, not high. Watch the bananas closely during the last minute of cooking. If the sugar starts to smoke, remove the pan from the heat immediately.
Can I make this recipe ahead of time?
It’s best made fresh. However, you can prep the sugar mixture and slice the bananas in advance. Store them in the fridge and cook them when you’re ready to eat. The texture will be best when cooked hot.
Pin This Recipe!
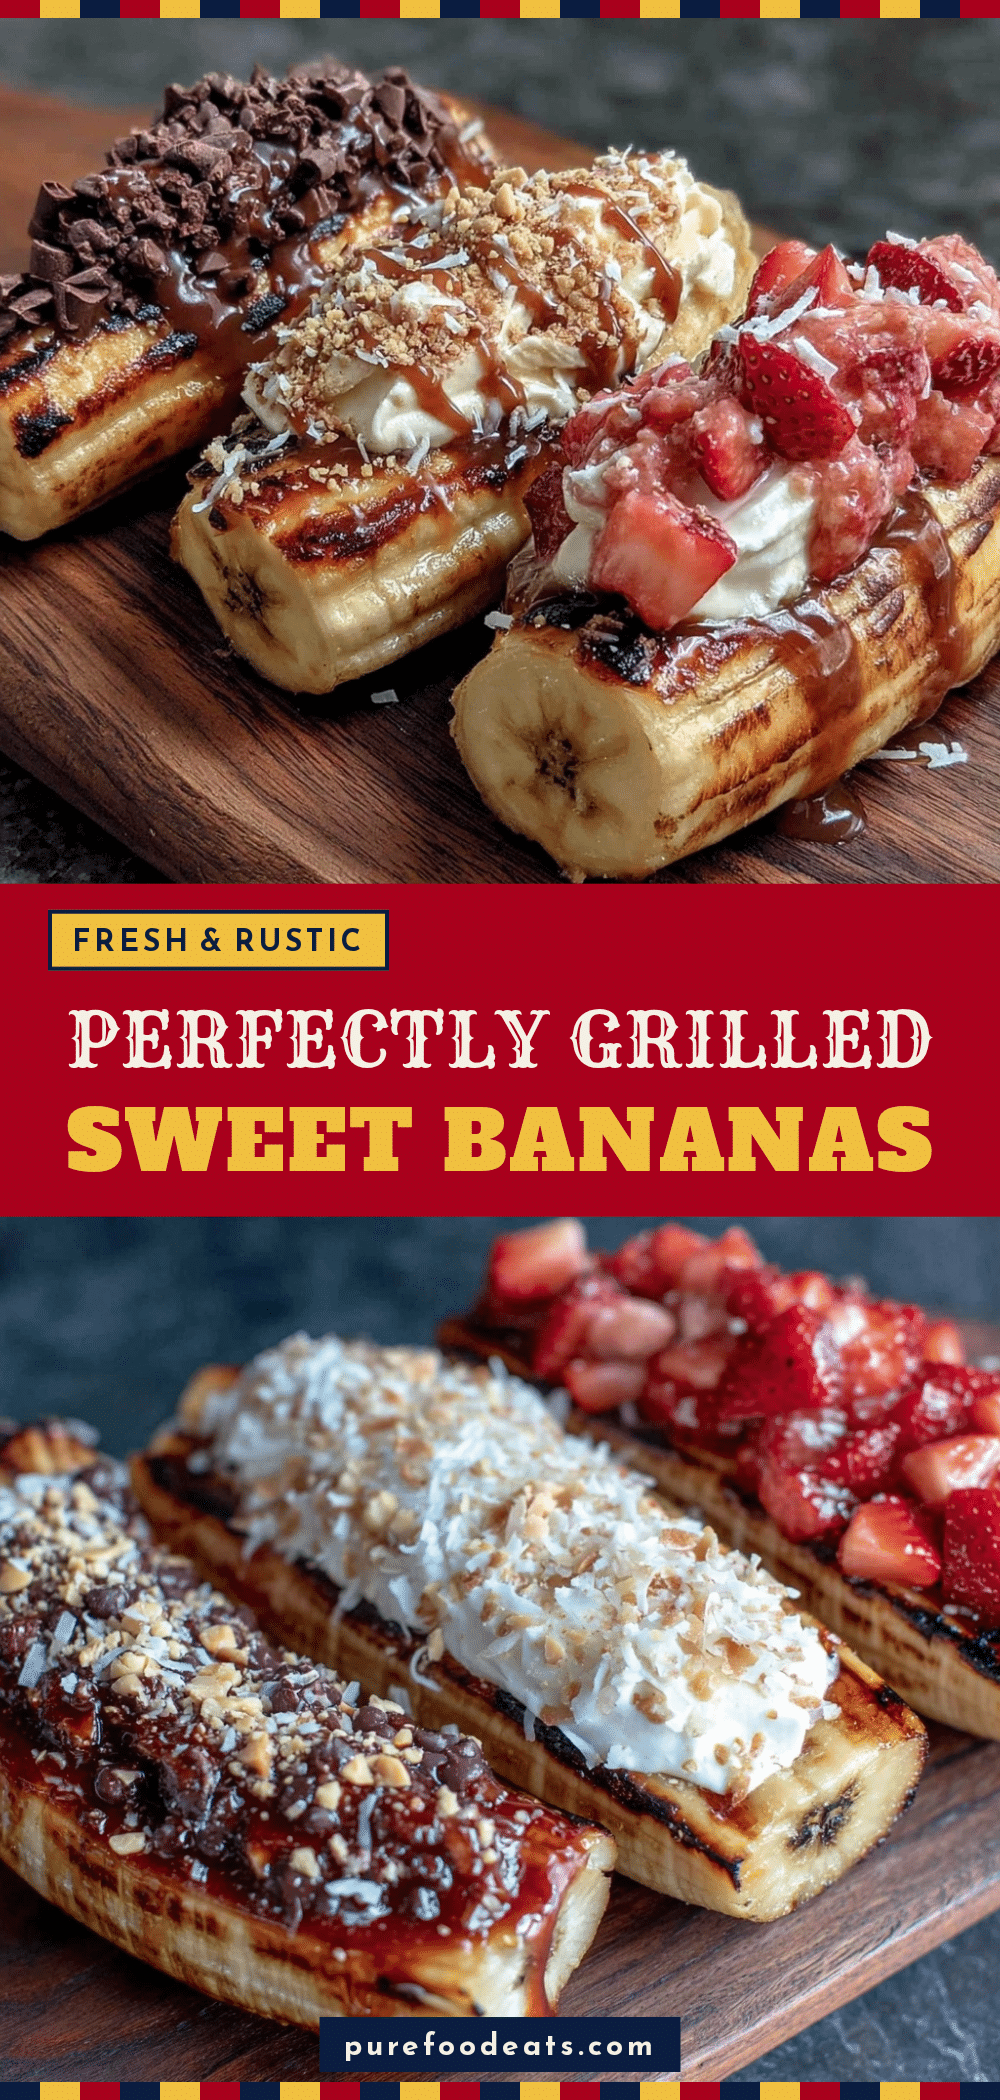

Perfect Grilled Bananas: Easy Campfire Dessert
- Total Time: 15 minutes
- Yield: 4 servings 1x
Description
A simple, campfire-friendly dessert featuring ripe bananas caramelized with brown sugar, butter, and cinnamon. This recipe is naturally gluten-free and vegan, offering a quick and delicious treat that requires minimal prep and cleanup.
Ingredients
- 4 ripe bananas (yellow with brown speckles)
- 2 tablespoons unsalted butter, softened (or dairy-free coconut oil for vegan option)
- 2 tablespoons dark brown sugar
- 1/2 teaspoon ground cinnamon
- 1/4 teaspoon nutmeg (optional)
- 1/4 teaspoon salt
- 1/2 teaspoon vanilla extract
- 2 tablespoons crushed nuts (walnuts or pecans, optional)
Instructions
- Wash bananas thoroughly. If grilling in a skillet, peel them and slice in half lengthwise without cutting all the way through. If using the foil method, leave them unpeeled.
- In a small bowl, mix softened butter, brown sugar, cinnamon, nutmeg, salt, and vanilla extract until a thick paste forms.
- Spread the sugar mixture generously over the cut sides of the banana halves (or on top of the peel for the foil method).
- Heat a cast-iron skillet over medium heat for about 2 minutes. Add a tiny bit of butter to prevent sticking.
- Place bananas cut-side down in the hot skillet. Press gently with a spatula.
- Cook for 3-4 minutes until the sugar melts, bubbles, and the bottom is golden brown.
- Carefully flip the bananas and cook the other side for 1-2 minutes until warmed through.
- Transfer to plates, spoon remaining caramel sauce over the top, and serve immediately with ice cream or whipped cream if desired.
Notes
Use ripe bananas with brown spots for best caramelization. Avoid green bananas as they lack sugar. Do not overcook or bananas will become mushy. For the foil method, wrap unpeeled bananas with topping in foil and cook on coals for 10-15 minutes. Serve immediately for best texture.
- Prep Time: 5 minutes
- Cook Time: 10 minutes
- Category: Dessert
- Cuisine: American
Nutrition
- Serving Size: 1 banana half
- Calories: 180
- Sugar: 22
- Sodium: 120
- Fat: 8
- Saturated Fat: 5
- Carbohydrates: 28
- Fiber: 3
- Protein: 2
Keywords: grilled bananas, campfire dessert, easy dessert, vegan dessert, gluten-free dessert, outdoor cooking, caramelized bananas, quick dessert