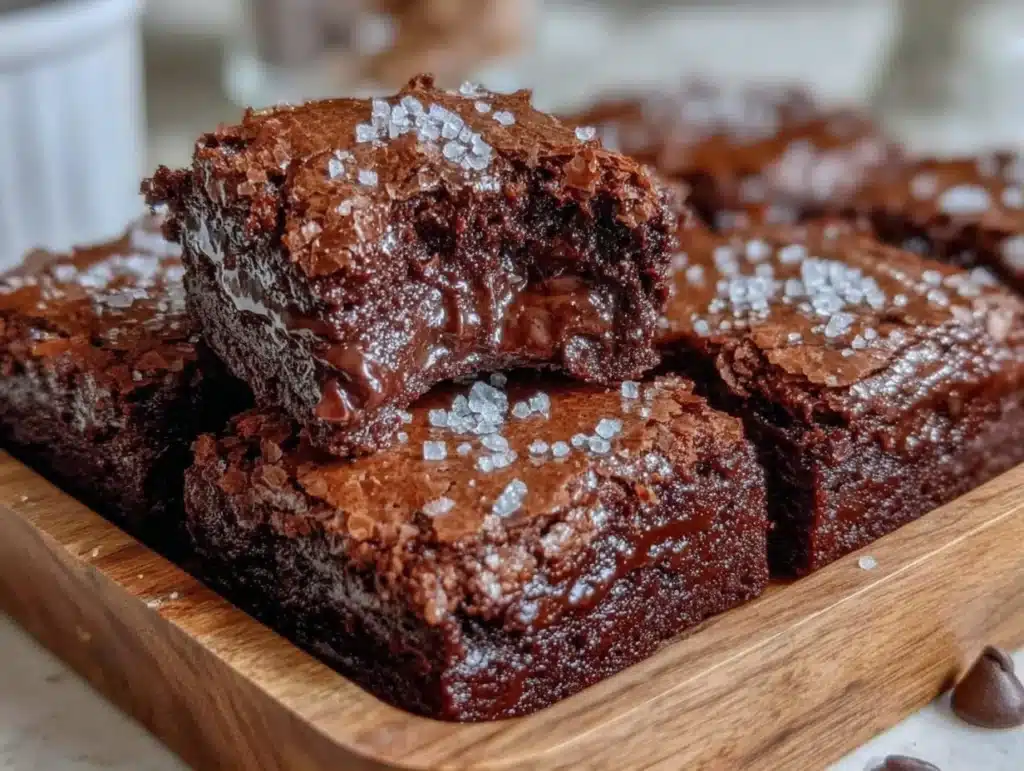
There is a specific, terrifying silence that follows the first bite of a perfect brownie. You know the one. It’s the sound of your brain shutting off to make room for pure chocolate bliss. I had that moment last Tuesday, standing in my kitchen in my pajamas, holding a square of homemade fudgy brownies with a crackly top that shattered like thin glass under my fingertips.
I didn’t bake these for a party or a holiday. I baked them because I had a surplus of dark chocolate and a serious case of the mid-week slump. Honestly, I’ve made this recipe over thirty times now. Some batches were too cakey, some were too greasy, but this version? This is the one. It’s the holy grail of chocolate desserts.
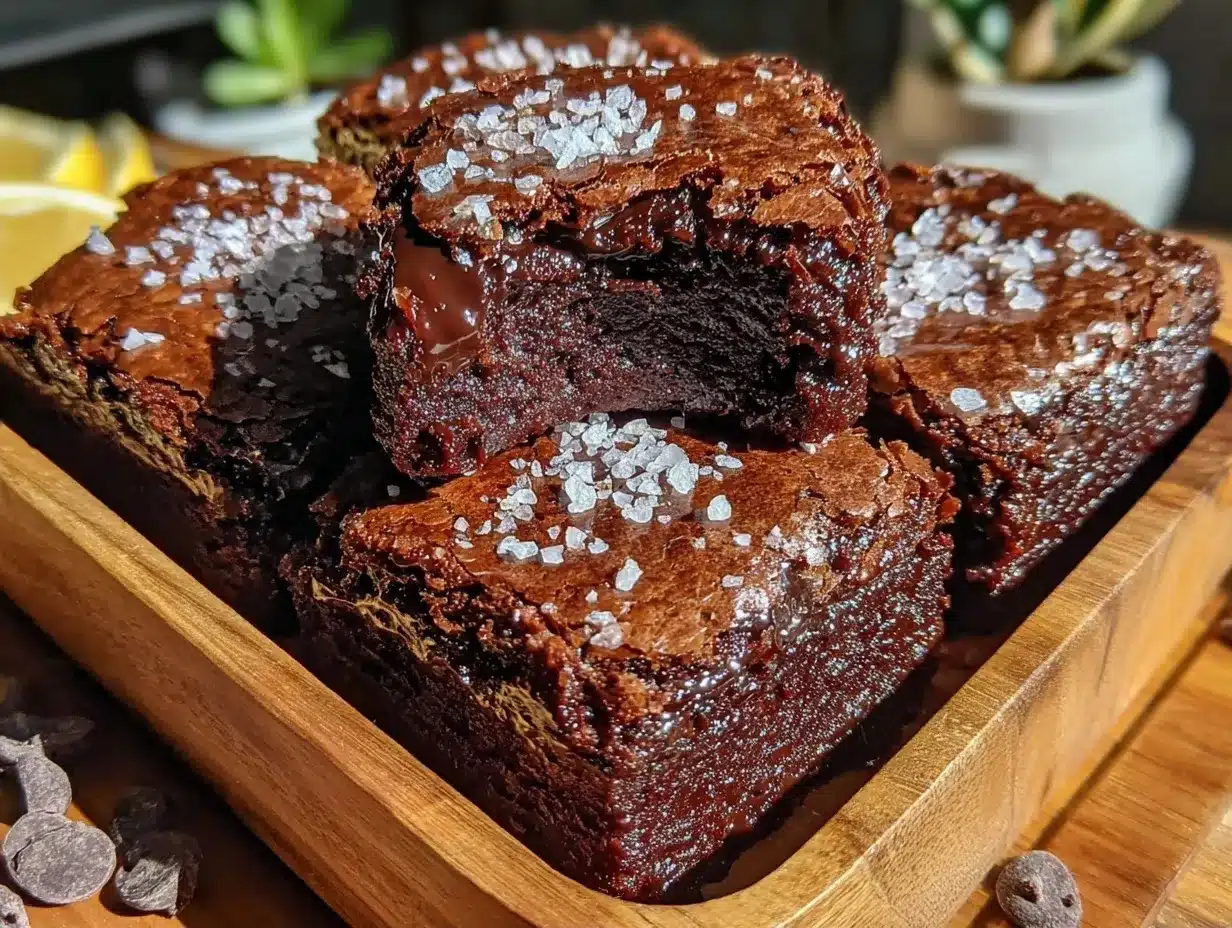
People often ask me for the best homemade fudgy brownies recipe, and I always hesitate. It’s hard to put words to something so visceral. But these brownies are different. They aren’t just sweet; they are intense. The texture is dense and chewy, like a warm chocolate truffle, but that signature crackly top adds a necessary crunch that keeps you coming back.
If you’re a busy parent, a late-night snacker, or just someone who believes chocolate is a food group, you need this recipe in your life. It’s simple, it’s forgiving, and it delivers results that taste like they came from a high-end bakery. Let’s get into the details.
Why You’ll Love This Recipe
After testing dozens of brownie recipes, I can tell you with authority that this one stands out. It’s not just about the chocolate; it’s about the science of the texture. I’ve spent years tweaking ratios to get that perfect balance between fudgy and cakey, and I’m convinced this is the most reliable method for home bakers.
- Quick & Easy: You can have these from bowl to oven in under 20 minutes. No creaming butter and sugar for hours. It’s a dump-and-mix style recipe that saves you time without sacrificing quality.
- Simple Ingredients: You likely have everything you need right now. Butter, sugar, eggs, flour, cocoa powder, and chocolate. No weird pantry staples or hard-to-find items.
- Perfect for Gifting: These brownies travel well. They stay moist for days, making them ideal for teacher gifts, neighbor favors, or potluck contributions.
- Crowd-Pleaser: I’ve served these to picky eaters and chocolate snobs alike. Everyone loves them. The crackly top is the visual cue that screams “professional baker.”
- Unbelievably Delicious: The flavor is deep and rich. It’s not just sugary; it has a slight bitterness from the dark chocolate that balances the sweetness perfectly.
What makes this recipe different is the technique. We aren’t using baking powder to make them rise. We are using air incorporation. By beating the eggs and sugar vigorously, we create that shiny, crinkly crust. It’s a small step that makes a massive difference. It’s comfort food, elevated by simple physics.
This isn’t just a brownie. It’s a mood booster. It’s the kind of treat that makes a rainy day feel cozy. Whether you’re baking with kids or treating yourself after a long week, these brownies deliver satisfaction in every bite.
What Ingredients You Will Need
This recipe relies on high-quality basics. You don’t need fancy flours or exotic spices. The magic happens in how you combine simple pantry staples. I recommend using unsalted butter so you can control the salt level, but salted butter works in a pinch if you adjust the added salt slightly.
For the Brownie Base:
- Unsalted Butter: 1 cup (2 sticks or 226 grams), melted. Using real butter is non-negotiable for flavor. Margarine will make them greasy.
- Granulated Sugar: 1 ½ cups (300 grams). White sugar is key for that crackly top. Brown sugar makes them chewy, but white sugar creates the crust.
- Large Eggs: 3 large eggs, room temperature. Room temp eggs emulsify better with the sugar.
- Egg Yolk: 1 extra large egg yolk. This adds richness and contributes to the fudgy texture.
- Vanilla Extract: 1 tablespoon (15 ml). Pure vanilla, not imitation, makes a huge difference in aroma.
- All-Purpose Flour: 1 cup (125 grams). Do not overmeasure. Spoon and level for accuracy.
- Cocoa Powder: ½ cup (45 grams) unsweetened cocoa powder. I prefer Dutch-processed cocoa for a darker color and smoother taste.
- Salt: ½ teaspoon. Enhances the chocolate flavor.
For the Mix-Ins:
- Dark Chocolate Chips: 1 cup (170 grams). Use high-quality chips like Ghirardelli or Guittard for better melt.
- Optional: ½ cup walnuts or pecans, chopped. If you like crunch, add nuts. If you want pure chocolate, skip them.
I always buy my cocoa powder in bulk. It keeps for a long time in the pantry. If your cocoa is old, it might taste dusty. Always check the expiration date. For the butter, I like to melt it in the microwave in 30-second intervals to avoid burning. The chocolate chips should be semi-sweet for that classic fudgy balance. If you prefer darker brownies, use 70% cacao chocolate.
Can I use dark chocolate instead of chips?
Yes! Chopping up a bar of high-quality dark chocolate gives you those beautiful gooey pockets. Just chop it into small, uneven chunks for the best distribution.
What if I don’t have an egg yolk?
You can skip the extra yolk, but the brownies might be slightly less fudgy. You can substitute it with a tablespoon of extra butter or a splash of heavy cream if you want to maintain the richness.
Equipment Needed
You don’t need a fancy stand mixer for this. In fact, a hand mixer or even a strong whisk and a wooden spoon are better. Over-mixing with a machine can toughen the gluten in the flour, leading to cakey brownies instead of fudgy ones.
- 9×9 Inch Baking Pan: This is the standard size for thick, fudgy brownies. You can use a 9×13 pan, but they will be thinner and bake faster. Adjust cooking time accordingly.
- Parchment Paper: Essential for easy removal. Line the pan with a cross-hatch of parchment paper, leaving overhangs on the sides. This acts as a sling to lift the brownies out once cooled.
- Mixing Bowls: One medium bowl for dry ingredients and one large bowl for wet ingredients.
- Whisk: A standard wire whisk is perfect for beating the eggs and sugar. This step is crucial for the crackly top.
- Spatula: A silicone spatula helps you scrape the bowl clean and fold in the chocolate chips gently.
- Measuring Cups and Spoons: Accuracy is key in baking. Use a set of dry and liquid measuring cups for best results.
I’ve tried using aluminum pans and glass pans. Aluminum heats up faster and gives a crisper edge, which I love. Glass pans retain heat longer, so you might need to reduce the oven temperature by 25 degrees. Stick to aluminum if you can for that classic bakery texture.
Preparation Method
Getting this right is easier than you think. The secret is patience during the mixing stage. Don’t rush the eggs and sugar. This is where the magic happens.
- Prep the Pan and Oven: Preheat your oven to 350°F (175°C). Line your 9×9 inch baking pan with parchment paper. Leave a slight overhang on the sides so you can lift the brownies out later. Grease the parchment lightly with butter or cooking spray.
- Melt the Butter: Melt the 1 cup of butter in the microwave or a saucepan over low heat. Let it cool for a minute so it’s warm but not hot. Hot butter will cook the eggs if you add them immediately.
- Beat the Eggs and Sugar: In a large bowl, combine the granulated sugar, eggs, and extra egg yolk. Use a whisk or hand mixer to beat this mixture vigorously for about 2-3 minutes. It should look pale, thick, and slightly fluffy. This step incorporates air, which creates the crackly top. If you skip this, you won’t get that signature crust.
- Add Vanilla and Butter: Stir in the vanilla extract and the melted butter. Mix until just combined. The mixture might look slightly curdled, which is normal. Don’t worry.
- Mix Dry Ingredients: In a separate medium bowl, whisk together the flour, cocoa powder, and salt. Sifting is optional but recommended if your cocoa powder is lumpy. We want a smooth blend.
- Combine Wet and Dry: Pour the dry ingredients into the wet mixture. Use a spatula to fold them together. Stop mixing as soon as you no longer see streaks of flour. Overmixing develops gluten, which makes brownies tough and cakey. We want them tender.
- Add Chocolate Chips: Fold in the chocolate chips (and nuts, if using). Reserve a small handful of chips to sprinkle on top later for a professional look.
- Bake: Pour the batter into the prepared pan. Smooth the top with your spatula. Bake for 25-30 minutes. The brownies are done when a toothpick inserted into the center comes out with moist crumbs clinging to it, not wet batter. If it comes out clean, you’ve overbaked them. They will continue to cook slightly as they cool.
- Cool Completely: Let the brownies cool in the pan for at least 30 minutes. This is the hardest part. If you cut them warm, they will fall apart. Cooling allows the structure to set.
- Cut and Serve: Lift the brownies out using the parchment sling. Cut into squares. Enjoy immediately or store for later.
Why do my brownies look flat?
If your brownies are flat, you likely didn’t beat the eggs and sugar enough. That air incorporation is vital for the rise and the crackly texture. Make sure you whisk for a full 2-3 minutes.
Cooking Tips & Techniques
I’ve learned a lot from my baking failures. Here are some pro tips to ensure success every time.
- Don’t Skip the Whisking: I know it’s tedious, but beating the eggs and sugar is the most important step. It creates the shiny, crinkly top. If you just stir it, you’ll get a flat, matte top.
- Underbake Slightly: Brownies continue to cook on the hot pan after you take them out of the oven. If you wait until the toothpick is completely clean, they will be dry. Aim for moist crumbs.
- Room Temperature Eggs: Cold eggs don’t emulsify as well with the sugar. Take your eggs out of the fridge 30 minutes before you start.
- Quality Chocolate: Since chocolate is the star, use good chocolate. Cheap chips often contain stabilizers that prevent proper melting. Look for brands with high cocoa butter content.
- Resting Time: Patience is a virtue. Cutting warm brownies is a mistake. Let them cool completely to get clean cuts and the right texture.
I once made brownies for a wedding and rushed the cooling process. They were a mess. Now, I always plan ahead. If I’m baking for an event, I make them the day before. They actually taste better the next day as the flavors meld together.
Variations & Adaptations
While the classic version is my favorite, there are many ways to twist this recipe.
- Double Chocolate: Add ½ cup of mini chocolate chips to the batter and use chocolate frosting instead of a plain top.
- Espresso Brownies: Add 1 teaspoon of instant espresso powder to the dry ingredients. It enhances the chocolate flavor without making them taste like coffee.
- Gluten-Free: Swap the all-purpose flour for a 1:1 gluten-free flour blend. Add ½ teaspoon of xanthan gum if your blend doesn’t include it.
- Nutty Brownies: Add 1 cup of toasted walnuts or pecans for added crunch and flavor.
- Peanut Butter Swirl: After pouring the batter, drop spoonfuls of peanut butter on top and swirl with a knife before baking.
I love making the espresso version for my husband. He says it makes the chocolate taste more intense. It’s a simple change that elevates the flavor profile significantly.
Can I make these vegan?
Yes! Use flax eggs (1 tablespoon ground flaxseed mixed with 3 tablespoons water per egg) and vegan butter and chocolate chips. The texture will be slightly different but still delicious.
Serving & Storage Suggestions
These brownies are best served at room temperature. They have a fudgy texture that softens slightly as they warm up. If you like them cold, you can refrigerate them, but they will become firmer.
- Storage: Store brownies in an airtight container at room temperature for up to 5 days. They stay moist for days.
- Freezing: You can freeze brownies for up to 3 months. Wrap them tightly in plastic wrap and then in aluminum foil. Thaw at room temperature before serving.
- Serving Ideas: Serve with a scoop of vanilla ice cream, a dollop of whipped cream, or a glass of cold milk. The contrast of hot brownie and cold ice cream is unbeatable.
- Reheating: If you want a warm brownie, microwave it for 10-15 seconds. It will become gooey and soft.
I often make a batch on Sunday and keep them in the office for mid-week treats. They travel well in a tin or a box. Just make sure they are completely cool before packing them to avoid condensation.
Nutritional Information & Benefits
While these are definitely a treat, they do have some nutritional benefits. Dark chocolate is rich in antioxidants and can be good for heart health in moderation. Eggs provide protein and essential vitamins like B12 and D.
One brownie (1/16th of the pan) contains approximately:
- Calories: 220
- Fat: 12g
- Carbohydrates: 28g
- Protein: 3g
- Sugar: 20g
Keep in mind that these values are estimates. Using different brands of chocolate or adding nuts will change the nutritional profile. Enjoy these as a special indulgence rather than a daily snack. Balance is key.
Conclusion
Making homemade fudgy brownies with a crackly top is one of the most rewarding baking experiences you can have. It’s simple, it’s delicious, and it’s perfect for any occasion. I hope this recipe becomes a staple in your kitchen, just like it has in mine.
Don’t be afraid to experiment with variations. Add your favorite mix-ins or try the espresso twist. Baking is about having fun and creating something delicious. Share these brownies with friends and family, and watch them disappear.
If you make this recipe, I’d love to hear how it turns out. Leave a comment below with your thoughts or tag me on social media. Happy baking!
FAQs
Why are my brownies cakey instead of fudgy?
This usually happens if you add too much flour or bake them for too long. Make sure you measure the flour accurately and underbake slightly for a fudgy texture.
Can I use cocoa mix instead of unsweetened cocoa powder?
No. Cocoa mix contains sugar and milk solids, which will throw off the balance of the recipe. Use unsweetened cocoa powder for the best results.
How do I get a crackly top?
The key is to beat the eggs and sugar vigorously for 2-3 minutes until pale and fluffy. This incorporates air, which creates the crackly crust.
Can I use a glass pan?
Yes, but you should reduce the oven temperature by 25°F (15°C) to prevent the edges from burning. Glass retains heat longer than metal.
Do I need to sift the cocoa powder?
It’s not strictly necessary, but it helps remove lumps and ensures a smooth batter. If your cocoa powder is clumpy, sifting is a good idea.
Pin This Recipe!

Homemade Fudgy Brownies: 5-Step Easy Recipe
- Total Time: 40 minutes
- Yield: 16 servings 1x
Description
These homemade fudgy brownies feature a dense, chewy texture and a signature crackly top. Made with simple pantry staples and a specific mixing technique, they deliver bakery-quality results in under 20 minutes of prep time.
Ingredients
- 1 cup (2 sticks or 226 grams) unsalted butter, melted
- 1 ½ cups (300 grams) granulated sugar
- 3 large eggs, room temperature
- 1 extra large egg yolk
- 1 tablespoon (15 ml) vanilla extract
- 1 cup (125 grams) all-purpose flour
- ½ cup (45 grams) unsweetened cocoa powder
- ½ teaspoon salt
- 1 cup (170 grams) dark chocolate chips
- Optional: ½ cup walnuts or pecans, chopped
Instructions
- Preheat oven to 350°F (175°C). Line a 9×9 inch baking pan with parchment paper, leaving an overhang on the sides, and grease lightly.
- Melt the butter in the microwave or saucepan and let it cool slightly so it is warm but not hot.
- In a large bowl, vigorously whisk the granulated sugar, eggs, and extra egg yolk for 2-3 minutes until the mixture is pale, thick, and fluffy to incorporate air.
- Stir in the vanilla extract and melted butter until just combined.
- In a separate medium bowl, whisk together the flour, cocoa powder, and salt.
- Pour the dry ingredients into the wet mixture and fold with a spatula until no streaks of flour remain. Do not overmix.
- Fold in the chocolate chips (and nuts if using), reserving a small handful to sprinkle on top.
- Pour batter into the prepared pan and smooth the top. Bake for 25-30 minutes until a toothpick inserted in the center comes out with moist crumbs.
- Let brownies cool in the pan for at least 30 minutes before lifting them out using the parchment sling and cutting into squares.
Notes
For the best crackly top, beat the eggs and sugar vigorously for 2-3 minutes. Do not overbake; the toothpick should have moist crumbs, not wet batter. Cool completely before cutting to ensure clean slices. For gluten-free, swap flour for a 1:1 gluten-free blend.
- Prep Time: 10 minutes
- Cook Time: 30 minutes
- Category: Dessert
- Cuisine: American
Nutrition
- Serving Size: 1 square (1/16th of
- Calories: 220
- Sugar: 20
- Sodium: 120
- Fat: 12
- Saturated Fat: 7
- Carbohydrates: 28
- Fiber: 2
- Protein: 3
Keywords: brownies, fudgy brownies, chocolate dessert, easy baking, crackly top, homemade brownies, dark chocolate