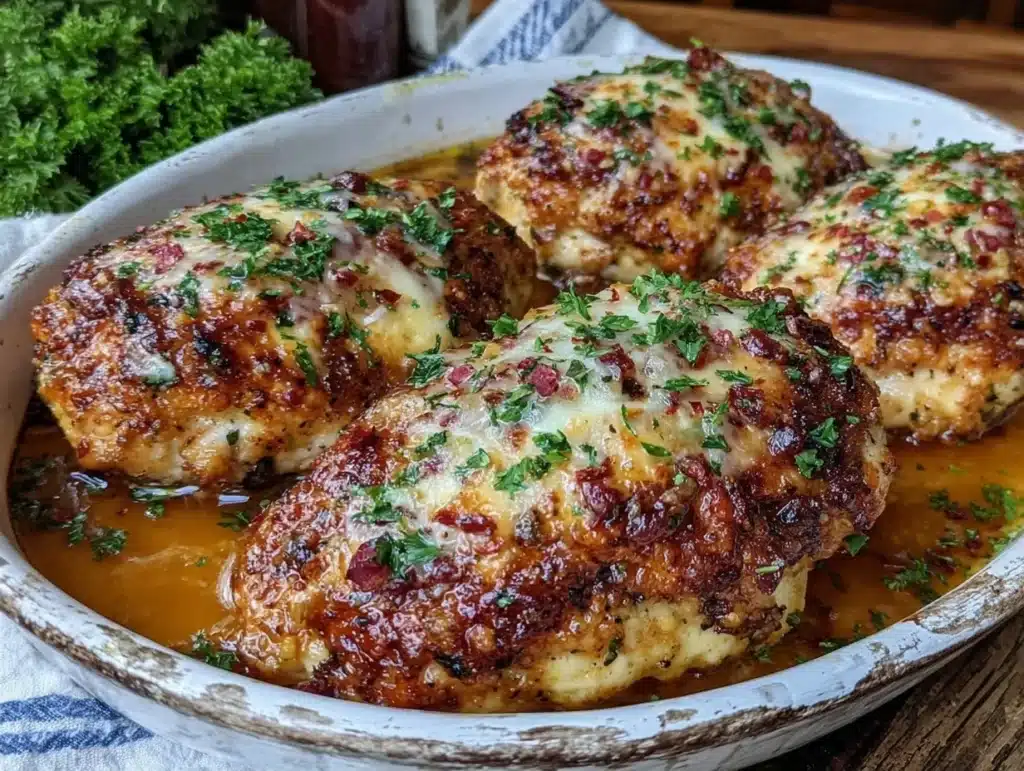
Let’s face it, some nights the last thing you want to do is scrub a baking sheet or wash a pile of mixing bowls. That was exactly the mood I was in last Tuesday when I came home exhausted and realized I had forgotten to defrost the chicken. Honestly, I almost ordered takeout, but then I remembered the bag of parmesan cheese in the back of the fridge and a few heads of garlic waiting to be used. I threw everything onto one sheet pan, and what came out of the oven was nothing short of magic. The smell of roasting garlic and melting cheese filled the entire house, making my kids rush to the table before I even finished plating. This isn’t just another chicken recipe; it’s the kind of meal that feels indulgent but actually leaves you feeling light and satisfied. It’s crispy on the outside, juicy on the inside, and requires zero complicated techniques to pull off. You know that feeling when dinner just works? That’s this dish. I’ve tested this garlic parmesan chicken bake over a dozen times to get the coating just right, ensuring it stays crunchy without needing a deep fryer. It’s perfect for busy parents, health-conscious eaters, or anyone who wants restaurant-quality flavor without the restaurant price tag. The best part? You can make it lighter by swapping heavy creams for simple broth and using a lighter touch on the cheese, yet it still tastes incredibly rich. It’s comfort food that doesn’t weigh you down, which is exactly why I keep coming back to it. Whether you are serving it to guests or just need a quick, nourishing dinner for your family, this one-pan wonder delivers every single time. I love how the garlic infuses every bite, creating a savory depth that pairs perfectly with the salty parmesan crust. It’s a meal that feels special, yet it’s so easy to throw together that you’ll wonder why you didn’t make it sooner. Plus, the cleanup is a breeze, which means more time for you and less time staring at a sink full of dishes. Let’s be real, who has time for that after a long day? This recipe respects your time and your appetite equally. It’s become a staple in my weekly rotation because it just works, consistently and reliably. I’ve shared this with friends who are picky eaters, and even they were impressed by the texture and flavor profile. It’s not about restricting yourself; it’s about making smarter choices that still taste amazing. This garlic parmesan chicken bake is proof that you can eat well without sacrificing joy. It’s nourishing, simple, and deeply satisfying. I truly believe this will become your go-to recipe for those nights when you need dinner on the table fast but don’t want to compromise on taste. So, preheat your oven and get ready to fall in love with this one-pan miracle.
Why You’ll Love This Recipe
I’ve spent years experimenting with chicken preparations, trying to find that sweet spot between healthy and hearty. This garlic parmesan chicken bake hits that mark perfectly, and here is why it stands out from the crowd. First off, it is incredibly quick and easy. From prep to plate, you’re looking at under 45 minutes, which is a lifesaver on chaotic weeknights when you’re juggling work, school runs, and everything in between. You don’t need to be a professional chef to pull this off; if you can chop garlic, you can make this. Second, the ingredients are simple. You likely have most of them in your kitchen right now. Chicken breasts, parmesan cheese, garlic, and some basic spices. No fancy grocery trips or obscure items that sit in your pantry for months. It’s about using what you have and making it shine. Third, this recipe is perfect for meal prep or family dinners. The flavors actually develop more as it rests, making it great for leftovers. But honestly, it rarely lasts until the next day because it’s just that good. It’s a crowd-pleaser that wins over kids and adults alike. The crispy coating satisfies that craving for fried food, but the lean protein keeps it feeling light. The texture is what really sets this apart. I’ve tried many versions, but this one uses a specific technique to ensure the parmesan crust stays crunchy without becoming greasy. It’s not just another breaded chicken recipe; it’s my best version, refined through trial and error. The garlic is roasted until sweet and aromatic, balancing the sharpness of the cheese. It’s the kind of dish that makes you close your eyes after the first bite and just savor the moment. It’s comfort food reimagined for a modern, wellness-focused lifestyle. You get the soul-soothing satisfaction of a hearty meal without the heavy, sluggish feeling afterward. It’s perfect for impressing guests without spending hours in the kitchen. Or, it’s just a wonderful way to turn a simple Tuesday night into something memorable. I love how versatile it is. Serve it with a green salad for a light lunch, or pair it with roasted veggies for a complete dinner. It adapts to your needs and preferences effortlessly. This recipe isn’t just about feeding your body; it’s about feeding your soul in a way that feels good. It’s nourishing, delicious, and incredibly satisfying. You’ll find yourself making it again and again because it just works. It’s reliable, tasty, and fits into a balanced lifestyle without feeling like a chore. That’s the magic of this garlic parmesan chicken bake. It’s the kind of recipe you’ll thank me for later.
What Ingredients You Will Need
This recipe relies on a handful of wholesome, accessible ingredients to deliver bold flavor and satisfying texture without the fuss. The beauty here is in the simplicity. You don’t need a pantry full of specialty items to make this work. In fact, the fewer ingredients you use, the more they shine. I like to keep it straightforward, using high-quality basics that I know I can trust. Most of these items are pantry staples or easy-to-find refrigerated goods. If you’re shopping seasonally, you can swap out vegetables, but the core components remain the same. I always recommend looking for fresh, firm chicken breasts for the best texture. As for the cheese, I prefer a block of parmesan that I grate myself, as pre-grated cheese often contains anti-caking agents that can prevent it from melting and crisping up nicely. Here is what you’ll need to get started:
- Chicken Breasts: 4 boneless, skinless chicken breasts, pounded to an even thickness. This ensures they cook uniformly. I like to use organic, free-range chicken when possible for better flavor and texture.
- Parmesan Cheese: ½ cup freshly grated parmesan cheese. Use a hard, aged parmesan for the sharpest flavor. Grating it yourself makes a huge difference in the final crust.
- Breadcrumbs: ¼ cup panko breadcrumbs. Panko gives a lighter, crunchier coating than regular breadcrumbs. You can use gluten-free panko if needed.
- Garlic: 4-5 cloves of fresh garlic, minced. Fresh garlic is non-negotiable here. Powdered garlic just doesn’t have the same aromatic punch. Look for firm bulbs with tight skins.
- Italian Seasoning: 1 tablespoon of dried Italian seasoning. This blend usually contains oregano, basil, and thyme, which adds earthy depth.
- Olive Oil: 2 tablespoons of extra virgin olive oil. I use a good quality oil with a fruity note to complement the garlic and cheese.
- Lemon: 1 lemon, zested and juiced. The acidity cuts through the richness of the cheese and brightens the overall dish.
- Black Pepper: ½ teaspoon of freshly cracked black pepper. Freshly cracked adds a subtle heat and aroma that pre-ground pepper lacks.
- Salt: ½ teaspoon of sea salt, or to taste. Adjust based on the saltiness of your parmesan cheese.
- Red Pepper Flakes: A pinch, optional. Just a touch for a subtle kick that wakes up the palate.
For the breadcrumbs, I personally prefer the brand Trader Joe’s Panko for its consistent flake size and crunch. If you can’t find panko, regular breadcrumbs work, but you might need to toast them slightly in the oven for extra crispness. The olive oil should be extra virgin to ensure the best flavor profile. Avoid using refined oils here as they lack the necessary depth. The lemon is crucial for balancing the dish, so don’t skip it. If you’re sensitive to citrus, you can use a splash of white wine vinegar instead, though the flavor will be different. These ingredients come together to create a harmonious blend of savory, salty, and bright notes. It’s a simple list, but each component plays a vital role. I’ve tested this with various brands, and the quality of the parmesan and olive oil really makes a difference. Don’t skimp on the good stuff. Your taste buds will thank you. This selection ensures that every bite is packed with flavor without being overly heavy or complicated.
Equipment Needed
You really don’t need much to make this recipe work. A large sheet pan is the star of the show. I recommend using a rimmed baking sheet, preferably half-sheet size (18×13 inches), so the chicken has enough room to breathe. If the pieces are crowded, they will steam instead of roast, and you won’t get that desirable crispy crust. A wire rack that fits inside your baking sheet is a game-changer. It allows hot air to circulate underneath the chicken, ensuring even browning on all sides. If you don’t have a rack, you can line the pan with parchment paper or aluminum foil for easy cleanup, but the texture won’t be quite as crisp. I’ve tried both methods, and the rack definitely wins for texture. A small mixing bowl is needed for combining the breadcrumbs, parmesan, and spices. A pastry brush or your hands work fine for applying the oil. A meat mallet or rolling pin is helpful for pounding the chicken breasts to an even thickness. This step is crucial for even cooking. If your chicken is uneven, some parts will be dry while others are undercooked. A sharp knife and cutting board are needed for mincing the garlic and zesting the lemon. I also recommend a microplane zester for getting fine lemon zest without the bitter white pith. For maintenance, keep your baking sheet clean and seasoned if it’s cast iron. Non-stick pans should be treated gently to preserve the coating. Budget-friendly options include using a standard baking sheet and skipping the rack if you’re careful to flip the chicken halfway through. But honestly, the rack is worth the investment for the quality of results.
How to Make Garlic Parmesan Chicken Bake
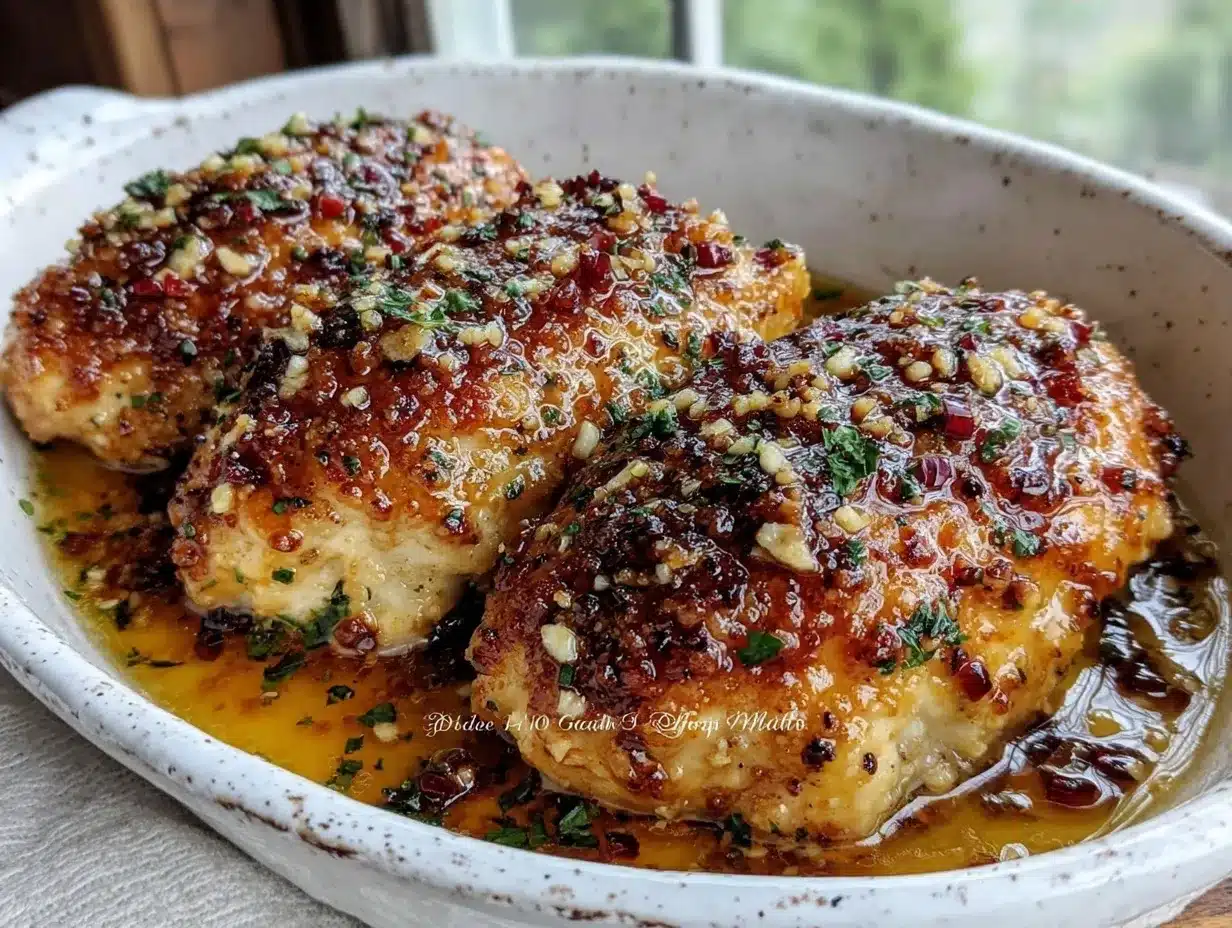
Preheat your oven to 400°F (200°C). This high heat is essential for getting that golden, crispy exterior without drying out the meat. While the oven heats, take your chicken breasts and place them between two sheets of plastic wrap or parchment paper. Use a meat mallet or a heavy rolling pin to pound them to an even thickness, about ½ inch thick. This step usually takes about 5-10 minutes. It might seem tedious, but it ensures every piece cooks at the same rate. You don’t want one piece dry and another raw. Once pounded, pat the chicken dry with paper towels. Moisture is the enemy of crispiness, so getting the surface as dry as possible is key. In a small mixing bowl, combine the panko breadcrumbs, grated parmesan cheese, minced garlic, Italian seasoning, salt, black pepper, and red pepper flakes if using. Mix these thoroughly with a fork until the spices are evenly distributed. The garlic should be finely minced so it doesn’t burn in the oven. If you prefer a milder garlic flavor, you can use half the amount. Now, take each chicken breast and drizzle it lightly with olive oil. Rub the oil over the entire surface of the chicken. This helps the breadcrumb mixture adhere and promotes browning. Next, press the breadcrumb mixture onto the oiled side of the chicken. Use your hands to gently press the crumbs into the chicken, ensuring they stick well. You want a generous coating, but not so thick that it falls off. Place the coated chicken breasts on the prepared baking sheet or wire rack, coated side up. Drizzle the remaining olive oil over the top of the chicken. This helps the crumbs turn golden brown. Roast in the preheated oven for 20-25 minutes. The chicken is done when it reaches an internal temperature of 165°F (74°C) and the coating is golden and crispy. About halfway through cooking, you can check the color. If it’s browning too quickly, you can tent it loosely with foil. Once cooked, remove from the oven and let the chicken rest for 5 minutes. This allows the juices to redistribute, keeping the meat moist. While the chicken rests, you can zest the lemon over the top for a fresh burst of flavor. Serve immediately for the best texture. The resting period is crucial; if you cut into it right away, the juices will run out, and the chicken will be dry. Patience pays off here. The result is tender, juicy chicken with a crunchy, garlicky crust that is absolutely delicious. This method is straightforward but yields professional-looking results every time.
Cooking Tips & Techniques
I’ve made my fair share of mistakes in the kitchen, and some of them were quite costly. One of the biggest errors I made early on was overcrowding the pan. When chicken pieces are too close together, they release moisture and steam each other. This prevents the Maillard reaction, which is responsible for that beautiful browning and crispy texture. Always give your chicken space. If you’re cooking for more than four people, use two pans. Another common mistake is skipping the pounding step. Uneven chicken breasts cook unevenly. The thick ends will dry out before the thin ends are cooked through. Pounding them to an even thickness is a simple step that makes a huge difference in the final texture. Timing is also key. Don’t overcook the chicken. Use a meat thermometer to check for doneness. Pull it at 165°F (74°C) and let it rest. The residual heat will continue to cook it slightly, ensuring it stays juicy. Multitasking can be tricky with one-pan meals, but this recipe is forgiving. While the chicken roasts, you can prepare a quick side dish or salad. This helps streamline your dinner service. Consistency comes with practice. Once you get the hang of the breadcrumb adhesion and oven temperature, it becomes second nature. I also recommend toasting the panko breadcrumbs in a dry pan for a minute before mixing them with the cheese. This adds an extra layer of crunch and nutty flavor. It’s a small step that elevates the dish. Avoid using wet breadcrumbs or stale ones. Fresh panko is best. If you’re using a convection oven, reduce the temperature by 25°F to prevent burning. Keep an eye on the chicken during the last few minutes of cooking. Every oven is different, so visual cues are your best guide. The coating should be deep golden brown, not pale or burnt. These tips have saved me from many disappointing dinners. They are simple adjustments that lead to better results. Trust your senses. If it smells good, it’s probably ready. If the crust looks pale, give it a few more minutes. With these techniques, you’ll master this recipe in no time. It’s all about attention to detail and a little bit of patience.
Variations & Adaptations
One of the best things about this recipe is how adaptable it is. You can tweak it to suit different dietary needs or flavor preferences. For a gluten-free version, simply swap the panko breadcrumbs for gluten-free panko or crushed pork rinds. Pork rinds add a fantastic crunch and are zero-carb, making this keto-friendly. I’ve tried the pork rind version, and it’s surprisingly delicious. For a dairy-free option, you can use nutritional yeast instead of parmesan cheese. It provides a cheesy, savory flavor without the dairy. You’ll need to use a bit more nutritional yeast to get the same coating thickness. If you want to add some heat, increase the red pepper flakes or add a dash of cayenne pepper to the breadcrumb mixture. I like to add a pinch of cayenne for a subtle background warmth. For a herbaceous twist, add fresh chopped parsley or basil to the breadcrumb mix. Fresh herbs add a bright, fresh note that complements the garlic well. You can also add a teaspoon of lemon zest to the breadcrumb mixture for extra citrus flavor. For a veggie-packed variation, serve the chicken over a bed of roasted asparagus or broccoli on the same pan. Just add the veggies in the last 15 minutes of cooking so they don’t overcook. This turns the meal into a complete one-pan dinner. I’ve also tried adding a thin slice of prosciutto on top of the chicken before baking for a salty, umami boost. It’s a fun twist that adds complexity. For a lighter option, reduce the amount of oil and cheese slightly, though the flavor will be milder. It’s all about finding what works for you. These variations allow you to keep the recipe fresh and exciting. Don’t be afraid to experiment. Cooking is about creativity and personal taste. Try a new spice blend or swap out the herbs. You might discover a new favorite combination. The base recipe is a solid foundation, but the possibilities are endless. This flexibility is why I keep coming back to it. It fits into any lifestyle or preference.
Serving & Storage Suggestions
This garlic parmesan chicken bake is best served immediately while the crust is still crispy. I like to plate it with a side of steamed green beans or a simple arugula salad with a lemon vinaigrette. The acidity of the salad cuts through the richness of the chicken perfectly. A squeeze of fresh lemon juice over the chicken right before serving adds a bright finish that enhances all the flavors. For a heartier meal, serve it with roasted potatoes or quinoa. These sides absorb the juices and complement the savory chicken well. Leftovers can be stored in an airtight container in the refrigerator for up to 3 days. To reheat, avoid the microwave as it will make the crust soggy. Instead, reheat in a toaster oven or conventional oven at 350°F (175°C) for about 10 minutes. This helps restore the crispiness. You can also freeze the cooked chicken for up to 3 months. Thaw in the refrigerator overnight and reheat as described above. The flavors tend to meld together over time, so leftovers often taste even more savory the next day. However, the texture may soften slightly upon reheating. For the best experience, try to eat it fresh. If you need to meal prep, consider keeping the breadcrumb mixture separate and coating the chicken just before baking. This ensures maximum crispiness. The chicken pairs well with a glass of white wine, such as a Pinot Grigio or Sauvignon Blanc. The crisp acidity of the wine complements the garlic and lemon notes. It’s a versatile dish that fits many occasions. Whether it’s a quick weeknight dinner or a casual gathering with friends, it’s sure to be a hit. Enjoy it warm and savor every bite.
Nutritional Information & Benefits
This garlic parmesan chicken bake is not only delicious but also offers some solid nutritional benefits. Chicken breast is a lean source of protein, which is essential for muscle repair and satiety. One serving provides about 30-35 grams of protein, helping you stay full and satisfied. The parmesan cheese adds calcium and phosphorus, which are important for bone health. Garlic is known for its immune-boosting properties and contains antioxidants that support overall wellness. The olive oil provides healthy monounsaturated fats, which are good for heart health. Compared to fried chicken, this baked version is significantly lower in calories and saturated fat. It’s a great option for those looking to reduce their intake of heavy, fried foods without giving up flavor. The recipe is naturally low in carbohydrates, making it suitable for low-carb or keto diets, especially if you use pork rinds or almond flour instead of breadcrumbs. It is gluten-free if you use gluten-free breadcrumbs. However, it contains dairy due to the parmesan cheese. If you have a dairy allergy, use the nutritional yeast substitution. The portion size is important to keep in mind. One chicken breast with a moderate amount of breadcrumb coating makes for a balanced meal. Pairing it with non-starchy vegetables creates a nutrient-dense plate. I find that this recipe helps me stay on track with my wellness goals because it’s satisfying and doesn’t leave me feeling sluggish. It’s a practical way to eat well without feeling deprived. The combination of protein, healthy fats, and fiber from the sides creates a balanced macronutrient profile. This supports stable energy levels throughout the afternoon. It’s a meal that nourishes your body while pleasing your taste buds. That’s the goal, after all. Eating well should be enjoyable, not a chore. This recipe strikes that balance perfectly.
Conclusion
This garlic parmesan chicken bake is a testament to the fact that healthy eating can be incredibly satisfying. It’s crispy, savory, and packed with flavor, yet it’s light enough to fit into a wellness-focused lifestyle. I love this recipe because it brings together simple ingredients to create something truly special. It’s perfect for busy weeknights when you need dinner on the table fast, but you don’t want to compromise on taste. I encourage you to try it and customize it to your liking. Add some herbs, swap the breadcrumbs, or serve it with your favorite sides. The possibilities are endless. This dish has become a staple in my home because it just works. It’s reliable, delicious, and nourishing. I hope it becomes a favorite in your kitchen too. Please share your experiences in the comments below. Let me know how you like to prepare it and what sides you pair it with. Your feedback helps me create better content for you. Don’t forget to save this recipe for later and share it with friends who need a quick, healthy dinner idea. Cooking should be a joy, not a burden. This recipe makes it easy to enjoy good food without the stress. Thank you for joining me in the kitchen. I can’t wait to hear what you think of this garlic parmesan chicken bake. It’s a meal that brings people together and nourishes the body. Enjoy every bite!
Frequently Asked Questions
Can I use chicken thighs instead of breasts?
Yes, you can use boneless, skinless chicken thighs. They are juicier and have a richer flavor, but they will cook slightly faster. Keep an eye on them to avoid overcooking. The cooking time may be reduced by 5 minutes.
How do I keep the breadcrumb coating crispy?
The key is to ensure the chicken is dry before coating and to use a wire rack for baking. This allows air to circulate underneath. Avoid overcrowding the pan, and do not cover the chicken while it rests.
Can I make this recipe ahead of time?
You can prep the chicken and breadcrumb mixture up to 24 hours in advance. Store them separately in the refrigerator. Coat the chicken just before baking to ensure the crispiest texture.
Is this recipe gluten-free?
Yes, if you use gluten-free panko breadcrumbs or crushed pork rinds instead of regular panko. Make sure to check the labels of all ingredients to ensure they are certified gluten-free.
What sides go well with this chicken bake?
It pairs beautifully with roasted vegetables like asparagus, broccoli, or zucchini. A simple green salad with lemon vinaigrette is also a great choice. Quinoa or cauliflower rice are excellent low-carb alternatives to potatoes.
Pin This Recipe!
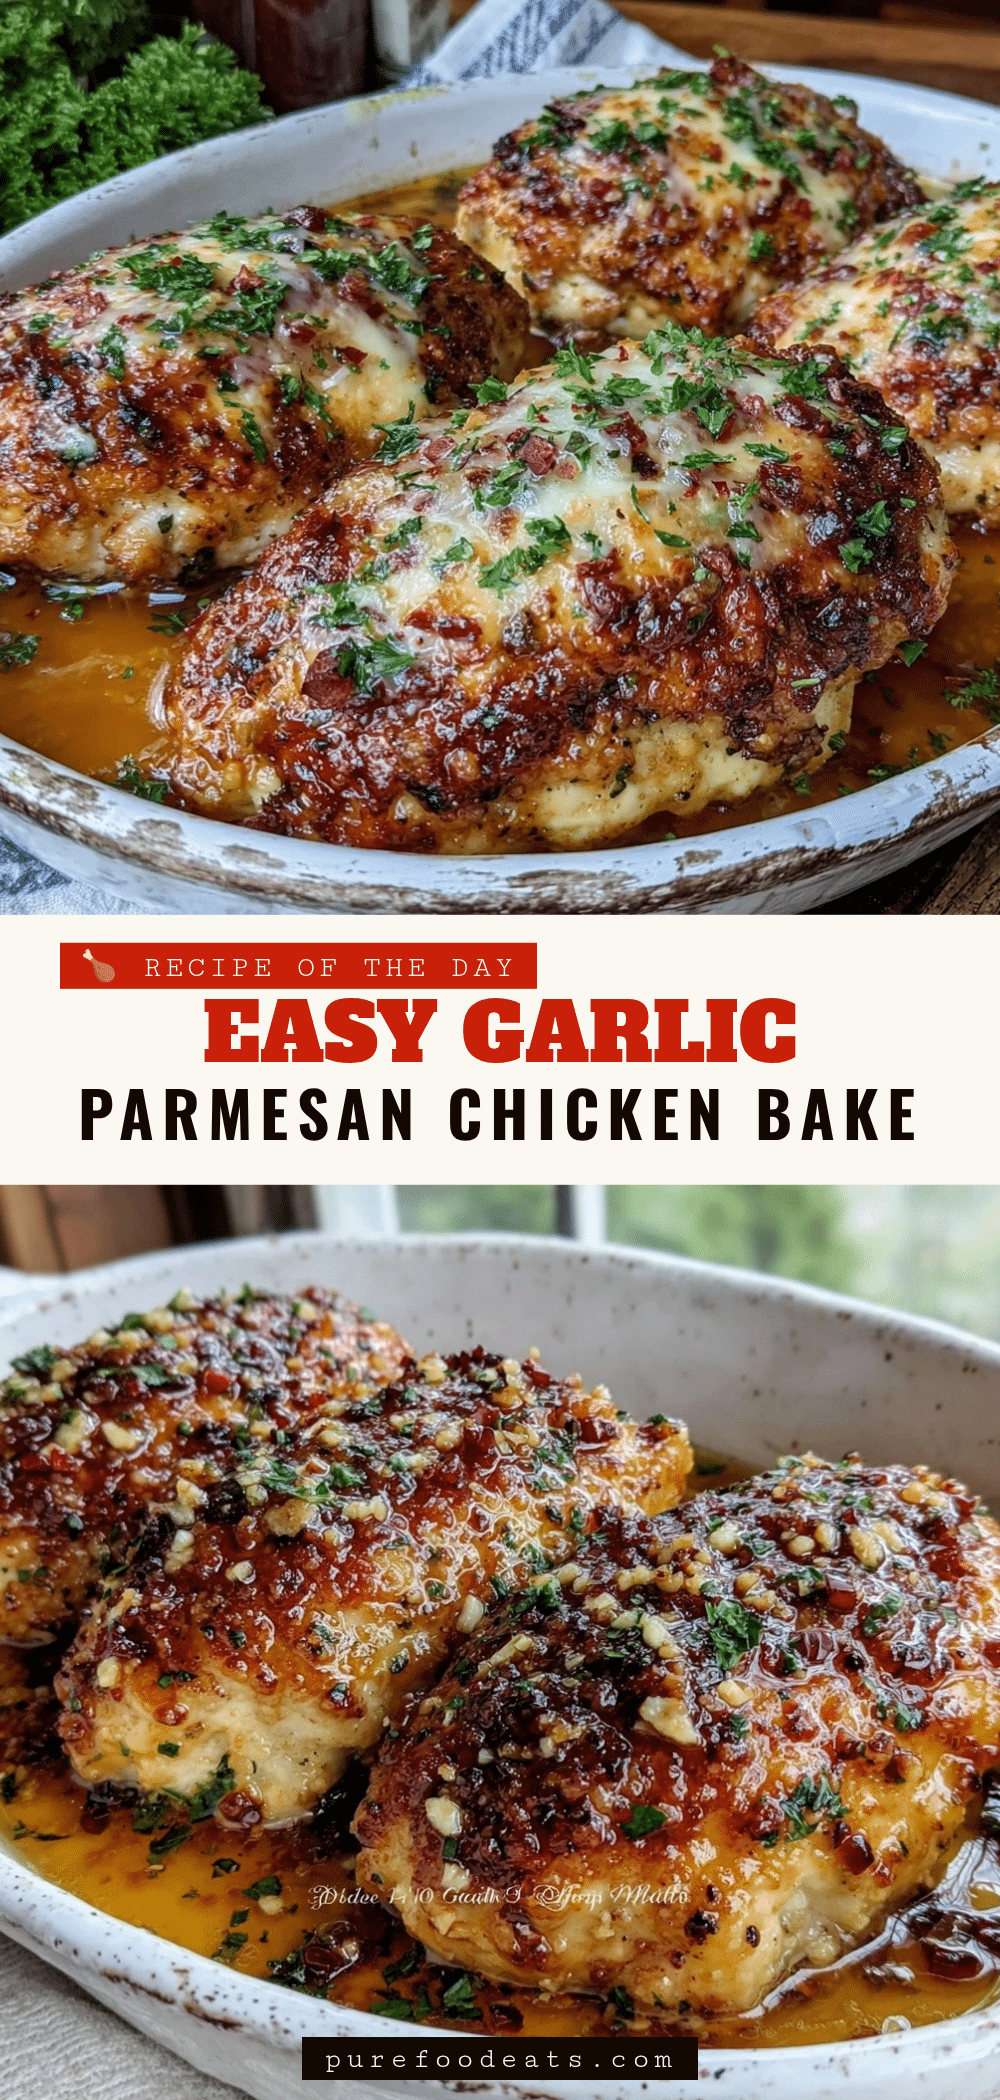

Garlic Parmesan Chicken Bake: 1-Pan Lighter Meal
- Total Time: 40 minutes
- Yield: 4 servings 1x
Description
A quick, one-pan baked chicken dish featuring a crispy parmesan and panko crust with roasted garlic. It is lighter than traditional fried chicken but delivers rich, savory flavor perfect for busy weeknights.
Ingredients
- 4 boneless, skinless chicken breasts, pounded to ½ inch thickness
- ½ cup freshly grated parmesan cheese
- ¼ cup panko breadcrumbs
- 4–5 cloves fresh garlic, minced
- 1 tablespoon dried Italian seasoning
- 2 tablespoons extra virgin olive oil
- 1 lemon, zested and juiced
- ½ teaspoon freshly cracked black pepper
- ½ teaspoon sea salt
- Pinch of red pepper flakes (optional)
Instructions
- Preheat oven to 400°F (200°C).
- Place chicken breasts between plastic wrap or parchment paper and pound to an even ½ inch thickness.
- Pat chicken dry with paper towels to ensure crispiness.
- In a small bowl, combine panko, parmesan, minced garlic, Italian seasoning, salt, black pepper, and red pepper flakes.
- Drizzle chicken with olive oil and rub to coat evenly.
- Press the breadcrumb mixture firmly onto the oiled side of each chicken breast.
- Place chicken on a baking sheet or wire rack, coated side up.
- Drizzle remaining olive oil over the top of the chicken.
- Roast for 20-25 minutes until internal temperature reaches 165°F (74°C) and coating is golden brown.
- Let chicken rest for 5 minutes before serving.
- Zest lemon over the top and serve immediately.
Notes
For best results, use a wire rack to allow air circulation for a crispier crust. Do not overcrowd the pan. If using a convection oven, reduce temperature by 25°F. Leftovers can be stored for 3 days and reheated in an oven at 350°F to maintain crispness.
- Prep Time: 15 minutes
- Cook Time: 25 minutes
- Category: Main Course
- Cuisine: American
Nutrition
- Serving Size: 1 chicken breast wit
- Calories: 350
- Sugar: 1
- Sodium: 650
- Fat: 18
- Saturated Fat: 6
- Carbohydrates: 12
- Fiber: 1
- Protein: 32
Keywords: garlic parmesan chicken, one pan dinner, healthy chicken recipe, baked chicken, quick weeknight meals, keto friendly, gluten free option