Let’s face it, most Sunday mornings start with a frantic search for something that doesn’t involve burning the toast. I remember one specific brunch where I had invited over six friends, and my original plan was to make elaborate eggs benedict. Spoiler alert: it was a disaster. The hollandaise separated, the English muffins were stale, and I was sweating in the kitchen while everyone else was chatting in the living room. That was the moment I decided I needed a backup plan that was foolproof, delicious, and actually fun to eat.
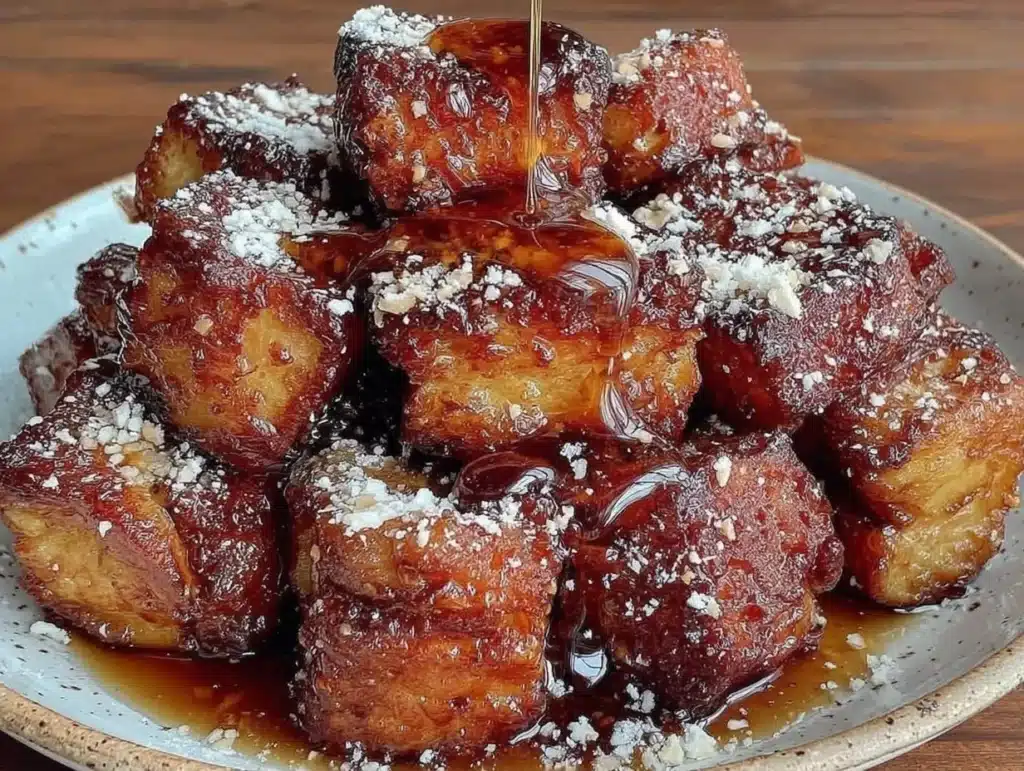
That’s when I discovered the magic of Easy Hawaiian Roll French Toast Bites. Honestly, it started as a way to use up those slightly stale Hawaiian rolls sitting in my pantry. I cut them into cubes, dipped them in a rich egg mixture, and pan-fried them until they were golden and gooey. The result? A breakfast that tastes like a dessert but is ready in under 20 minutes. It’s the kind of dish that makes people stop talking and start eating.
I’ve tested this recipe over a dozen times since that chaotic morning. I’ve tweaked the butter-to-oil ratio, experimented with different pan temperatures, and even tried adding different spices. The version I’m sharing today is the winner. It’s soft on the inside, crispy on the outside, and perfect for dipping into maple syrup or just eating plain. If you’re looking for a crowd-pleaser that requires minimal effort but delivers maximum flavor, this is it. Plus, it’s great for picky eaters and foodies alike.
Why You’ll Love This Recipe
After spending years in the kitchen, I’ve learned that the best recipes are the ones that solve problems. This Hawaiian roll French toast isn’t just another breakfast idea; it’s a solution for busy schedules, picky palates, and the need for comfort food that feels special. Here is why this recipe has earned a permanent spot in my weekly rotation and why I think you’ll love it too.
- Quick & Easy: From cutting the rolls to plating the first bite, this comes together in under 20 minutes. It is perfect for busy weeknights when you want something fancy, or lazy weekend mornings when you don’t want to spend hours in the kitchen.
- Simple Ingredients: You likely already have everything in your kitchen. Sweet Hawaiian rolls, eggs, milk, vanilla, and cinnamon are pantry staples. No fancy grocery trips or hard-to-find items needed.
- Perfect for Brunch: These bites are small enough to be finger food, making them ideal for potlucks, holiday mornings, or casual brunches with friends. They look elegant but are incredibly low-stress to prepare.
- Crowd-Pleaser: I have served these to toddlers and teenagers, and they all love them. The sweet, buttery flavor appeals to almost everyone, and the soft texture is comforting.
- Unbelievably Delicious: The combination of the sweet, brioche-like Hawaiian rolls with the rich custard creates a texture that is next-level comfort food. It’s crispy edges meeting a soft, custardy center.
What makes this recipe different from standard French toast? It’s the roll. Hawaiian rolls are already sweet and soft, so they absorb the egg mixture without falling apart. They hold their shape better than sliced bread, allowing you to get that perfect golden crust without burning the sugar inside. This isn’t just a quick breakfast; it’s a reimagined classic that feels indulgent but is actually quite simple to execute.
What Ingredients You Will Need
This recipe relies on a few key components to create that perfect balance of sweetness and richness. The beauty of this dish is how simple the ingredient list is, yet how much flavor each part contributes. You don’t need exotic spices or expensive cheeses. Just good quality basics that work together harmoniously.
- Hawaiian Sweet Rolls: This is the star of the show. You will need one standard pack (usually 6 rolls). Look for soft, pillowy rolls. If they are slightly stale, that is actually better because they absorb the custard without getting soggy. I prefer brands like King’s Hawaiian for their consistent sweetness and texture.
- Eggs: Large eggs are essential for structure. You need enough to create a thick enough batter to coat the rolls. Room temperature eggs mix more evenly, but cold eggs work fine if you whisk them well.
- Milk: Whole milk is my go-to for richness, but you can use 2% or even oat milk for a dairy-free option. The fat content helps create a tender interior. Avoid skim milk if you want that luxurious mouthfeel.
- Heavy Cream: Adding a splash of heavy cream instead of more milk makes the custard richer and helps achieve that bakery-style texture. It’s an optional upgrade, but it makes a noticeable difference.
- Vanilla Extract: Use pure vanilla extract, not imitation. It adds a warm, aromatic flavor that complements the sweetness of the rolls perfectly. About one teaspoon is sufficient.
- Cinnamon: Ground cinnamon adds warmth and depth. It balances the sweetness of the rolls. I use about half a teaspoon, but you can adjust to taste.
- Butter: Unsalted butter is used for frying. It provides the necessary fat for browning and adds a nutty flavor. Salted butter works too, but you may want to reduce any additional salt in the egg mixture.
- Maple Syrup: For serving. Real maple syrup is best, but if you are on a budget, a high-quality pancake syrup will do in a pinch. It adds the final touch of sweetness.
- Optional Toppings: Powdered sugar, fresh berries, or a drizzle of caramel sauce can add extra flair. I often keep it simple with just powdered sugar, but fresh strawberries look beautiful.
Equipment Needed
You don’t need a fancy kitchen to make this recipe. In fact, keeping it simple is part of the appeal. Here is what you will need to get started.
- Large Mixing Bowl: A wide bowl is best for whisking the egg mixture. It gives you enough space to combine the ingredients without splashing. I use a glass bowl because it is easy to clean and visually appealing.
- Whisk: A standard wire whisk is perfect for breaking up the eggs and incorporating the milk and spices. You want a smooth, homogeneous mixture with no lumps of egg white.
- Non-Stick Skillet or Griddle: This is crucial. A non-stick surface ensures that the rolls don’t stick and burn. A cast-iron skillet works well if you have it properly seasoned, but for beginners, a non-stick pan is safer. I recommend a 10-inch skillet for a batch of six rolls.
- Spatula: A flexible silicone spatula is ideal for flipping the rolls gently. It helps you get under the delicate pieces without breaking them. Avoid metal spatulas as they can scratch your non-stick pan.
- Knife and Cutting Board: You will need to cut the rolls into bite-sized cubes. A serrated knife works best for cutting through the soft rolls without squishing them. A simple chef’s knife is also fine if you are gentle.
- Tongs: Optional, but helpful for handling the pieces if you are flipping a large batch. They give you better control than a spatula for small cubes.
If you don’t have a non-stick skillet, you can use a stainless steel pan with plenty of butter, but you must be vigilant about heat levels to prevent sticking. Also, ensure your pans are clean and dry before heating to avoid any moisture interference with the browning process.
How to Make Easy Hawaiian Roll French Toast Bites
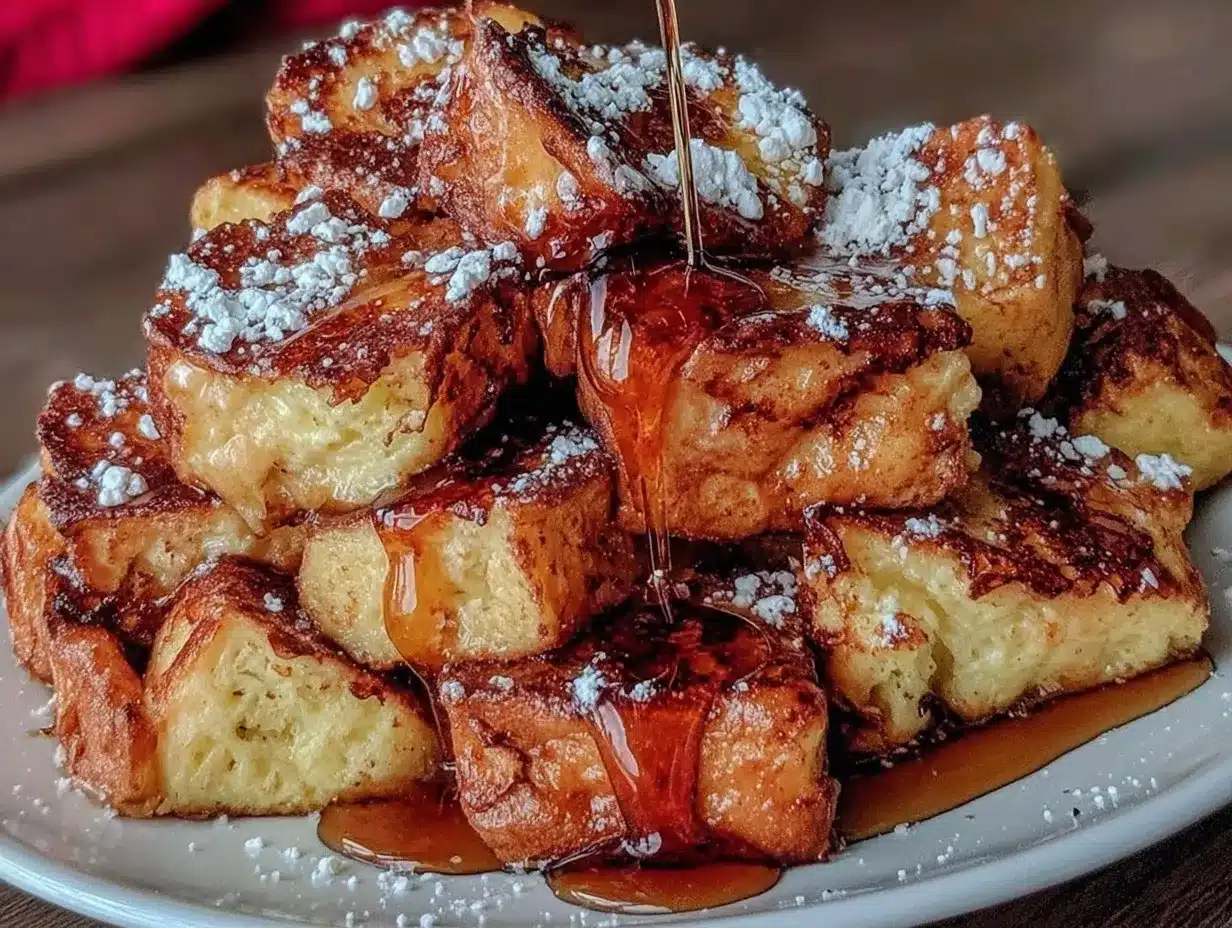
Preparing these bites is straightforward, but attention to detail makes all the difference. Here is the step-by-step process to ensure perfect results every time.
- Prepare the Rolls (2 minutes): Start by taking your Hawaiian rolls out of the package. If they are still attached in a cluster, gently separate them. Place them on a cutting board. Using a serrated knife, cut each roll into quarters or eighths, depending on how large you want your bites. Aim for uniform sizes so they cook evenly. Smaller cubes will cook faster but may dry out; larger cubes retain more moisture. I prefer medium-sized cubes for a good balance.
- Whisk the Custard (2 minutes): In your large mixing bowl, crack the eggs. Add the milk, heavy cream, vanilla extract, and cinnamon. Whisk vigorously until the mixture is completely smooth and slightly frothy. You want to ensure there are no streaks of egg white remaining. Taste a tiny drop to check the sweetness; if it tastes bland, add a pinch of sugar, though the rolls are usually sweet enough.
- Dip the Rolls (5 minutes): This is the most critical step. Place the cut rolls into the egg mixture. Gently toss them to ensure every piece is coated. Let them sit for about 30 seconds to a minute. You want the custard to soak into the bread, but not so long that the rolls fall apart. If you leave them too long, they will become mushy. Turn them over once to coat the other side.
- Heat the Pan (2 minutes): While the rolls are soaking, heat your skillet over medium heat. Add a tablespoon of butter and let it melt. Wait until the butter stops foaming and starts to shimmer. This indicates the pan is at the right temperature. If the butter burns immediately, the pan is too hot. If it just sits there, it’s too cold.
- Cook the Bites (6-8 minutes): Carefully transfer the rolls to the hot pan. Do not overcrowd the pan; cook in batches if necessary. Overcrowding leads to steaming instead of frying, which prevents browning. Cook for 2-3 minutes on the first side until golden brown. You should see bubbles forming and the edges crisping up. Flip the pieces and cook for another 2-3 minutes on the other side. They should be deep golden brown and crispy on the outside but soft inside.
- Drain and Serve (1 minute): Remove the cooked bites from the pan and place them on a paper towel-lined plate to drain excess butter. Serve immediately while hot. Dust with powdered sugar or drizzle with maple syrup. Enjoy!
If you notice the bottoms are browning too quickly before the centers are cooked, lower the heat. It is better to cook them slowly over medium-low heat to ensure the inside is fluffy and the outside is perfectly crisp. Patience is key here.
Cooking Tips & Techniques
Having cooked this recipe many times, I have picked up a few tricks that can save you from common pitfalls. These tips are based on trial and error, so you can skip the mistakes I made.
- Don’t Skip the Resting Time: Allowing the rolls to sit in the egg mixture is not optional. It ensures that the flavor penetrates the bread. However, do not soak them for more than two minutes. Hawaiian rolls are dense; they need time to absorb the liquid, but they are also sturdy. Too long, and they disintegrate.
- Control Your Heat: Medium heat is the sweet spot. High heat will burn the sugar in the rolls before the egg is cooked. Low heat will make them greasy. If your stove runs hot, use medium-low. If it runs cold, you might need medium-high, but watch closely.
- Use Enough Butter: Butter is flavor. Don’t be shy with it. A generous amount in the pan creates that rich, golden crust. If you are worried about calories, you can use a mix of butter and oil, as oil has a higher smoke point.
- Batch Cooking: If you are feeding a crowd, cook in batches. Keep the cooked bites warm in a low oven (200°F) while you finish the rest. This ensures everyone eats at the same temperature.
- Check for Doneness: The best way to check if they are done is to press gently on a piece. It should spring back slightly and feel firm on the outside but soft inside. If it feels soggy, cook for another minute.
One common mistake I see is using stale rolls that are too hard. If your rolls are rock hard, they won’t absorb the custard. Lightly toast them in the oven for a minute to soften them up before dipping. Conversely, if they are too fresh, they might fall apart. Letting them sit out for an hour to dry slightly can help.
Variations & Adaptations
One of the best things about this recipe is its versatility. You can easily adapt it to suit different dietary needs or flavor preferences.
- Dairy-Free Option: Swap the milk and heavy cream for oat milk or almond milk. Use coconut oil or dairy-free butter for frying. The texture will be slightly different but still delicious.
- Gluten-Free: Use gluten-free sweet rolls. Many brands now offer soft, sweet gluten-free breads that work well for this recipe. Be careful not to over-soak them, as gluten-free bread can be more fragile.
- Flavor Boost: Add a pinch of nutmeg or cardamom to the egg mixture for a warmer spice profile. You can also add orange zest for a citrusy twist that pairs beautifully with the sweet rolls.
- Protein Pack: Add a scoop of vanilla protein powder to the egg mixture for a higher-protein breakfast. This might make the batter thicker, so you may need to add a little more milk.
- Savory Twist: Skip the cinnamon and vanilla. Add cheddar cheese, cooked bacon bits, and green onions to the egg mixture. Top with a dollop of sour cream. It’s a completely different dish but uses the same base.
I personally love adding a dash of maple syrup to the egg mixture for an extra caramelized flavor. It’s a small change that makes a big impact. Feel free to experiment with these variations to find your favorite combination.
Serving & Storage Suggestions
How you serve these bites can make them feel even more special. Presentation matters, especially if you are hosting guests.
- Serving Temperature: Serve them immediately while hot. They are best enjoyed fresh from the pan. The contrast between the crispy exterior and warm, soft interior is lost if they sit out too long.
- Complementary Dishes: These bites pair well with fresh fruit salad, bacon, or scrambled eggs. They also go great with a cup of coffee or orange juice. For a complete brunch, serve them with a side of yogurt and granola.
- Storage: Leftovers can be stored in an airtight container in the refrigerator for up to two days. However, they are best eaten fresh. Reheating can make them slightly soggy.
- Reheating: To reheat, use a toaster oven or an air fryer at 350°F for 3-4 minutes. This helps restore the crispiness. Avoid the microwave, as it will make them chewy and soft.
- Freezing: You can freeze the cooked bites. Let them cool completely, then place them in a freezer-safe bag. Reheat in the toaster oven for best results.
The flavors actually meld together nicely if you let them sit for a short time, but the texture is always best fresh. I recommend making them in small batches if you have leftovers to ensure the best quality.
Nutritional Information & Benefits
While this is a treat, it can fit into a balanced diet if enjoyed in moderation. Here is a general overview of the nutritional content per serving (assuming 4 bites per person).
- Calories: Approximately 250-300 calories per serving, depending on the size of the bites and the amount of butter used.
- Carbohydrates: High in carbs due to the sweet rolls. This provides quick energy, making it a good option for active mornings.
- Protein: Moderate protein from the eggs and milk. Adding protein powder can boost this significantly.
- Fat: Contains fat from the butter, eggs, and cream. Using less butter or switching to oil can reduce this.
- Sugar: Naturally high in sugar from the Hawaiian rolls. If you are watching sugar intake, consider using unsweetened rolls or reducing the syrup.
From a wellness perspective, this recipe is comforting and satisfying. It provides the emotional boost of a sweet breakfast, which can start your day on a positive note. Just be mindful of portion sizes if you are managing your sugar intake.
Conclusion
Easy Hawaiian Roll French Toast Bites are more than just a quick breakfast; they are a celebration of simple ingredients coming together to create something extraordinary. I still remember that chaotic morning that led me to this recipe, and every time I make it now, I feel that same sense of relief and joy. It’s reliable, delicious, and universally loved.
I encourage you to try this recipe and make it your own. Add your favorite spices, change up the toppings, or serve it to your friends and family. The beauty of cooking is in the personal touch. I would love to hear how you enjoy these bites. Do you add berries? Do you drizzle extra syrup? Share your variations in the comments below.
Happy cooking, and enjoy every bite of this sweet, crispy, comforting breakfast treat!
Frequently Asked Questions
Can I use stale Hawaiian rolls?
Yes, stale rolls are actually ideal because they absorb the egg mixture better without falling apart. If they are very hard, let them sit out for a bit to soften slightly.
How do I prevent the rolls from sticking to the pan?
Ensure your pan is properly preheated and use enough butter. A non-stick skillet is highly recommended. Do not move the rolls too early; let them form a crust before flipping.
Can I make this recipe ahead of time?
You can prepare the egg mixture and cut the rolls ahead of time, but it is best to cook them fresh. If you must prep ahead, store the cut rolls in the fridge and cook them in the morning.
What is the best way to reheat leftovers?
Use a toaster oven or air fryer to restore crispiness. Avoid the microwave, as it will make them soggy.
Can I use a different type of sweet roll?
Yes, you can use cinnamon rolls or brioche rolls. The cooking time may vary slightly, so keep an eye on them to avoid burning.
Pin This Recipe!
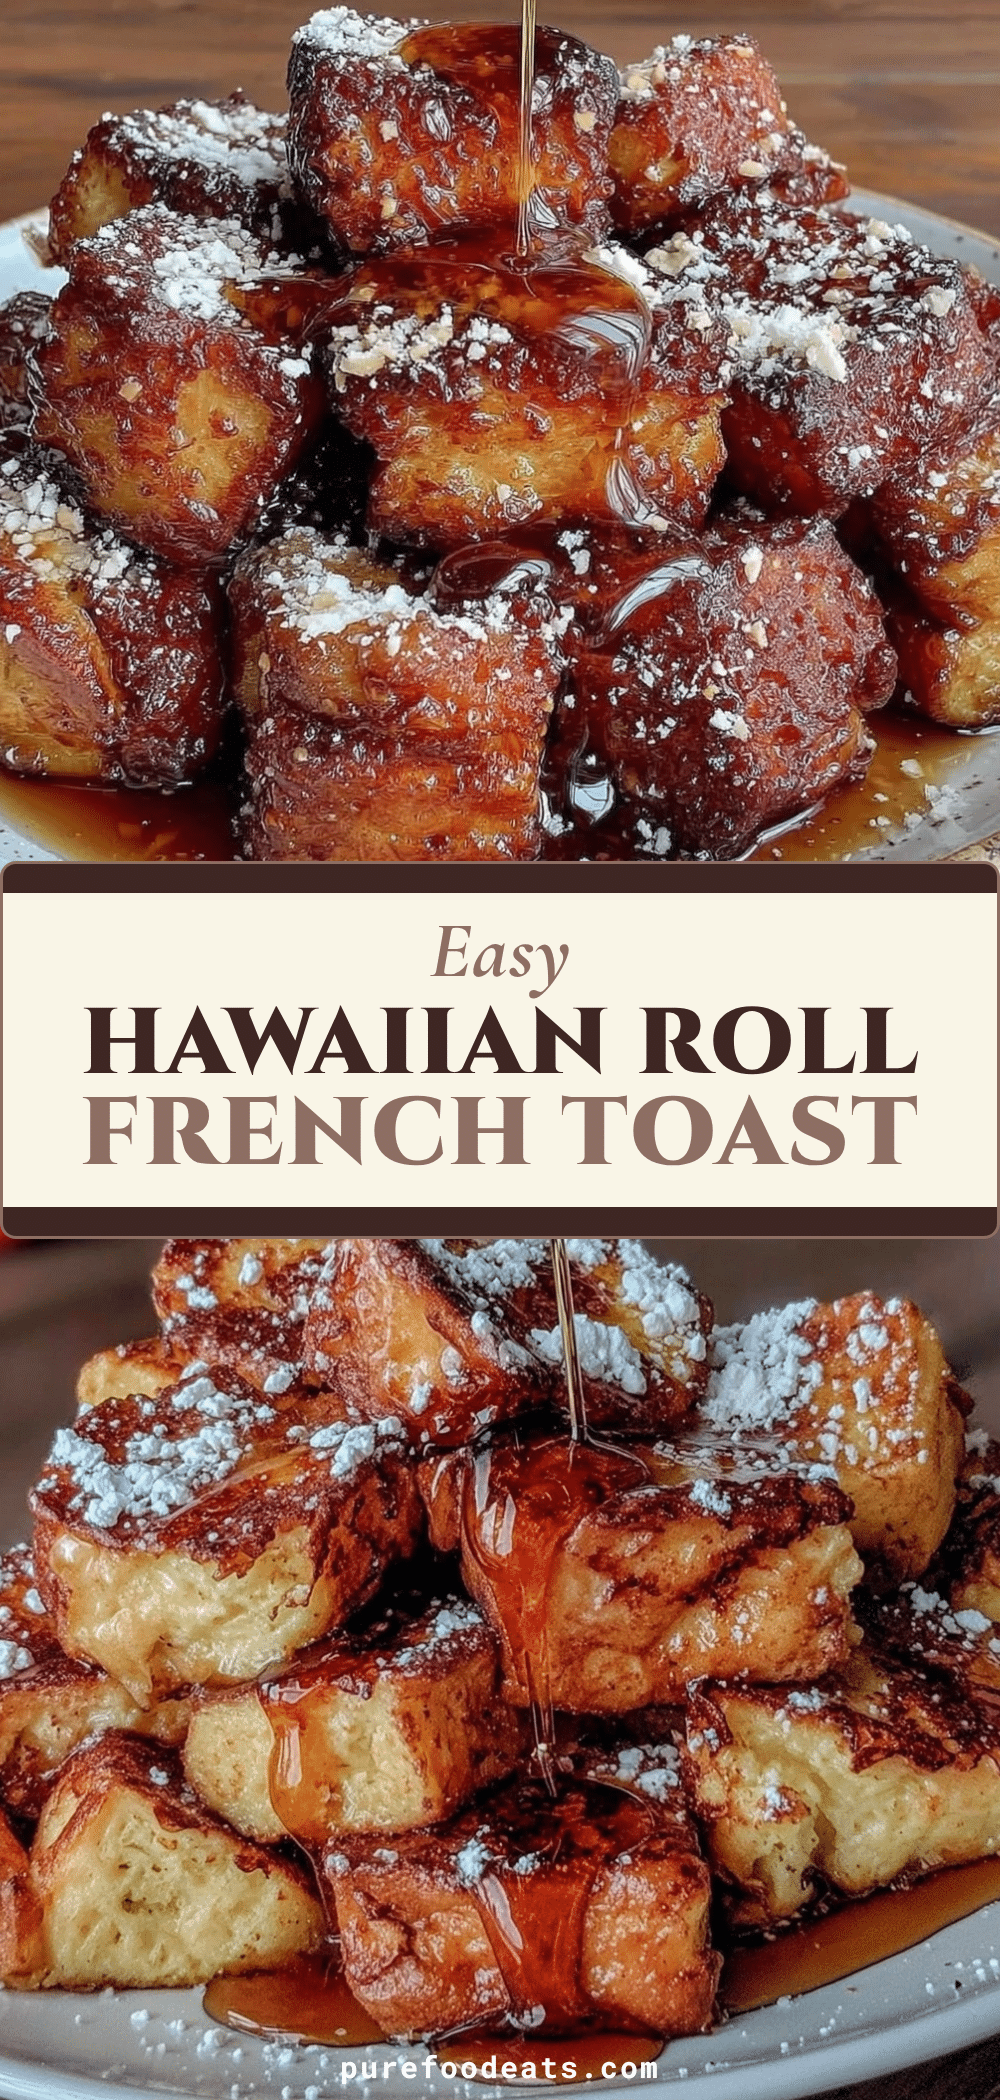
Easy Hawaiian Roll French Toast Bites: 5-Minute Breakfast
- Total Time: 20 minutes
- Yield: 4 servings 1x
Description
A quick and foolproof breakfast dish featuring sweet Hawaiian rolls dipped in a rich custard and pan-fried until golden and gooey. Perfect for busy mornings or brunches, this recipe delivers maximum flavor with minimal effort.
Ingredients
- 1 pack (6 rolls) Hawaiian Sweet Rolls
- Large eggs
- Whole milk (or 2% or oat milk)
- Heavy cream (optional, for richness)
- 1 tsp pure vanilla extract
- 1/2 tsp ground cinnamon
- Unsalted butter (for frying)
- Maple syrup (for serving)
- Powdered sugar (optional topping)
- Fresh berries (optional topping)
Instructions
- Cut the Hawaiian rolls into uniform bite-sized cubes (quarters or eighths).
- In a large mixing bowl, whisk together eggs, milk, heavy cream, vanilla extract, and cinnamon until smooth and frothy.
- Place the cut rolls into the egg mixture and gently toss to coat. Let them sit for 30 seconds to 1 minute to absorb the custard, then turn to coat the other side.
- Heat a non-stick skillet over medium heat and add butter, melting until it stops foaming and starts to shimmer.
- Transfer the rolls to the hot pan in batches, ensuring not to overcrowd. Cook for 2-3 minutes on the first side until golden brown.
- Flip the pieces and cook for another 2-3 minutes on the other side until deep golden brown and crispy outside but soft inside.
- Remove from pan and drain on a paper towel-lined plate. Serve immediately with maple syrup and powdered sugar.
Notes
Stale rolls are ideal as they absorb custard without falling apart. If rolls are too hard, let them sit out to soften. Control heat carefully to prevent burning the sugar in the rolls. For a dairy-free option, use oat milk and coconut oil. For gluten-free, use gluten-free sweet rolls but be careful not to over-soak.
- Prep Time: 10 minutes
- Cook Time: 10 minutes
- Category: Breakfast
- Cuisine: American
Nutrition
- Serving Size: 4 bites per person
- Calories: 275
- Sugar: 20
- Sodium: 250
- Fat: 12
- Saturated Fat: 6
- Carbohydrates: 35
- Fiber: 1
- Protein: 6
Keywords: Hawaiian rolls, french toast bites, quick breakfast, brunch ideas, easy recipe, sweet breakfast, crowd-pleaser