
The smell of garlic hitting hot oil is instantly recognizable, isn’t it? It’s that specific, savory scent that makes your stomach growl before you even think about lunch. I remember the first time I tried to recreate a classic Caesar salad as a sandwich. It was a disaster. The lettuce wilted in minutes, and the dressing turned the bun into a soggy mess. Honestly, I almost gave up on the idea entirely.
But then, I had a breakthrough moment. I swapped the flimsy lettuce for something sturdy and added a layer of crunchy, fried chicken. Suddenly, everything clicked. This Crispy Chicken Caesar Sandwich isn’t just a meal; it’s a texture explosion. The crunch of the chicken contrasts perfectly with the creamy, tangy dressing.
I’ve tested this recipe over a dozen times now. Each attempt taught me something new about how to keep the breading crisp while letting the flavors shine. You know how it is with salads—you want them fresh, not waterlogged. This version solves that problem completely. It’s sturdy enough to hold up in a lunchbox or a picnic basket.
This recipe is perfect for busy weeknights when you need something fast but feels indulgent. It’s also great for anyone who loves the classic flavors of Caesar but wants a heartier meal. The combination of sharp parmesan, garlicky aioli, and crispy chicken is unbeatable. It brings the comfort of fried food with the brightness of a garden salad.
Why You’ll Love This Crispy Chicken Caesar Sandwich Recipe
Let’s be real, not all sandwiches are created equal. Some fall apart in your hands, while others lack that “wow” factor. This Crispy Chicken Caesar Sandwich hits every single note. It’s the kind of dish that makes you close your eyes after the first bite because the flavor profile is just so balanced.
Here is why this recipe stands out from the crowd:
- Quick & Easy: You can have this on the table in under 20 minutes. The chicken cooks fast, and the dressing comes together in seconds. It’s perfect for those chaotic weeknights when you’re hungry but tired.
- Simple Ingredients: You likely have most of these items in your kitchen right now. Chicken breasts, mayo, parmesan, lemon, and garlic. No fancy grocery trips needed for obscure spices.
- Perfect for Lunch: Unlike traditional Caesar salads that get messy, this sandwich travels well. It’s sturdy, handheld, and satisfying. It’s my go-to for meal prep lunches that don’t taste boring.
- Crowd-Pleaser: Kids love the crunch, and adults love the sophisticated flavor. It’s a win-win for family dinners or casual gatherings with friends.
- Unbelievably Delicious: The texture is next-level. You get the shatteringly crisp exterior of the chicken, the cool creaminess of the dressing, and the sharp bite of the cheese. It’s comfort food reimagined.
What makes this recipe different is the attention to detail in the assembly. We don’t just toss chicken on bread. We toast the bun, we make a garlic-parmesan aioli, and we use romaine hearts that add a fresh crunch. It’s not just another sandwich; it’s your best version of a classic lunch.
I’ve served this to friends who are picky eaters, and they always ask for the recipe. It’s the kind of meal that turns a simple Tuesday into something memorable. It’s fast, it’s flavorful, and it’s genuinely satisfying.
What Ingredients You Will Need
This recipe uses simple, wholesome ingredients to deliver bold flavor and satisfying texture without the fuss. The magic lies in the quality of a few key components. You don’t need expensive cuts of meat or rare spices. Just fresh, good-quality basics.
Here is what you will need to make this Crispy Chicken Caesar Sandwich:
- Chicken Breasts: Two large boneless, skinless chicken breasts. I recommend pounding them to an even thickness for uniform cooking. Look for fresh, plump breasts rather than frozen ones if possible.
- All-Purpose Flour: One cup, for the dredging station. This creates the base for a golden crust. You can use gluten-free flour if needed, but all-purpose gives the best crunch.
- Eggs: Two large eggs, beaten. These act as the glue for the breading. Room temperature eggs work best here.
- Panko Breadcrumbs: One and a half cups. This is crucial. Panko creates that shatteringly crisp exterior that regular breadcrumbs can’t match. I prefer Japanese-style panko for its light, airy texture.
- Seasonings: One teaspoon of garlic powder, one teaspoon of onion powder, half a teaspoon of paprika, and salt and pepper to taste. These simple spices add depth to the chicken.
- Mayonnaise: Half a cup. This is the base of our Caesar dressing. I recommend a high-quality mayo like Hellmann’s or Duke’s for the best flavor.
- Garlic: Two cloves, minced. Fresh garlic is non-negotiable for that authentic Caesar taste. Powdered garlic just doesn’t cut it here.
- Parmesan Cheese: Half a cup, finely grated. Use the hard, aged variety for the sharpest flavor. Pre-grated cheese often has anti-caking agents that affect texture.
- Lemon Juice: One tablespoon. Freshly squeezed is best. It cuts through the richness of the mayo and cheese.
- Worcestershire Sauce: One teaspoon. This adds that umami depth that defines a classic Caesar dressing. Don’t skip it!
- Romaine Lettuce: Two hearts, chopped. Use the inner hearts for the tenderest crunch. The outer leaves can be too tough.
- Hamburger Buns: Four to six buns. Potato buns or brioche buns work well because they are soft yet sturdy enough to hold the filling.
- Oil for Frying: Vegetable or canola oil. You need enough to coat the bottom of the pan for shallow frying.
These ingredients are pantry staples or easy to find at any grocery store. The key is to keep the chicken cold before dredging and the oil hot for frying. This ensures the best texture every time.
Equipment Needed
You don’t need a fancy kitchen to make this sandwich. Basic tools will do the job perfectly. Having the right setup makes the process smoother and less stressful.
- Meat Mallet or Rolling Pin: Essential for pounding the chicken breasts to an even quarter-inch thickness. This ensures they cook evenly and quickly.
- Three Shallow Bowls: One for flour, one for eggs, and one for panko. Using three separate bowls makes the breading process organized and efficient.
- Large Skillet or Cast Iron Pan: A heavy-bottomed skillet retains heat well, which is important for getting a consistent golden crust. Cast iron is my personal favorite for this.
- Chef’s Knife and Cutting Board: For chopping the lettuce and mincing the garlic. A sharp knife makes prep work much safer and faster.
- Microplane or Fine Grater: If you are grating your own parmesan, a microplane gives you that fine, powdery texture that melts into the dressing beautifully.
- Tongs: Great for flipping the chicken without breaking the breading. They also help with tossing the salad ingredients.
If you don’t have a meat mallet, a heavy skillet works too. Just be gentle to avoid tearing the meat. Keeping your equipment clean and ready before you start cooking will save you time and hassle.
Preparation Method

Let’s get cooking. This process is straightforward, but timing is everything. Follow these steps closely for the best results.
- Prepare the Chicken: Place the chicken breasts on a cutting board. Cover them with plastic wrap. Use a meat mallet to pound them to about 1/4 inch thickness. This step is vital for even cooking. If the chicken is too thick, the outside will burn before the inside is done. Set aside on a plate.
- Set Up the Breading Station: Take three shallow bowls. In the first, add the flour and season with salt and pepper. In the second, beat the eggs with a fork. In the third, mix the panko breadcrumbs with the garlic powder, onion powder, paprika, and a pinch of salt. Having everything ready before you touch the chicken prevents messes.
- Bread the Chicken: Dredge each chicken breast in the flour, shaking off any excess. Dip it into the egg wash, ensuring it is fully coated. Finally, press it firmly into the panko mixture. Make sure the coating is thick and even. Press the crumbs in so they stick well. Place the breaded chicken on a clean plate.
- Make the Caesar Aioli: In a small bowl, combine the mayonnaise, minced garlic, grated parmesan, lemon juice, and Worcestershire sauce. Whisk until smooth. Taste and adjust seasoning if needed. This dressing is the soul of the sandwich. It should be creamy and tangy.
- Fry the Chicken: Heat about 1/4 inch of oil in your large skillet over medium-high heat. The oil is ready when a pinch of panko sizzles immediately. Carefully place the chicken in the pan. Do not overcrowd the pan. Fry for about 4-5 minutes per side, or until golden brown and cooked through. The internal temperature should reach 165°F (74°C). Transfer to a paper towel-lined plate to drain excess oil.
- Toast the Buns: While the chicken rests, slice the buns in half. Place them cut-side down in the same skillet for a minute or two. This adds a nutty flavor and prevents the bun from getting soggy. Remove and set aside.
- Chop the Lettuce: Wash and dry the romaine hearts thoroughly. Chop them into bite-sized pieces. Dry lettuce is important so the dressing clings properly. Toss the lettuce with a tiny bit of olive oil and salt.
- Assemble the Sandwich: Spread a generous layer of Caesar aioli on both halves of the toasted bun. Place the chopped romaine on the bottom bun. Top with the crispy chicken breast. Add a few more croutons if you have them. Close the sandwich.
The key here is not to rush the frying process. Medium-high heat gives you that perfect crunch without burning the garlic in the breading.
Cooking Tips & Techniques
I’ve made my fair share of mistakes in the kitchen, and some of them involved soggy chicken. Here are some tips to help you avoid common pitfalls.
- Keep the Oil at the Right Temperature: If the oil is too cool, the chicken will absorb grease. If it’s too hot, the breadcrumbs will burn. Aim for a steady medium-high heat. If the oil starts smoking, lower the heat immediately.
- Don’t Skip the Toasting: Toasting the buns is non-negotiable. It creates a barrier between the wet dressing and the soft bread. This simple step changes the entire texture of the sandwich.
- Use Fresh Garlic: Bottled garlic often has a metallic taste. Fresh garlic provides a bright, aromatic punch that elevates the aioli. Mince it finely so it distributes evenly.
- Pat the Chicken Dry: Before dredging, make sure the chicken is dry. Moisture prevents the flour from sticking properly. A dry surface ensures a crispier crust.
- Rest the Chicken: Let the chicken rest for a few minutes after frying. This allows the juices to redistribute. Cutting into it immediately will cause the juices to run out, leaving the meat dry.
I once tried to deep fry the chicken in a small pot, and it splattered everywhere. Lesson learned: use a wide skillet. It’s safer and gives you more control. Also, always season your chicken well. Bland chicken can’t be saved by dressing alone.
Variations & Adaptations
This recipe is versatile. You can tweak it to suit different dietary needs or flavor preferences.
- Baked Option: For a lighter version, bake the chicken at 400°F (200°C) for 20 minutes. Spray the top with cooking oil to help it brown. It won’t be as crispy as fried, but it’s still delicious.
- Spicy Twist: Add red pepper flakes to the panko mixture. Or, mix a spoonful of sriracha into the Caesar aioli. This adds a nice kick for those who like heat.
- Gluten-Free: Use gluten-free flour and gluten-free panko breadcrumbs. The result is surprisingly similar to the original version.
- Veggie Version: Swap the chicken for grilled halloumi or a thick slice of portobello mushroom. The Caesar flavors work surprisingly well with these substitutes.
- Avocado Addition: Add sliced avocado to the sandwich. The creaminess pairs perfectly with the tangy dressing and crunchy chicken.
I often add bacon bits to this sandwich when I have some on hand. The smokiness complements the garlic and parmesan beautifully. Feel free to experiment and make it your own.
Serving & Storage Suggestions
This sandwich is best served immediately after assembly. The contrast between the hot, crispy chicken and the cool, fresh lettuce is at its peak.
- Serving Ideas: Pair this sandwich with a side of sweet potato fries or a light cucumber salad. A cold lemonade or iced tea complements the richness of the sandwich well.
- Storage: Store leftover chicken in an airtight container in the refrigerator for up to three days. Keep the dressing and lettuce separate to maintain freshness.
- Reheating: Reheat the chicken in an air fryer at 350°F for 3-4 minutes. This restores the crispiness better than a microwave. The microwave will make the breading soggy, so avoid it if possible.
- Flavor Development: The flavors meld nicely if you prepare the aioli a day ahead. Let it sit in the fridge to allow the garlic and parmesan to infuse the mayo.
If you are packing this for lunch, pack the dressing in a small container and assemble it just before eating. This ensures the bun stays firm and the lettuce stays crisp. It’s a practical tip that makes a huge difference in taste.
Nutritional Information & Benefits
While this is a treat, it can fit into a balanced diet. The chicken provides high-quality protein, which helps keep you full. The lettuce adds fiber and vitamins.
- Protein: Each serving contains about 30-35 grams of protein from the chicken breast.
- Fat: The fat content comes mainly from the mayo and oil. Using a lighter mayo or baking the chicken can reduce this.
- Carbohydrates: The carbs come from the bun and panko. Choosing a whole wheat bun adds extra fiber.
I enjoy this as an occasional indulgence. It satisfies cravings without feeling too heavy. The fresh ingredients like lemon and garlic also offer some antioxidant benefits. It’s a comforting meal that doesn’t leave you feeling sluggish.
Conclusion
This Crispy Chicken Caesar Sandwich is more than just a quick meal. It’s a celebration of texture and flavor. I love how it combines the classic tastes of a Caesar salad with the heartiness of a fried chicken sandwich. It’s easy to make, delicious, and always a hit.
I encourage you to try it and see how it compares to your favorite restaurant versions. You can customize it with your favorite add-ons or spices. Make it your own!
Please leave a comment below if you try this recipe. I’d love to hear how it turned out for you. Share your photos or variations with me. Happy cooking, and enjoy every crunchy bite!
Frequently Asked Questions
Can I use chicken thighs instead of breasts?
Yes, you can use boneless, skinless chicken thighs. They are juicier and more flavorful, though they may cook slightly faster. Adjust your frying time accordingly to ensure they are cooked through.
How do I keep the panko from falling off?
Press the breadcrumbs firmly into the chicken. Make sure the egg wash is generous. Let the breaded chicken rest for a few minutes before frying to help the coating set.
Can I make the Caesar aioli ahead of time?
Absolutely. The aioli tastes even better after sitting in the fridge for a few hours. Store it in an airtight container for up to three days.
What kind of bread works best?
Potato buns or brioche buns are excellent choices. They are soft but sturdy. You can also use ciabatta for a chewier texture.
Is there a dairy-free option for this sandwich?
Yes, use dairy-free mayonnaise and skip the parmesan or use a nutritional yeast substitute. The core flavors will still be delicious without the dairy.
Pin This Recipe!
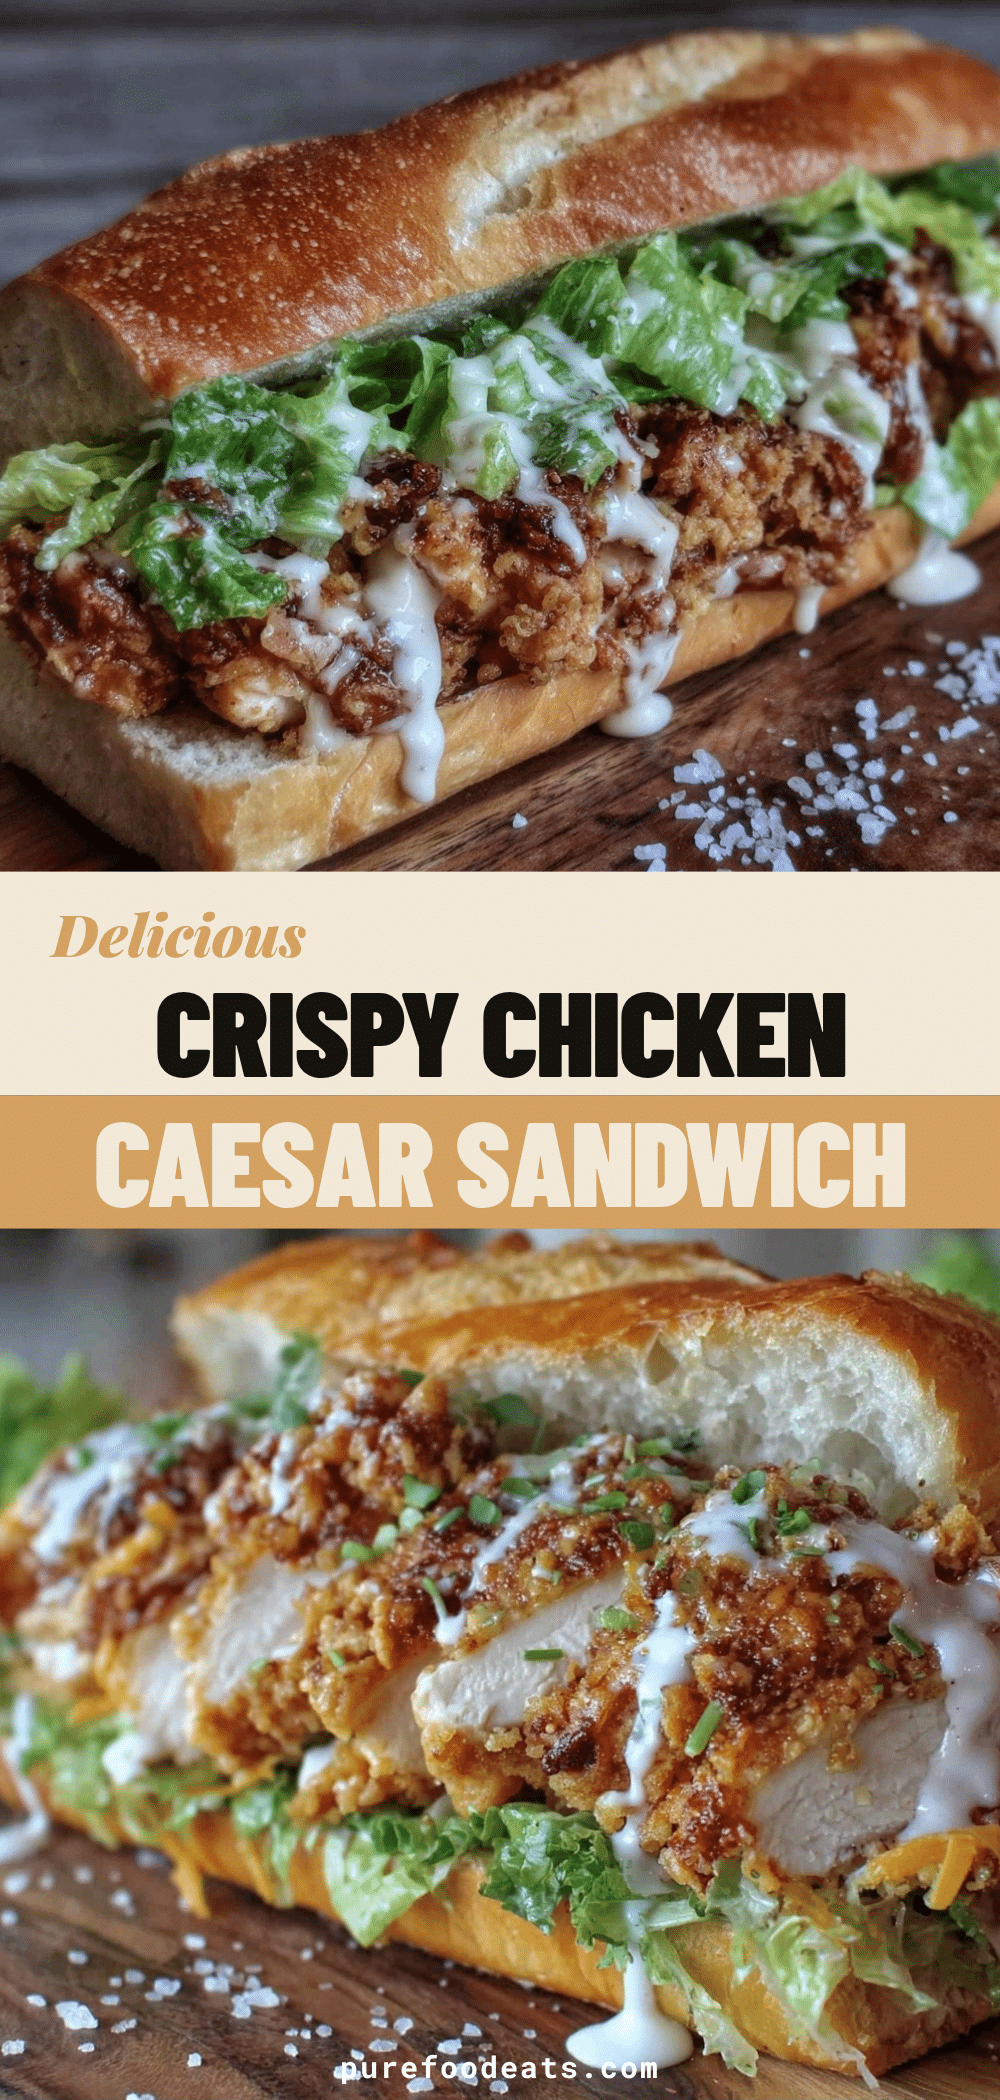

Crispy Chicken Caesar Sandwich
- Total Time: 25 minutes
- Yield: 4 servings 1x
Description
A quick and indulgent 15-minute meal featuring shatteringly crisp fried chicken, creamy garlic-parmesan aioli, and fresh romaine lettuce on a toasted bun.
Ingredients
- 2 large boneless, skinless chicken breasts
- 1 cup all-purpose flour
- 2 large eggs, beaten
- 1.5 cups panko breadcrumbs
- 1 tsp garlic powder
- 1 tsp onion powder
- 0.5 tsp paprika
- Salt and pepper to taste
- 0.5 cup mayonnaise
- 2 cloves garlic, minced
- 0.5 cup finely grated parmesan cheese
- 1 tbsp lemon juice
- 1 tsp Worcestershire sauce
- 2 romaine lettuce hearts, chopped
- 4–6 hamburger buns (potato or brioche)
- Vegetable or canola oil for frying
Instructions
- Place chicken breasts between plastic wrap and pound to 1/4 inch thickness.
- Set up three shallow bowls: one with flour seasoned with salt and pepper, one with beaten eggs, and one with panko mixed with garlic powder, onion powder, paprika, and salt.
- Dredge chicken in flour, dip in egg wash, then press firmly into panko mixture to coat evenly.
- Whisk together mayonnaise, minced garlic, parmesan, lemon juice, and Worcestershire sauce to make the Caesar aioli.
- Heat 1/4 inch of oil in a large skillet over medium-high heat.
- Fry chicken for 4-5 minutes per side until golden brown and internal temperature reaches 165°F. Transfer to a paper towel-lined plate.
- Toast bun halves cut-side down in the same skillet for 1-2 minutes.
- Chop romaine hearts and toss with a tiny bit of olive oil and salt.
- Spread Caesar aioli on both bun halves, layer with lettuce, top with crispy chicken, and assemble.
Notes
Keep the chicken cold before dredging and the oil hot for frying to ensure the best texture. Toasting the buns is non-negotiable to prevent sogginess. Let the chicken rest for a few minutes after frying to redistribute juices. For a lighter version, bake chicken at 400°F for 20 minutes.
- Prep Time: 15 minutes
- Cook Time: 10 minutes
- Category: Main Course
- Cuisine: American
Nutrition
- Serving Size: 1 sandwich
- Calories: 650
- Sugar: 6
- Sodium: 800
- Fat: 35
- Saturated Fat: 7
- Carbohydrates: 45
- Fiber: 3
- Protein: 32
Keywords: crispy chicken, caesar sandwich, quick lunch, fried chicken sandwich, caesar aioli, easy dinner, 15 minute meal