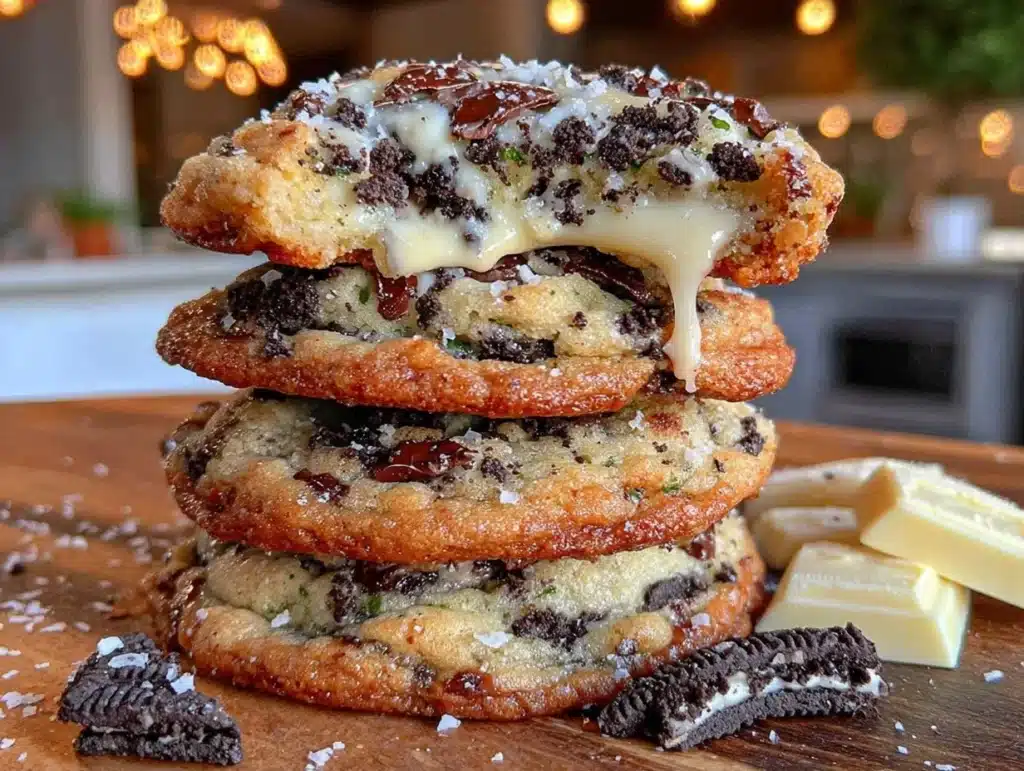
There is a specific kind of magic that happens when you mix crushed Oreos into cookie dough. It smells like childhood Saturday mornings and feels like pure comfort. I remember the first time I made these creamy Oreo cookies and cream cookies. I was trying to fix a batch that had turned out too cakey and dry. You know that feeling when you bite into a cookie and it crumbles into dust? Yeah, not my vibe.
So, I decided to swap out some of the flour for a little extra fat and a splash of cream cheese. I honestly didn’t expect much. I just wanted something softer. But when I pulled that first tray out of the oven, the scent was intoxicating. It wasn’t just sweet; it was rich and creamy in a way I hadn’t experienced before. The cookies held their shape but melted on the tongue.
These cookies are the boost you won’t even taste. They use high-quality ingredients that make a huge difference in texture without adding weird dietary restrictions. They are rich, indulgent, and perfect for sharing with friends who think they don’t like Oreos. Honestly, once you try this version, you’ll never go back to the dry, crumbly ones again. Let’s face it, we all want that soft, chewy center with a slight crisp edge.
I’ve tested this recipe over a dozen times now. I’ve adjusted the ratios, changed the baking times, and even tried different types of chocolate chips. Each time, the goal was the same: maximum creaminess with minimal effort. This recipe is for anyone who loves a dessert that feels luxurious but comes together in under an hour. It’s the kind of treat that makes your kitchen smell amazing and your mood lift instantly. You’ll wonder why you ever settled for anything less.
Why You’ll Love This Recipe
After years of baking and testing countless variations, I can confidently say this is the ultimate Oreo cookie recipe. It combines the best of both worlds: the nostalgic crunch of the cookie and the velvety smoothness of a cheesecake filling. Here is why this recipe stands out from the crowd:
- Quick & Easy: You don’t need to chill the dough for hours. This creamy Oreo cookies and cream cookies recipe comes together in about 15 minutes of prep. Perfect for when a craving hits on a Tuesday night.
- Simple Ingredients: You likely have most of this in your pantry. Cream cheese, butter, sugar, Oreos, and flour. No fancy, hard-to-find items. Just wholesome, good-quality staples.
- Perfect for Gifting: These cookies package beautifully. They stay soft in a tin for days. I often make a double batch to give to neighbors or bring to work. They are always the first thing to disappear.
- Crowd-Pleaser: Kids love the chocolate flavor, and adults appreciate the subtle tang from the cream cheese. It bridges the gap between a dessert and a snack perfectly.
- Unbelievably Delicious: The texture is next-level. Soft, chewy, and loaded with creamy pockets. It’s comfort food reimagined for the modern home baker.
What makes this recipe different is the addition of softened cream cheese directly into the dough. This isn’t just a topping; it changes the entire structure of the cookie. It creates a tender crumb that stays moist for days. Most Oreo cookie recipes rely solely on butter, which can lead to spreading and crispiness. By using cream cheese, you get that bakery-style softness every single time. It’s a simple tweak that makes a massive difference.
Emotionally, this recipe taps into that sense of nostalgia. It reminds me of late-night study sessions in college when Oreos were my go-to snack. But this version is elevated. It feels more special, more intentional. It’s the kind of cookie you eat with a glass of cold milk while watching a movie. It’s not just about the taste; it’s about the feeling of relaxation it brings. You close your eyes, take a bite, and suddenly, the stress of the week fades away. That’s the power of good baking.
What Ingredients You Will Need
This recipe uses simple, wholesome ingredients to deliver bold flavor and satisfying texture without the fuss. The key is quality. Since there are so few ingredients, each one plays a major role in the final taste and texture. I recommend using unsalted butter so you can control the saltiness, and full-fat cream cheese for that rich, tangy profile.
Here is what you need to gather:
- Unsalted Butter: 1 cup (2 sticks), softened to room temperature. This provides the base fat and flavor. If your butter is too cold, it won’t cream properly with the sugar. If it’s melted, your cookies will spread too thin.
- Full-Fat Cream Cheese: 8 ounces (225g), softened. This is the secret ingredient. It adds moisture and a slight tang that balances the sweetness. Look for small-curd varieties for the smoothest blend.
- Granulated Sugar: 1 cup (200g). This helps create that slight crisp edge while keeping the interior soft.
- Light Brown Sugar: 1 cup (220g), packed. Brown sugar adds chewiness and a hint of molasses flavor. It keeps the cookies moist for longer.
- Eggs: 2 large eggs, room temperature. These bind the dough together. Room temperature eggs emulsify better with the butter and cream cheese.
- Vanilla Extract: 2 teaspoons. Use pure vanilla extract, not imitation. It adds depth and warmth to the chocolate flavor.
- All-Purpose Flour: 2 ½ cups (315g). This is the structure of the cookie. Don’t pack it too tightly into the measuring cup, or your cookies will be dense.
- Baking Soda: 1 teaspoon. This helps the cookies rise and brown.
- Salt: ½ teaspoon. Salt is crucial for balancing the sweetness. Don’t skip it.
- Oreo Cookies: 15 to 20 cookies, crushed. You’ll use some for the dough and some for mixing in chunks. Reserve a few for garnish.
- White Chocolate Chips: 1 cup (170g). These add extra sweetness and creaminess that complements the Oreos perfectly.
I personally prefer using a food processor to crush the Oreos. It gives you a nice mix of fine crumbs and small chunks. If you use a rolling pin, you might get too much dust, which can make the dough dry. Also, if you want to avoid gelatin, check your Oreo packages, as some regions have recipes without it. For the white chocolate, I like using high-quality chips that melt smoothly. Cheap chips can sometimes seize up or have a waxy texture. Taking a moment to choose good ingredients pays off in the final bite.
Equipment Needed
You don’t need fancy gadgets to make these cookies, but having the right tools helps. A stand mixer or hand mixer is essential for creaming the butter and cream cheese properly. This step incorporates air into the dough, which helps the cookies rise slightly and stay soft.
A large mixing bowl is needed for combining the dry ingredients separately. This ensures the baking soda and salt are distributed evenly before they hit the wet mixture. A baking sheet lined with parchment paper or a silicone baking mat is crucial. Parchment paper prevents sticking and helps with even browning. If you don’t have parchment, you can use a light coating of butter, but it might change the texture slightly.
An airtight container is important for storing the dough if you plan to bake them over a few days. It keeps the dough fresh and prevents it from drying out. A cookie scoop is my favorite tool for portioning. It ensures every cookie is the same size, so they bake evenly. If you don’t have a scoop, you can use two spoons or just your hands, but consistency helps with baking time.
For crushing the Oreos, a food processor is ideal, but a zip-top bag and a rolling pin work fine too. Just be careful not to make the crumbs too fine. You want some texture in the final cookie. A cooling rack is also helpful. It allows air to circulate around the cookies so they don’t get soggy from steam. These are all basic kitchen items, so you likely already have them. Using the right equipment makes the process smoother and the results more consistent.
Preparation Method
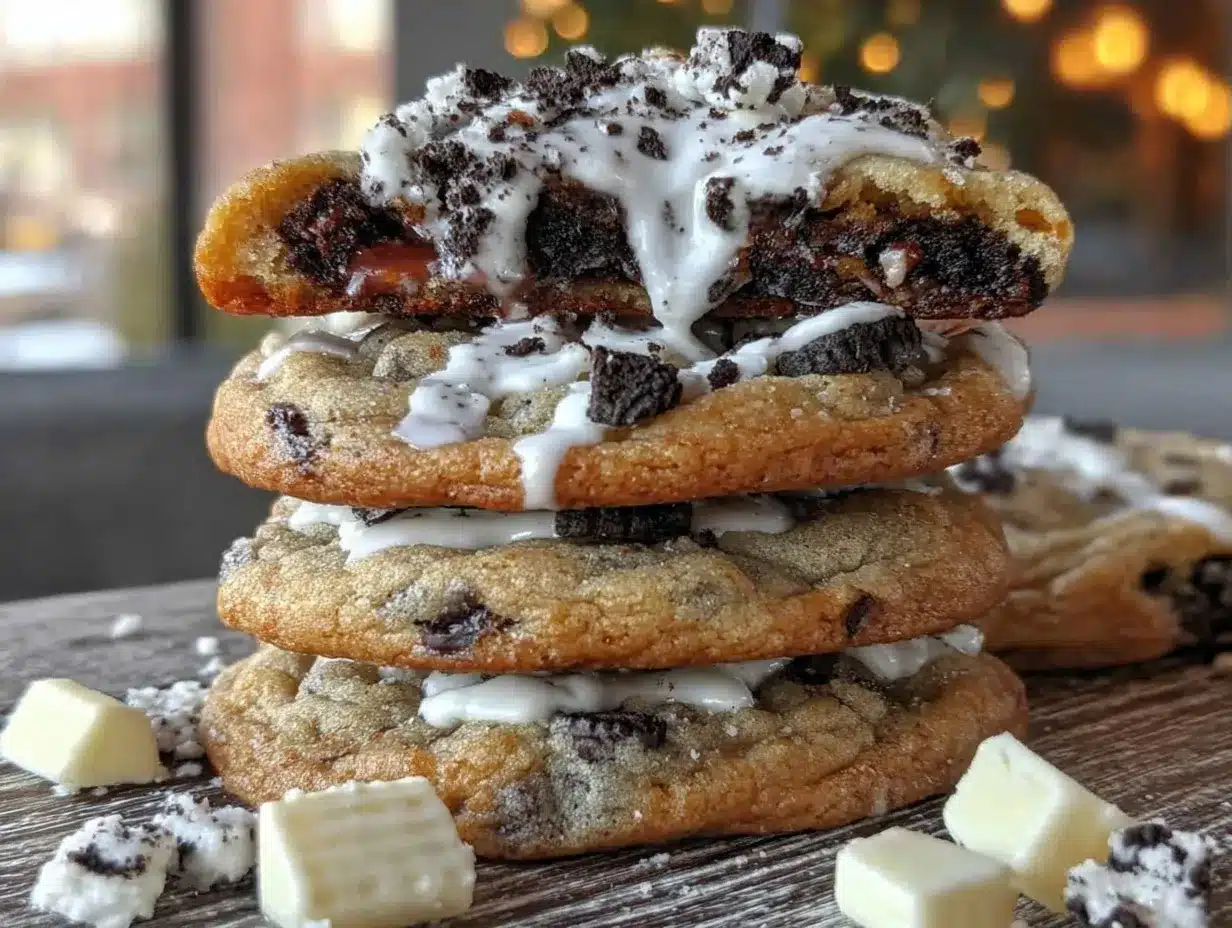
Getting these creamy Oreo cookies and cream cookies right is all about technique. Follow these steps carefully for the best results.
- Prepare the Dry Ingredients: In a medium bowl, whisk together the all-purpose flour, baking soda, and salt. Set this aside. This ensures there are no lumps of baking soda in your cookies, which can cause bitter spots. It takes about 2 minutes.
- Cream the Fats: In a large bowl, beat the softened unsalted butter and cream cheese together on medium-high speed. Do this for about 3 to 4 minutes until the mixture is completely smooth and creamy. Scrape down the sides of the bowl with a spatula to ensure everything is well combined. This step is critical for texture. It should look like a smooth, pale paste.
- Add the Sugars: Add the granulated sugar and packed brown sugar to the butter mixture. Beat on medium-high speed for another 3 to 4 minutes. The mixture should become light and fluffy. This incorporates air, which helps the cookies rise. Don’t rush this step; it makes a big difference in the final chewiness.
- Incorporate Eggs and Vanilla: Add the eggs one at a time, beating well after each addition. Then, add the vanilla extract. Mix until just combined. Be careful not to overmix here, as too much air can cause the cookies to collapse. It should take about 1 minute total.
- Combine Wet and Dry: Gradually add the flour mixture to the wet ingredients. Mix on low speed until just combined. You might see a few streaks of flour, which is okay. Overmixing at this stage can make the cookies tough. Stop mixing as soon as the dry ingredients disappear.
- Fold in the Oreos and Chocolate: Gently fold in the crushed Oreos and white chocolate chips using a spatula. Reserve about 1 tablespoon of fine Oreo crumbs for sprinkling on top later. Fold gently to avoid breaking the Oreo chunks too much. You want visible pieces of cookie in every bite. This takes about 2 minutes.
- Scoop and Chill: Scoop the dough onto a baking sheet lined with parchment paper. Place the entire baking sheet in the refrigerator for at least 30 minutes. This step is non-negotiable. Chilling the dough prevents the cookies from spreading too much and helps them hold their shape. It also allows the flavors to meld together.
- Preheat and Bake: Preheat your oven to 350°F (175°C). Once the dough is chilled, remove it from the fridge. Sprinkle the reserved fine Oreo crumbs on top of each dough ball. Bake for 10 to 12 minutes. The edges should be set and slightly golden, but the centers should still look soft and slightly underbaked. They will continue to cook on the hot pan.
- Cool and Serve: Let the cookies cool on the baking sheet for 5 minutes. Then, transfer them to a wire rack to cool completely. This prevents them from breaking apart. Enjoy them warm for the best texture!
If your dough feels too sticky, add a teaspoon more flour. If it’s too dry, add a teaspoon of milk. Trust your instincts. The consistency should be like thick playdough. If you live in a humid climate, you might need to chill the dough a bit longer. Humidity can affect how cookies spread. Pay attention to your oven. Every oven runs differently, so keep an eye on them around the 9-minute mark.
Cooking Tips & Techniques
Baking cookies can be tricky, but these tips will help you get it right every time. First, measure your flour correctly. Scooping flour directly from the bag packs it down, leading to dry cookies. Instead, fluff the flour with a spoon and then scoop it into the measuring cup, leveling it off with a knife. This simple habit makes a huge difference.
Room temperature ingredients are key. Cold butter and cream cheese won’t blend smoothly, leaving lumps in your dough. Take them out of the fridge at least an hour before you start. If you forget, you can microwave the butter in 5-second bursts until it’s soft but not melted. For the cream cheese, just let it sit on the counter a bit longer.
Don’t overbake the cookies. This is the most common mistake. They should look soft in the center when you take them out. They will firm up as they cool. If you bake them until they look fully set, they will be hard and crunchy, not soft and chewy. Pull them out when the edges are just starting to turn golden.
If you want extra Oreo flavor, add a tablespoon of cocoa powder to the dry ingredients. It deepens the chocolate taste without making the cookies cakey. Also, consider using a mix of Oreos and chocolate sandwich cookies for a fun twist. The key is to keep the dough chilled. Warm dough spreads too fast in the oven, resulting in flat, greasy cookies.
Another tip is to use a light-colored baking sheet. Dark pans absorb more heat and can burn the bottoms of the cookies. If you only have dark pans, lower the oven temperature by 25°F and check the cookies a minute earlier. Consistency is everything in baking. Stick to the recipe and techniques, and you’ll get perfect cookies every time.
Variations & Adaptations
One of the best things about this recipe is how adaptable it is. You can tweak it to fit your tastes or dietary needs. Here are a few ideas:
- Dark Chocolate Twist: Swap the white chocolate chips for dark chocolate chips. This adds a bitter contrast to the sweet Oreos and cream cheese. It’s a more sophisticated flavor profile for adults.
- Gluten-Free Option: Use a 1:1 gluten-free flour blend. Make sure it contains xanthan gum, or add ½ teaspoon if it doesn’t. The texture will be slightly more tender, but still delicious.
- Strawberry Cheesecake: Replace the Oreos with crushed strawberry shortcake cookies or add freeze-dried strawberry powder to the dough. This creates a fun, fruity twist on the classic flavor.
- Nutty Variation: Add ½ cup of chopped pecans or walnuts to the dough. The nuts add crunch and a rich, earthy flavor that pairs well with the cream cheese.
- Vegan Version: Use vegan butter and cream cheese, and vegan Oreos (check labels, as some contain honey). Use a flax egg instead of regular eggs. It works surprisingly well for this type of cookie.
I tried the dark chocolate version last week, and it was a hit. The bitterness of the chocolate cut through the sweetness perfectly. It felt more like a dessert bar than a cookie. For the gluten-free version, I used a blend with rice flour and tapioca starch. It held together well and didn’t crumble. Always test small batches when making substitutions to see how the dough behaves. These variations allow you to keep the recipe fresh and exciting.
Serving & Storage Suggestions
These cookies are best served at room temperature. They have the perfect soft texture when they aren’t cold from the fridge. I like to pair them with a cold glass of milk or a hot cup of coffee. The contrast in temperature and flavor is amazing. They also go well with a scoop of vanilla ice cream if you want to make them into a dessert plate.
For storage, keep the cookies in an airtight container at room temperature for up to 5 days. Place a piece of bread in the container with the cookies. The bread releases moisture, which keeps the cookies soft. This is a classic baker’s trick that really works. If you want to freeze them, bake them first and let them cool completely. Then, store them in a freezer-safe bag or container for up to 3 months.
To reheat, microwave a cookie for 10-15 seconds. It will be warm and gooey, almost like a brownie. You can also freeze the dough balls. Scoop them onto a tray, freeze them solid, and then transfer them to a bag. Bake them straight from the freezer, adding 1-2 minutes to the baking time. This is great for having fresh cookies on demand. The flavors actually develop and meld together over the first couple of days, so they might taste even better on day two.
Nutritional Information & Benefits
While these are definitely a treat, they are made with nutrient-dense ingredients that offer more than just sugar. The cream cheese adds protein and calcium, which helps balance the meal slightly. The butter provides fat, which helps you feel satisfied and full. Unlike refined snacks that leave you hungry, these cookies are substantial.
Each cookie contains approximately 250-300 calories, depending on size. They are high in carbohydrates and fat, with a moderate amount of protein. If you are watching your sugar intake, consider using sugar-free Oreos or reducing the sugar in the recipe by ¼ cup. The white chocolate adds extra sugar, so you can omit it or use dark chocolate chips to lower the glycemic impact.
These cookies are not suitable for those with gluten or dairy allergies unless you use the substitutions mentioned earlier. They are also high in calories, so portion control is key. Enjoy them as a special treat rather than a daily snack. From a wellness perspective, they satisfy the craving for sweets without leaving you feeling deprived. They are a guilt-free indulgence when enjoyed in moderation. The combination of fat and sugar triggers the brain’s reward center, making them truly satisfying.
Conclusion
These creamy Oreo cookies and cream cookies are a game-changer. They are soft, chewy, and packed with flavor. I hope you try this recipe and enjoy it as much as I do. It’s a simple recipe that delivers big results. Don’t be afraid to experiment with the variations. Add nuts, swap chocolates, or try different cookie flavors. Make it your own.
I love this recipe because it brings people together. There is nothing like sharing a plate of warm cookies with friends or family. It creates memories and brings joy. So, grab your apron and get baking. You won’t regret it. If you make this recipe, please leave a comment below. I’d love to hear how they turned out for you. Share your photos on social media and tag me. Let’s see your beautiful creations!
Happy baking! Remember, the best part of cooking is the love you put into it. Enjoy every bite.
Frequently Asked Questions
Why are my cookies spreading too much?
This usually happens if the butter is too warm or if the dough wasn’t chilled enough. Make sure your butter is softened, not melted. Also, chill the dough for at least 30 minutes before baking. If your kitchen is very warm, chill the dough longer.
Can I use salted butter instead of unsalted?
Yes, you can. Just reduce the added salt in the recipe by half. Salted butter varies in salt content, so taste the dough if you can (don’t eat raw eggs) to adjust.
How do I store the dough for later?
You can scoop the dough into balls and freeze them on a baking sheet. Once frozen, transfer them to a freezer bag. They will keep for up to 3 months. Bake them straight from the freezer.
Can I add other mix-ins?
Absolutely! Chopped nuts, M&Ms, or even peanut butter chips work well. Just make sure not to overload the dough, or the cookies might fall apart.
Why do my cookies taste bland?
Make sure you are using enough salt. Salt enhances flavor. Also, ensure your vanilla extract is pure, not imitation. And don’t skip the cream cheese; it adds a tangy depth that balances the sweetness.
Pin This Recipe!


Creamy Oreo Cookies and Cream Cookies
- Total Time: 45 minutes
- Yield: Approximately 24 cookies 1x
Description
Soft, chewy cookies made with cream cheese, crushed Oreos, and white chocolate chips for a rich, bakery-style texture that stays moist for days.
Ingredients
- 1 cup (2 sticks) unsalted butter, softened to room temperature
- 8 ounces (225g) full-fat cream cheese, softened
- 1 cup (200g) granulated sugar
- 1 cup (220g) light brown sugar, packed
- 2 large eggs, room temperature
- 2 teaspoons pure vanilla extract
- 2 ½ cups (315g) all-purpose flour
- 1 teaspoon baking soda
- ½ teaspoon salt
- 15 to 20 Oreo cookies, crushed
- 1 cup (170g) white chocolate chips
Instructions
- In a medium bowl, whisk together the all-purpose flour, baking soda, and salt. Set aside.
- In a large bowl, beat the softened unsalted butter and cream cheese together on medium-high speed for 3-4 minutes until smooth and creamy. Scrape down the sides.
- Add the granulated sugar and packed brown sugar to the butter mixture. Beat on medium-high speed for another 3-4 minutes until light and fluffy.
- Add the eggs one at a time, beating well after each addition. Add the vanilla extract and mix until just combined.
- Gradually add the flour mixture to the wet ingredients on low speed until just combined. Do not overmix.
- Gently fold in the crushed Oreos and white chocolate chips using a spatula. Reserve 1 tablespoon of fine Oreo crumbs for topping.
- Scoop the dough onto a baking sheet lined with parchment paper. Refrigerate the entire sheet for at least 30 minutes.
- Preheat oven to 350°F (175°C). Sprinkle reserved Oreo crumbs on top of dough balls.
- Bake for 10-12 minutes until edges are set and slightly golden, but centers look soft.
- Let cookies cool on the baking sheet for 5 minutes, then transfer to a wire rack to cool completely.
Notes
Ensure butter and cream cheese are softened but not melted. Chill dough for at least 30 minutes to prevent spreading. Do not overbake; cookies should look soft in the center. Store with a piece of bread to maintain softness.
- Prep Time: 15 minutes
- Cook Time: 10-12 minutes
- Category: Dessert
- Cuisine: American
Nutrition
- Serving Size: 1 cookie
- Calories: 275
- Sugar: 24
- Sodium: 180
- Fat: 14
- Saturated Fat: 8
- Carbohydrates: 35
- Fiber: 1
- Protein: 3
Keywords: Oreo cookies, cream cheese cookies, soft cookies, white chocolate chip cookies, dessert, baking, easy cookies