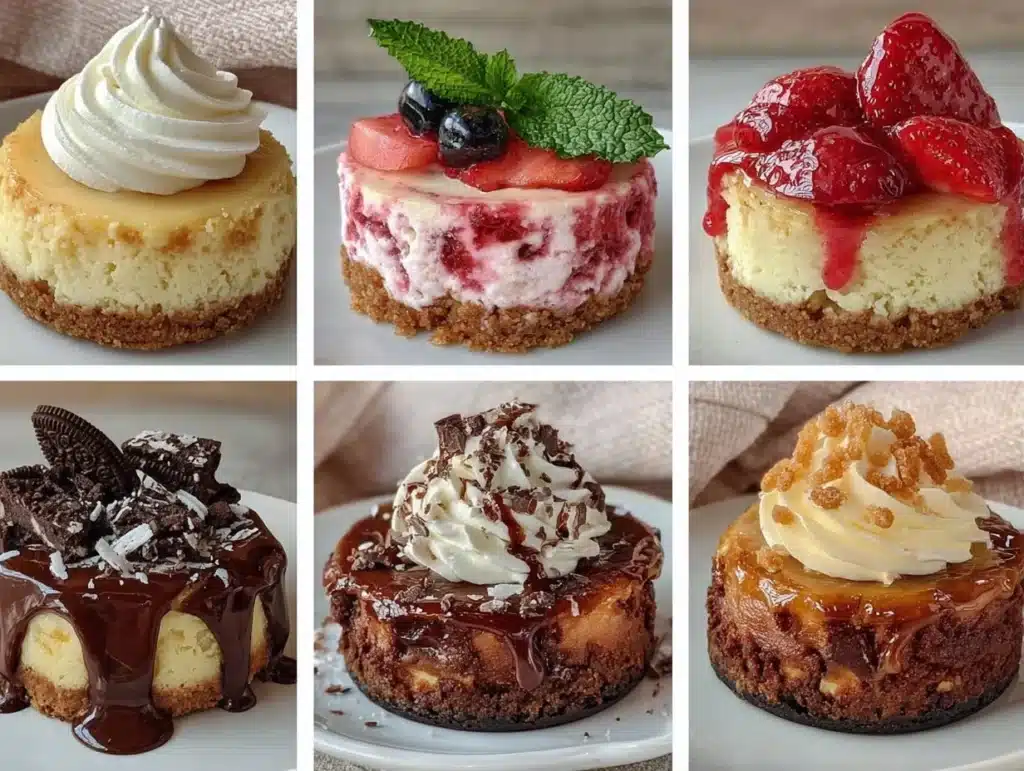
Let’s be honest for a second. There is something genuinely magical about a bite-sized dessert that doesn’t leave you feeling like you need a nap immediately after eating it. I remember the first time I made these classic mini cheesecakes. It was a rainy Tuesday, and I was trying to avoid making a massive, nine-inch cake that would sit in my fridge for a week, staring at me judgmentally. I wanted something cute, manageable, and totally indulgent without the guilt trip.
So, I grabbed a muffin tin and started experimenting. What came out of the oven wasn’t just good; it was incredible. The crust crumbled perfectly, the filling was impossibly creamy, and the berry topping added just the right amount of tartness to cut through the richness. Honestly, I’ve made them over a dozen times since then. They’ve become my go-to for dinner parties, potlucks, and even just treating myself on a Friday night. You know how some recipes feel like work? These don’t. They feel like a hug in dessert form.
What I love most about these classic mini cheesecakes is their versatility. You can top them with anything from fresh strawberries to salted caramel. They are perfect for impressing guests without the stress of slicing a giant cake. Plus, let’s face it, people love little things. It’s scientifically proven that smaller portions feel more luxurious. I’ve tested this recipe with different types of cream cheese and sugars, and I’ve found the sweet spot for texture and flavor. These aren’t just another cheesecake recipe; they are the best version I’ve found. They are creamy, tangy, and utterly addictive. If you’ve ever wanted to try your hand at cheesecake but felt intimidated by the water bath or the cracking issues, this is your answer. No cracks, no fuss, just pure deliciousness in every bite.
Why You’ll Love This Recipe
After testing this recipe countless times, I can confidently say that these classic mini cheesecakes are the ultimate crowd-pleaser. They strike that perfect balance between a rich, indulgent dessert and a manageable treat. Here is why they keep coming back to my kitchen:
- Quick & Easy: The entire process, from prep to bake, takes about 30 minutes of active time. The rest is just chilling. This makes them perfect for busy weeknights or when you need a dessert in a pinch.
- Simple Ingredients: You likely have everything you need right now. Cream cheese, sugar, eggs, vanilla, and graham crackers. No fancy grocery trips or obscure ingredients required.
- Perfect for Entertaining: Because they are individual portions, they are incredibly easy to serve. Just pull them out of the fridge and arrange them on a platter. They look elegant and professional with minimal effort.
- Crowd-Pleaser: Kids love the bite-sized format, and adults love the rich texture. I’ve served these at bridal showers, birthdays, and casual get-togethers, and they always disappear first.
- Unbelievably Delicious: The texture is what sets these apart. By using a muffin tin instead of a springform pan, the ratio of crust to filling is perfect in every single bite. It’s comfort food reimagined—richer, creamier, and easier to eat.
What makes this recipe different from the rest is the attention to detail in the mixing process. Many people rush the cream cheese, leading to lumpy cheesecakes. I’ve learned through experience that beating the cream cheese until it is completely smooth is non-negotiable. Also, the addition of a little sour cream or heavy cream ensures that silky, professional-quality texture. It’s not just a recipe; it’s a technique that guarantees success. These classic mini cheesecakes are the kind of dessert that makes you close your eyes after the first bite. They are soul-soothing and incredibly satisfying. Whether you are a novice baker or a seasoned pro, these will become a staple in your rotation.
What Ingredients You Will Need
This recipe relies on high-quality, simple ingredients to deliver bold flavor and that signature creamy texture. The key is to use room temperature ingredients so everything blends smoothly without overmixing. Here is what you need to gather:
- Graham Cracker Crumbs (1 ½ cups): You can use store-bought crumbs or crush your own whole graham crackers. For the best flavor, look for a brand that uses real cane sugar.
- Unsalted Butter, Melted (5 tablespoons): This binds the crust together. Use high-quality butter for a richer taste.
- Granulated Sugar (¼ cup): Just a touch in the crust for a hint of sweetness and caramelization.
- Full-Fat Cream Cheese, Softened (16 oz / 450g): This is the star of the show. Do not use low-fat cream cheese; it will make the texture grainy. Brands like Philadelphia are reliable for consistency.
- Granulated Sugar (1 cup / 200g): For the filling, you need enough sugar to balance the tang of the cream cheese.
- Sour Cream (½ cup / 120g): This adds moisture and a slight tang that keeps the cheesecake from being too heavy. It also helps prevent cracking.
- Vanilla Extract (1 teaspoon): Use pure vanilla extract, not imitation. It adds a warm, aromatic depth.
- Eggs, Large (3 large): Room temperature eggs incorporate better into the batter. Be careful not to overbeat them, or you’ll add too much air.
- Heavy Cream (2 tablespoons): Optional, but it makes the filling even silkier. You can substitute with milk if needed, but heavy cream is best.
- Fresh Berries (1 cup): Strawberries, raspberries, or blueberries work beautifully. Fresh is best for topping, but frozen works in a compote.
- Honey or Simple Syrup (for drizzling): A little sweetness to tie the berries to the cheesecake.
For the crust, I recommend using a food processor to get fine, even crumbs. If you don’t have one, put the crackers in a ziplock bag and crush them with a rolling pin. For the filling, make sure your cream cheese is truly soft. If it’s cold, microwave it in 10-second bursts until it yields to gentle pressure. This step is crucial for a lump-free batter. If you are looking for a dairy-free option, you can use a vegan cream cheese alternative, though the texture will be slightly different. For a gluten-free crust, swap the graham crackers for gluten-free digestive biscuits or almond flour.
Equipment Needed
You don’t need much fancy gear to make these classic mini cheesecakes, which is part of their charm. Here is what you will need:
- 12-Cup Muffin Tin: A standard metal muffin tin works best. Dark metal tins may brown the crust faster, so keep an eye on them.
- Muffin Liners or Cupcake Cases: Paper liners make cleanup a breeze and help release the cheesecakes easily. Grease them lightly if you want extra insurance.
- Mixer: A hand mixer or stand mixer with a paddle attachment is ideal. You need to beat the cream cheese until it is perfectly smooth.
- Measuring Cups and Spoons: Accurate measurements are key in baking. Use the scoop-and-level method for flour and crumbs.
- Spatula: A silicone spatula is great for scraping down the sides of the bowl to ensure even mixing.
- Small Saucepan: If you decide to make a berry compote topping, you’ll need a small pan to simmer the fruit and sugar.
If you don’t have a muffin tin, you can use a ramekin or even large ice cube trays for bite-sized versions, but the baking time will vary. I’ve found that metal tins conduct heat better than silicone ones, leading to a crisper crust. If you use silicone, you might need to bake them a minute or two longer. Also, keep your mixer clean between batches if you are making multiple tins. A quick wipe-down ensures no old batter gets into your fresh mix. These tools are likely already in your kitchen, making this a very accessible recipe.
How to Make Classic Mini Cheesecakes
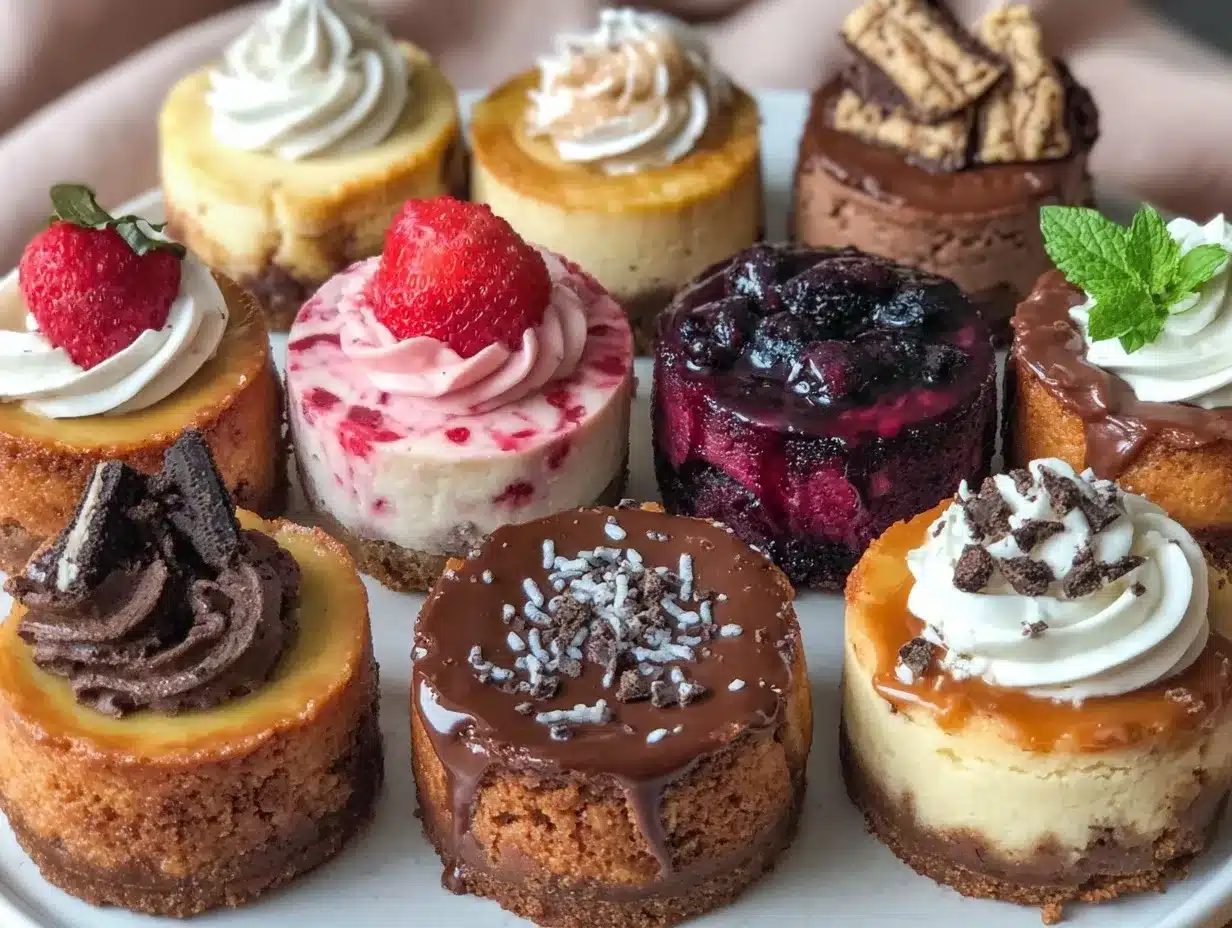
Making these classic mini cheesecakes is straightforward, but taking your time with each step ensures the best result. Here is how to do it:
- Preheat and Prep (5 minutes): Preheat your oven to 325°F (165°C). Line a 12-cup muffin tin with paper liners. If you don’t have liners, lightly grease the cups with butter or cooking spray. This step is crucial for easy removal later.
- Make the Crust (5 minutes): In a small bowl, combine the graham cracker crumbs, melted butter, and ¼ cup of sugar. Mix until it resembles wet sand. Press about 1 tablespoon of this mixture into the bottom of each muffin cup. Use the back of a measuring spoon to pack it down firmly. This creates a solid base that won’t crumble when you eat it.
- Beat the Cream Cheese (3 minutes): In a large bowl, beat the softened cream cheese on medium speed until it is completely smooth and creamy. This should take about 2-3 minutes. Scrape down the sides of the bowl with a spatula to ensure there are no lumps. This is the most important step for texture.
- Add Sugar and Flavor (2 minutes): Add the 1 cup of sugar, sour cream, and vanilla extract to the cream cheese. Mix on low speed until just combined. Do not overmix at this stage, or you’ll incorporate too much air, which can cause cracking.
- Incorporate the Eggs (2 minutes): Add the eggs one at a time, mixing on low speed just until the yellow disappears. Stop mixing as soon as the eggs are blended. Overmixing eggs leads to a dense or cracked cheesecake.
- Fill the Cups (2 minutes): Divide the batter evenly among the 12 muffin cups. Use a spoon or a small ice cream scoop for even distribution. Each cup should be filled about ¾ of the way up. Smooth the tops with a spatula if needed.
- Bake (20-25 minutes): Place the tin in the center of the oven. Bake for 20-25 minutes. The edges should be set, but the centers should still have a slight jiggle when you gently shake the pan. They will continue to set as they cool. Do not overbake, or they will become dry.
- Cool and Chill (4 hours): Let the cheesecakes cool in the pan for 10 minutes. Then, transfer them to a wire rack to cool completely to room temperature. Once cooled, cover the tin with plastic wrap and refrigerate for at least 4 hours, or ideally overnight. This chilling time is essential for the flavors to meld and the texture to firm up.
- Top and Serve: Before serving, top with fresh berries, a drizzle of honey, or your favorite topping. Enjoy!
If you notice cracks forming on top, don’t panic. A few cracks are normal and can be hidden with topping. If you want a perfectly smooth top, you can place a bowl of hot water in the oven while they bake to create steam. However, for mini cheesecakes, this is usually unnecessary. The key is gentle baking and gradual cooling.
How do I prevent cracks in mini cheesecakes?
Cracks usually happen due to overmixing or overbaking. Beat the ingredients only until combined, and bake just until the edges are set but the centers jiggle slightly. Cool them gradually in the turned-off oven with the door cracked open for extra insurance.
Can I make these ahead of time?
Yes! These classic mini cheesecakes actually taste better the next day. You can make them up to 3 days in advance. Store them in an airtight container in the refrigerator. They also freeze well for up to 2 months. Thaw them in the fridge overnight before serving.
What if I don’t have a muffin tin?
You can use ramekins, but you will need to adjust the baking time. Ramekins take longer to bake, usually 30-40 minutes. Alternatively, you can press the crust and batter into a standard springform pan and bake it as a regular cheesecake, then slice it into bite-sized pieces.
Can I use low-fat cream cheese?
I don’t recommend it. Low-fat cream cheese has a higher water content and can result in a grainy, less creamy texture. Full-fat cream cheese is worth the extra calories for the superior taste and mouthfeel.
How do I store leftovers?
Store them in an airtight container in the refrigerator for up to 5 days. If you add fresh fruit topping, add it just before serving to prevent sogginess. They are best enjoyed chilled.
Cooking Tips & Techniques
Having baked these classic mini cheesecakes dozens of times, I’ve picked up a few tricks that make a huge difference. First, always bring your ingredients to room temperature. Cold cream cheese and eggs will not blend smoothly, leading to a lumpy batter. If you forget to take them out, microwave the cream cheese in 10-second bursts and let the eggs sit in warm water for 5 minutes.
Another tip is to avoid overmixing. Once you add the eggs, mix on the lowest speed possible. You want to incorporate them, not aerate the batter. Too much air can cause the cheesecakes to rise and then collapse, creating cracks. I once overmixed a batch and ended up with a dense, heavy texture. Since then, I’ve been very gentle with the mixer.
Also, check your oven temperature. Ovens can run hot or cold. Use an oven thermometer to verify the temperature. If your oven runs hot, you might need to lower the baking temperature by 25°F. Consistent heat is key for even baking.
When pressing the crust, make sure to go up the sides of the liner slightly. This creates a “cup” that holds the filling better and prevents the crust from sliding out. I’ve learned this the hard way after eating a mouthful of just crust. A little extra effort here pays off in presentation and eating experience.
Finally, patience is your best friend. Don’t skip the chilling time. The cheesecake needs time to set properly. If you try to eat them warm, they will be too soft and messy. Let them chill for at least 4 hours. Overnight is even better, as the flavors develop and deepen. Trust the process, and you’ll be rewarded with perfect, creamy bites every time.
Variations & Adaptations
One of the best things about these classic mini cheesecakes is how easy they are to customize. Here are a few variations I love:
- Chocolate Chip: Add ½ cup of mini chocolate chips to the batter. Fold them in gently after the eggs are mixed. This is a huge hit with kids.
- Lemon Zest: Add 1 tablespoon of fresh lemon zest to the batter. It adds a bright, citrusy flavor that pairs beautifully with the creamy filling.
- Cookie Butter: Swirl 2 tablespoons of Biscoff cookie butter into the batter before baking. It adds a warm, spiced flavor that is incredible.
- Gluten-Free: Use gluten-free graham crackers or almond flour for the crust. Ensure all other ingredients are certified gluten-free.
- Vegan: Use vegan cream cheese and coconut cream instead of sour cream. Use flax eggs instead of regular eggs. The texture will be slightly different but still delicious.
I’ve also tried making them with a gingersnap crust, which adds a nice spice. For a seasonal twist, try adding pumpkin puree and pumpkin pie spice for a fall version. The possibilities are endless. Feel free to experiment with different extracts, like almond or coconut, to change the flavor profile. These mini cheesecakes are a blank canvas for your creativity.
Serving & Storage Suggestions
These classic mini cheesecakes are best served chilled. They have a firm, creamy texture that is perfect for eating with your fingers or a small fork. For presentation, arrange them on a platter with fresh berries, mint leaves, or a drizzle of caramel sauce. They look elegant and are easy for guests to grab.
Pair them with a cup of coffee or tea for a relaxing afternoon treat. They also go well with a glass of dessert wine or a sparkling beverage. If you are serving them at a party, place them on tiered stands for a fancy look.
For storage, keep them in an airtight container in the refrigerator for up to 5 days. If you want to freeze them, place them in a single layer on a baking sheet and freeze until solid. Then, transfer them to a freezer bag. They will keep for up to 2 months. Thaw them in the refrigerator overnight before serving. Do not freeze topped with fresh fruit, as the texture will change.
Over time, the flavors of the cheesecake will meld and become more pronounced. The crust may soften slightly, but the filling remains creamy. If you notice the crust getting too soft, you can crisp it up in the oven for a minute before serving. These cheesecakes are versatile and forgiving, making them a great make-ahead dessert.
Nutritional Information & Benefits
While these classic mini cheesecakes are a treat, they are also relatively manageable in portion size. Each mini cheesecake contains approximately 250-300 calories, depending on the toppings. The cream cheese provides calcium and protein, while the graham cracker crust offers carbohydrates for energy. Using full-fat cream cheese ensures you get the satisfying fat content that keeps you full longer.
If you are watching your sugar intake, you can reduce the sugar in the filling by half or use a natural sweetener like stevia. For a healthier twist, use a crust made from nuts and dates instead of graham crackers. This adds fiber and healthy fats. However, the traditional recipe is balanced and delicious as is. Enjoy these as a special indulgence, and they fit perfectly into a varied diet. They are a better alternative to larger, heavier desserts because you can enjoy a few bites without overindulging.
Conclusion
These classic mini cheesecakes are more than just a dessert; they are a confidence booster for bakers. They are easy to make, impressive to serve, and absolutely delicious to eat. I hope you try this recipe and enjoy the process as much as I do. Feel free to experiment with different toppings and flavors to make them your own. Whether you stick to the classic berry topping or try something new like salted caramel, these mini cheesecakes are sure to become a favorite.
I’d love to hear how they turn out for you! Share your creations on social media or leave a comment below with your favorite variation. Thank you for trying this recipe, and happy baking! Remember, the best part of cooking is sharing it with others. So gather your friends and family, and enjoy these bite-sized delights together.
Frequently Asked Questions
Can I use a different type of crust?
Yes, you can use Oreo crumbs, digestive biscuits, or even a nut-based crust like almond or pecan. Just adjust the sugar in the crust accordingly, as some cookies are sweeter than others.
Why did my cheesecakes sink in the middle?
This usually happens if they are overbaked or if the oven temperature was too high. The center collapses as it cools. Make sure to bake them just until set and let them cool gradually in the turned-off oven.
How do I get a smooth top without cracks?
Avoid overmixing the batter, especially after adding eggs. Also, ensure your cream cheese is completely smooth before adding other ingredients. A water bath can help, but for mini cheesecakes, gentle baking is usually enough.
Can I make these in a mini muffin tin?
Yes, you can use a mini muffin tin for even smaller bites. Reduce the baking time to 10-15 minutes and check them early to avoid overbaking.
What is the best topping for these cheesecakes?
Classic strawberry or raspberry compote is a favorite. You can also use chocolate sauce, caramel, or fresh fruit. The tartness of berries pairs perfectly with the rich cream cheese.
Pin This Recipe!


Classic Mini Cheesecakes: 20-Min Easy Bite-Sized Dessert
- Total Time: 4 hours 40 minutes
- Yield: 12 servings 1x
Description
These classic mini cheesecakes are bite-sized, creamy, and tangy desserts that are easy to make in a muffin tin. They require simple ingredients and offer a perfect balance of rich texture and manageable portions, making them ideal for entertaining or a quick treat.
Ingredients
- 1 ½ cups Graham Cracker Crumbs
- 5 tablespoons Unsalted Butter, Melted
- ¼ cup Granulated Sugar (for crust)
- 16 oz (450g) Full-Fat Cream Cheese, Softened
- 1 cup (200g) Granulated Sugar (for filling)
- ½ cup (120g) Sour Cream
- 1 teaspoon Vanilla Extract
- 3 Large Eggs, Room Temperature
- 2 tablespoons Heavy Cream (optional)
- 1 cup Fresh Berries (for topping)
- Honey or Simple Syrup (for drizzling)
Instructions
- Preheat oven to 325°F (165°C). Line a 12-cup muffin tin with paper liners or grease lightly.
- In a small bowl, combine graham cracker crumbs, melted butter, and ¼ cup sugar. Mix until it resembles wet sand.
- Press about 1 tablespoon of the crust mixture into the bottom of each muffin cup, packing it down firmly.
- In a large bowl, beat the softened cream cheese on medium speed until completely smooth (2-3 minutes). Scrape down sides.
- Add 1 cup sugar, sour cream, and vanilla extract to the cream cheese. Mix on low speed until just combined.
- Add eggs one at a time, mixing on low speed just until the yellow disappears. Do not overmix.
- Divide the batter evenly among the 12 muffin cups, filling them about ¾ of the way up.
- Bake for 20-25 minutes. The edges should be set, but centers should still have a slight jiggle.
- Let cheesecakes cool in the pan for 10 minutes, then transfer to a wire rack to cool completely.
- Refrigerate for at least 4 hours or overnight until firm.
- Top with fresh berries and a drizzle of honey or simple syrup before serving.
Notes
Ensure all ingredients, especially cream cheese and eggs, are at room temperature for a smooth batter. Avoid overmixing after adding eggs to prevent cracks. For best results, chill overnight. Can be stored in the refrigerator for up to 5 days or frozen for up to 2 months.
- Prep Time: 15 minutes
- Cook Time: 25 minutes
- Category: Dessert
- Cuisine: American
Nutrition
- Serving Size: 1 mini cheesecake
- Calories: 275
- Sugar: 16
- Sodium: 180
- Fat: 18
- Saturated Fat: 11
- Carbohydrates: 22
- Fiber: 0.5
- Protein: 5
Keywords: mini cheesecake, bite-sized dessert, easy cheesecake recipe, muffin tin cheesecake, cream cheese dessert, berry topping, make-ahead dessert