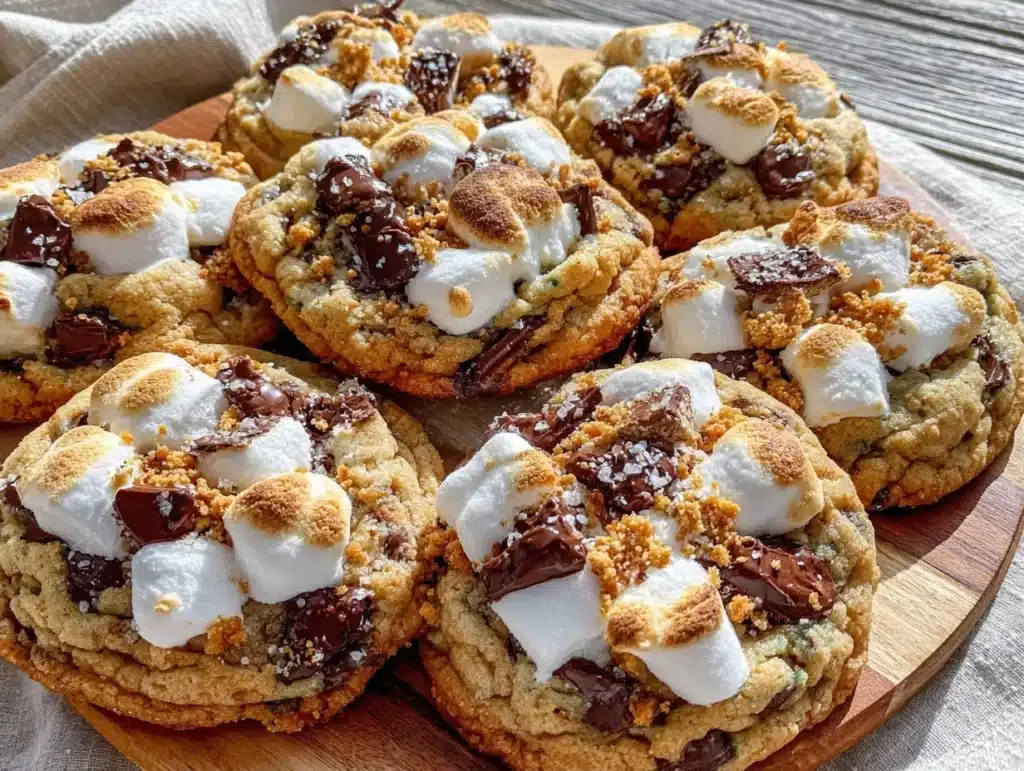
There is nothing quite like the smell of melting chocolate and toasted marshmallows drifting through a kitchen on a crisp autumn evening. It hits you right in the nostalgia center, doesn’t it? I remember camping with my family when I was about ten, sitting around a crackling fire while my dad tried (and mostly failed) to roast marshmallows without setting them on fire. We ate them burnt, sticky, and absolutely perfect. That specific combination of charred sugar, gooey center, and crisp graham cracker is the holy grail of summer memories. But let’s face it, not every night is perfect for camping. Sometimes you just want that campfire magic without the bugs, the cold, or the hassle of building a fire.
That’s exactly why I started experimenting with this Best S’mores Chocolate Chip Cookie recipe. I wanted to capture that quintessential campfire flavor in a handheld, bake-at-home format. Honestly, after testing this over a dozen times, I’m convinced it’s the ultimate comfort treat. It’s rich, it’s chewy, and it has that unexpected textural crunch from the graham crackers. Whether you are a dessert lover or just looking for a fun weekend baking project, this cookie delivers big flavor without feeling overly complicated. It’s the kind of treat that makes you close your eyes after the first bite and smile.
I’ve found that people often overlook how easy it is to recreate restaurant-quality desserts at home. With just a few pantry staples and some careful technique, you can have these cookies ready in under an hour. The beauty of this recipe is that it feels indulgent but actually has a bit of structure to it. The graham crackers add fiber and a nice snap, while the chocolate chips provide that familiar comfort. It’s a balance of textures and flavors that keeps you coming back for just one more. Plus, the aroma alone will have everyone in your house wondering what smells so amazing.
What I love most about this Best S’mores Chocolate Chip Cookie creation is its versatility. You can serve them warm with a glass of cold milk, or let them cool for a firmer bite. They travel well for office parties or school events, and they freeze beautifully for later cravings. I’ve shared these with neighbors, coworkers, and even my picky eater cousin, and they always get rave reviews. It’s one of those recipes that feels like a hug in cookie form. So, if you’re ready to bring a little bit of the campfire indoors, let’s get baking. You won’t regret the effort.
Why You’ll Love This Recipe
Let’s be real for a second. Not all cookie recipes are created equal. Some are dry, some are too sweet, and some just don’t deliver on their promises. This Best S’mores Chocolate Chip Cookie recipe is different because it balances three distinct flavor profiles into one cohesive bite. I’ve spent years perfecting dough hydration and baking times, and this recipe is the result of trial, error, and plenty of taste-testing. It’s not just another chocolate chip cookie; it’s a deconstructed s’more that actually works together harmoniously.
- Quick & Easy: You don’t need to make a special marshmallow fluff or toast marshmallows individually. The cookies come together in under 30 minutes of prep time, making them perfect for busy weeknights or last-minute dessert needs.
- Simple Ingredients: You likely already have everything you need in your pantry. Butter, sugars, eggs, flour, chocolate chips, and graham crackers are standard staples. No fancy grocery trips needed here.
- Perfect for Gifting: These cookies look impressive and taste gourmet, making them ideal for holiday gifts, teacher appreciation treats, or potluck contributions. They always get compliments.
- Crowd-Pleaser: Kids love the chocolate and marshmallow, while adults appreciate the subtle graham cracker crunch and less-sweet profile. It’s a win-win for all ages.
- Unbelievably Delicious: The texture is next-level. You get the chew of a brownie, the crisp edge of a sugar cookie, and the gooey melt of marshmallow. It’s comfort food reimagined.
What makes this recipe stand out from the rest is the technique used to incorporate the marshmallows. Many recipes fail because the marshmallows melt too much or sink to the bottom. I’ve found that using mini marshmallows and folding them in at the right temperature creates pockets of goo without turning your cookies into a mess. It’s a small detail that makes a huge difference. This isn’t just a recipe; it’s a tested method for consistent, bakery-quality results every single time.
What Ingredients You Will Need
This recipe relies on high-quality, wholesome ingredients to deliver bold flavor and satisfying texture. The key is balancing the sweetness of the marshmallows with the richness of the chocolate and the earthiness of the graham crackers. Here is what you need to gather before you start mixing.
- Unsalted Butter: 1 cup (2 sticks), softened to room temperature. Using unsalted butter allows you to control the salt level. (Adds richness and helps create a tender crumb)
- Granulated Sugar: 1 cup. This provides structure and helps create those crispy edges. (Use organic if preferred for cleaner taste)
- Light Brown Sugar: 1 cup, packed. This is crucial for the chewy texture and adds a hint of molasses flavor. (Dark brown sugar works too, but light is milder)
- Large Eggs: 2 large eggs, room temperature. Room temperature ingredients emulsify better, creating a smoother dough. (Don’t skip this step!)
- Vanilla Extract: 2 teaspoons. Use pure vanilla extract, not imitation, for that authentic flavor depth. (I recommend Nielsen-Massey for best aroma)
- All-Purpose Flour: 2 ½ cups. This is the base of the cookie. (Spoon and level method is best to avoid dense cookies)
- Baking Soda: 1 teaspoon. This helps the cookies spread and rise properly. (Ensure it’s fresh for maximum lift)
- Baking Powder: ½ teaspoon. Adds a little extra lift for a softer center. (Optional, but helps with texture)
- Salt: 1 teaspoon. Balances the sweetness and enhances the chocolate flavor. (Flaky sea salt on top is a nice touch)
- Mini Semi-Sweet Chocolate Chips: 1 cup. Mini chips distribute more evenly throughout the cookie than large chips. (Use high-quality chips like Ghirardelli for better melt)
- Mini Marshmallows: 1 ½ cups. These are the star of the show. (Regular marshmallows work but may be too large)
- Graham Crackers: 1 sleeve, crushed into small pieces. You want chunks, not dust. (Adds a nice crunch and authentic s’more flavor)
If you need to substitute, you can use gluten-free flour blend for a GF option, though the texture may vary slightly. For a dairy-free version, use plant-based butter and dairy-free chocolate chips. I’ve tried almond flour in place of some all-purpose flour, but it changes the chewiness too much, so I stick with standard flour for this specific texture.
Equipment Needed
You don’t need a lot of fancy gadgets to make these cookies, but having the right tools makes a huge difference in consistency. A large mixing bowl is essential for combining the wet and dry ingredients without making a mess. I prefer a glass or stainless steel bowl because they are easy to clean and don’t retain odors. An electric hand mixer or a stand mixer with a paddle attachment will save you arm fatigue when creaming the butter and sugars. If you don’t have one, a sturdy wooden spoon works, but it takes more elbow grease.
A silicone baking mat is my go-to for lining baking sheets. It promotes even baking and prevents sticking better than parchment paper in some cases. Plus, it’s reusable and eco-friendly. If you use parchment paper, make sure it’s heavy-duty to handle the heat. A cooling rack is necessary to stop the cooking process once the cookies come out of the oven. Letting them cool on the hot pan can cause them to become too crispy or break apart.
A measuring cup set and leveler ensure accuracy. Baking is chemistry, so precise measurements matter. For crushing the graham crackers, a rolling pin and a zip-top bag work well. You can also use a food processor, but be careful not to turn them into powder. You want distinct chunks for texture. A simple wire whisk is useful for combining the dry ingredients evenly before adding them to the wet mix. Keep your equipment clean and organized to make the process smooth and enjoyable.
Preparation Method
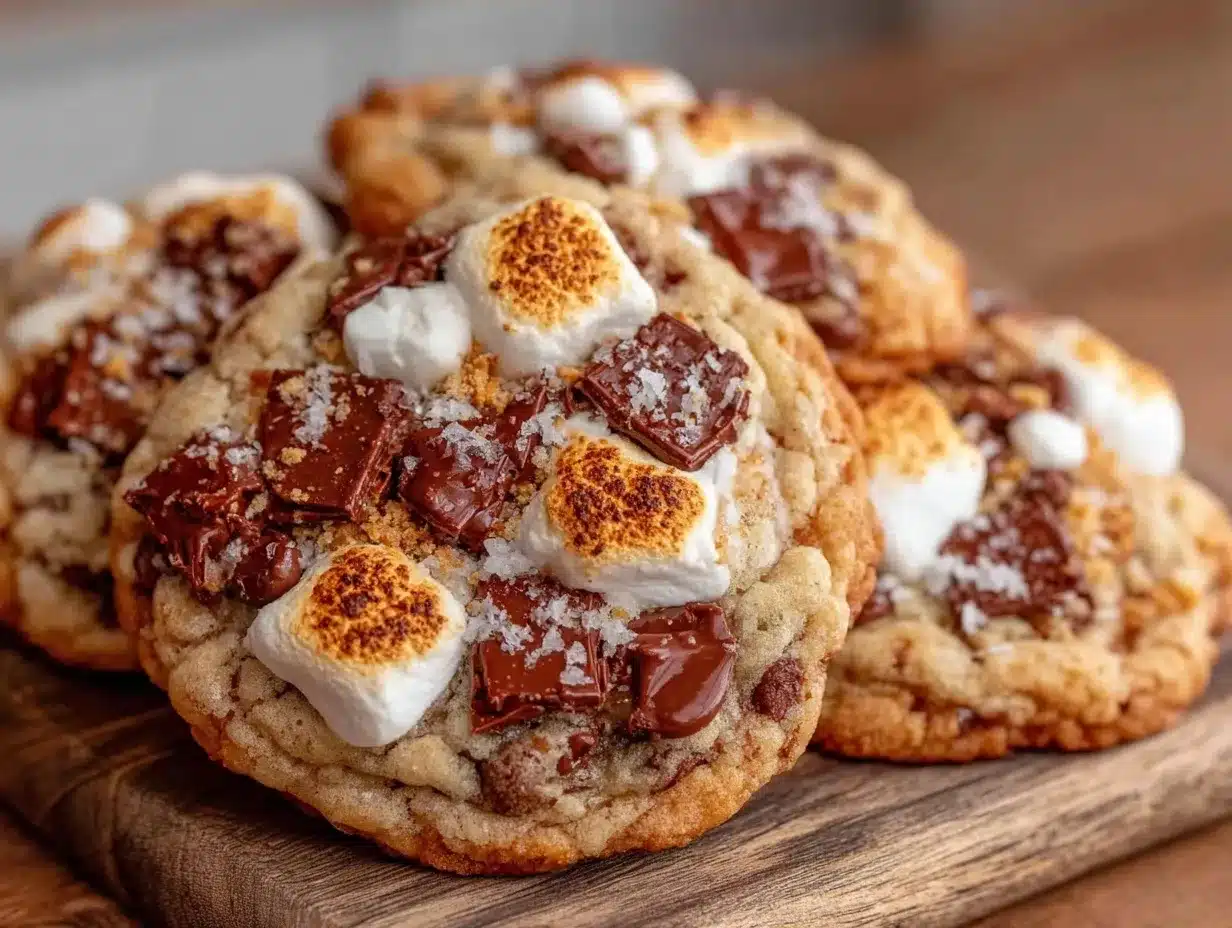
Let’s get into the nitty-gritty of making these cookies. Follow these steps carefully for the best results. The process is straightforward, but attention to detail ensures perfect cookies every time.
- Prep Your Oven and Pans: Preheat your oven to 350°F (175°C). Line two large baking sheets with silicone mats or parchment paper. This step takes about 5 minutes. Make sure the oven is fully preheated before baking for consistent results.
- Cream the Butter and Sugars: In a large mixing bowl, combine the softened unsalted butter, granulated sugar, and brown sugar. Using an electric mixer on medium speed, beat for 2-3 minutes until the mixture is light, fluffy, and pale in color. This step incorporates air, which helps the cookies rise. (Don’t rush this step; it’s crucial for texture)
- Add Wet Ingredients: Add the room temperature eggs one at a time, beating well after each addition. Pour in the vanilla extract and mix until combined. The mixture should look smooth and creamy. (If the butter is too warm, the dough may be greasy)
- Combine Dry Ingredients: In a separate medium bowl, whisk together the all-purpose flour, baking soda, baking powder, and salt. Ensure there are no lumps of flour or baking soda. This step takes about 1 minute. (Sifting is optional but helps for a finer texture)
- Mix Dry into Wet: Gradually add the dry ingredients to the wet mixture. Mix on low speed until just combined. Do not overmix, or the cookies will become tough. (Stop mixing as soon as you see no more streaks of flour)
- Fold in Mix-ins: Add the mini semi-sweet chocolate chips, mini marshmallows, and crushed graham crackers to the dough. Use a spatula to gently fold them in until evenly distributed. (Be gentle to keep the marshmallows intact)
- Scoop the Dough: Use a cookie scoop or tablespoon to portion the dough onto the prepared baking sheets. Space them about 2 inches apart to allow for spreading. (Chilling the dough for 30 minutes is optional but helps with shape)
- Bake: Bake for 10-12 minutes, or until the edges are golden brown but the centers still look slightly soft and underdone. (They will continue to cook on the hot pan)
- Cool: Remove the baking sheets from the oven and let the cookies cool on the pan for 5 minutes. Then, transfer them to a wire rack to cool completely. (This prevents them from breaking)
The total time from start to finish is about 45 minutes, including cooling. Trust the process, and you’ll have amazing cookies in no time.
Cooking Tips & Techniques
There are a few pro tips I’ve learned over the years that can save your cookies from disaster. First, always measure your flour correctly. Scooping directly from the bag packs it down, leading to dry, crumbly cookies. Instead, spoon the flour into the measuring cup and level it off with a knife. This simple change makes a huge difference in texture.
Another common mistake is overbaking. These cookies should look slightly soft in the center when you take them out. They continue to cook from the residual heat on the baking sheet. If you wait until they look fully set in the oven, they will be hard and crispy all the way through. Aim for a soft, chewy center with crisp edges.
Temperature control is key. Ensure your butter is softened but not melted. If it’s too warm, the cookies will spread too much. If it’s too cold, the dough won’t mix properly. Room temperature butter is the sweet spot. Also, make sure your eggs are at room temperature to help the dough emulsify smoothly.
When folding in the marshmallows, do it gently. You want to preserve their shape so they melt into gooey pockets rather than dissolving completely into the dough. If you overmix, you lose that texture contrast. Take your time with this step.
Finally, don’t skip the cooling step. Letting the cookies rest on the baking sheet for 5 minutes allows them to set. If you move them too soon, they might fall apart. Patience is a virtue in baking, especially with these gooey beauties.
Variations & Adaptations
While the classic version is fantastic, you can easily adapt this recipe to suit your tastes or dietary needs. Here are a few ideas I’ve tried and loved.
For a nut-free version, simply omit the graham crackers or use a gluten-free graham cracker alternative if you are sensitive to gluten. The texture will be slightly different, but the flavor remains delicious. If you want a richer chocolate experience, swap the semi-sweet chips for dark chocolate chunks. The bitterness of dark chocolate balances the sweetness of the marshmallows perfectly.
You can also add a layer of peanut butter to the center of each cookie before baking. Just press a small dollop of peanut butter into the dough ball before placing it on the sheet. This creates a salty-sweet contrast that is addictive. For a seasonal twist, add chopped pecans or walnuts to the dough for extra crunch and nutty flavor.
If you prefer a less sweet cookie, reduce the granulated sugar by ¼ cup. The marshmallows provide plenty of sweetness, so you might not even notice the difference. For a vegan version, use flax eggs (1 tbsp ground flaxseed mixed with 3 tbsp water per egg) and dairy-free chocolate chips and marshmallows. The texture may be slightly denser, but it’s still a treat worth trying.
I once tried adding a pinch of cayenne pepper to the dough for a spicy kick. It was an unexpected hit! The heat complements the chocolate and marshmallow in a subtle way. Feel free to experiment and make the recipe your own. The base dough is forgiving and adaptable.
Serving & Storage Suggestions
These cookies are best served slightly warm. If you have leftovers, reheat them in the microwave for 10-15 seconds to restore that gooey marshmallow texture. Serve them with a cold glass of milk or a cup of hot coffee. The contrast of temperatures is delightful. They also pair well with a scoop of vanilla ice cream for a decadent dessert.
For storage, keep the cookies in an airtight container at room temperature for up to 5 days. Place a slice of bread in the container to keep them soft. If you want to freeze them, bake the cookies and let them cool completely. Then, place them in a freezer-safe bag or container. They will last for up to 3 months. Thaw at room temperature before serving.
You can also freeze the dough balls before baking. Scoop the dough, place the balls on a baking sheet, and freeze until solid. Then transfer them to a bag. Bake directly from frozen, adding 1-2 minutes to the baking time. This is perfect for having homemade cookies ready to go anytime.
The flavors develop over time, so these cookies often taste even better on the second day as the marshmallows soften and the graham crackers meld with the dough. Enjoy them fresh out of the oven or saved for later. They are versatile and always a crowd-pleaser.
Nutritional Information & Benefits
While these are definitely a treat, they do offer some nutritional benefits. Graham crackers provide a source of carbohydrates and fiber, especially if you use whole grain versions. Chocolate chips contain antioxidants, particularly if you use dark chocolate. Marshmallows offer quick energy but are high in sugar.
Each cookie contains approximately 180-200 calories, depending on size. They are a good source of fat and carbohydrates. For a healthier twist, you can use dark chocolate chips and reduce the sugar slightly. The recipe is not gluten-free unless you use gluten-free flour and graham crackers. It is also not vegan unless you make the substitutions mentioned earlier.
I enjoy these as an occasional indulgence. They are a great way to satisfy a sweet tooth without feeling too deprived. Balance is key in nutrition, and these cookies fit well into a balanced diet when enjoyed in moderation. They are a fun, homemade alternative to store-bought desserts.
Conclusion
Making the Best S’mores Chocolate Chip Cookie is a rewarding experience that brings the magic of campfires into your home. The combination of chewy, crispy, and gooey textures is unbeatable. I hope this recipe becomes a staple in your baking rotation. Don’t be afraid to customize it to fit your preferences. Add nuts, change the chocolate, or adjust the sweetness.
I’d love to hear how your baking goes. Share your photos or variations in the comments below. Tag me on social media if you make them; I love seeing your creations. These cookies are perfect for sharing with friends and family, and they always bring a smile to people’s faces. So, grab your mixing bowl and get started. You won’t regret it.
Frequently Asked Questions
Can I use regular marshmallows instead of mini ones?
Yes, you can, but they may melt differently. Mini marshmallows distribute more evenly and create smaller gooey pockets. If you use regular marshmallows, cut them into smaller pieces first.
Why did my cookies spread too much?
This usually happens if the butter is too warm or if the dough wasn’t chilled. Ensure your butter is softened, not melted. Chilling the dough for 30 minutes can help firm it up before baking.
Can I freeze the cookie dough?
Absolutely! Scoop the dough into balls, freeze them on a sheet, then transfer to a bag. Bake from frozen, adding a minute or two to the baking time.
What kind of chocolate chips works best?
Semi-sweet chocolate chips are classic and balance the sweetness well. Dark chocolate chips add a richer, less sweet flavor. Milk chocolate chips will make the cookies sweeter.
How do I keep the cookies soft?
Store them in an airtight container with a slice of bread. This helps retain moisture. Also, avoid overbaking; take them out when they look slightly underdone in the center.
Pin This Recipe!


Best Smores Chocolate Chip Cookies: The Boost You Wont Even Taste
- Total Time: 45 minutes
- Yield: Approximately 24 cookies 1x
Description
These Best S’mores Chocolate Chip Cookies capture the quintessential campfire flavor in a handheld, bake-at-home format. Rich, chewy, and textured with graham crackers and mini marshmallows, they are a crowd-pleasing comfort treat ready in under an hour.
Ingredients
- 1 cup (2 sticks) unsalted butter, softened to room temperature
- 1 cup granulated sugar
- 1 cup light brown sugar, packed
- 2 large eggs, room temperature
- 2 teaspoons vanilla extract
- 2 ½ cups all-purpose flour
- 1 teaspoon baking soda
- ½ teaspoon baking powder
- 1 teaspoon salt
- 1 cup mini semi-sweet chocolate chips
- 1 ½ cups mini marshmallows
- 1 sleeve graham crackers, crushed into small pieces
Instructions
- Preheat your oven to 350°F (175°C). Line two large baking sheets with silicone mats or parchment paper.
- In a large mixing bowl, combine the softened unsalted butter, granulated sugar, and brown sugar. Using an electric mixer on medium speed, beat for 2-3 minutes until the mixture is light, fluffy, and pale in color.
- Add the room temperature eggs one at a time, beating well after each addition. Pour in the vanilla extract and mix until combined.
- In a separate medium bowl, whisk together the all-purpose flour, baking soda, baking powder, and salt.
- Gradually add the dry ingredients to the wet mixture. Mix on low speed until just combined. Do not overmix.
- Add the mini semi-sweet chocolate chips, mini marshmallows, and crushed graham crackers to the dough. Use a spatula to gently fold them in until evenly distributed.
- Use a cookie scoop or tablespoon to portion the dough onto the prepared baking sheets. Space them about 2 inches apart.
- Bake for 10-12 minutes, or until the edges are golden brown but the centers still look slightly soft and underdone.
- Remove the baking sheets from the oven and let the cookies cool on the pan for 5 minutes. Then, transfer them to a wire rack to cool completely.
Notes
Ensure butter is softened but not melted to prevent excessive spreading. Do not overmix the dough to avoid tough cookies. Mini marshmallows are preferred for even distribution. For softer cookies, store in an airtight container with a slice of bread. Cookies can be frozen for up to 3 months.
- Prep Time: 30 minutes
- Cook Time: 12 minutes
- Category: Dessert
- Cuisine: American
Nutrition
- Serving Size: 1 cookie
- Calories: 190
- Sugar: 18
- Sodium: 150
- Fat: 9
- Saturated Fat: 5
- Carbohydrates: 26
- Fiber: 1
- Protein: 2
Keywords: s'mores cookies, chocolate chip cookies, marshmallow cookies, graham cracker cookies, easy dessert, campfire cookies, homemade cookies, fall baking