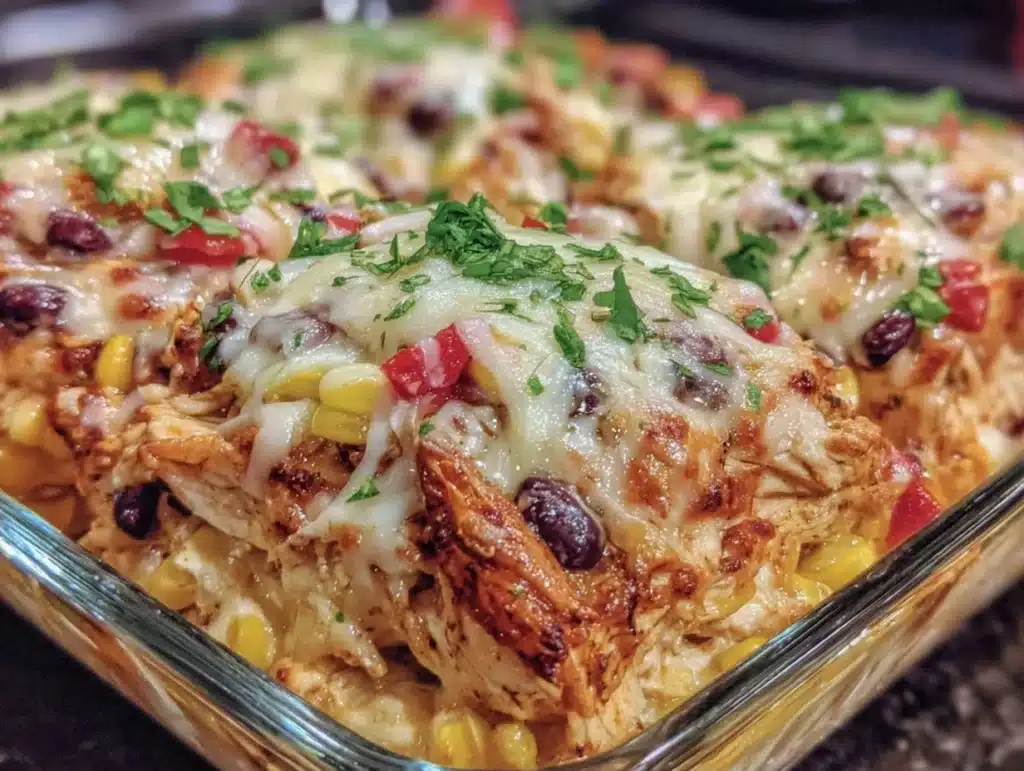
Let’s be honest for a second. There are nights when the last thing you want to do is chop onions, sauté peppers, and stand over a hot stove for forty-five minutes. You know the type of night. It’s Tuesday, you’re tired, and the idea of assembling individual burritos sounds like too much work. That is exactly why I fell in love with this easy chicken burrito casserole. It started as a desperate attempt to use up leftover rotisserie chicken and some lonely bags of rice in my pantry. I didn’t plan to make something this good, but it changed my meal prep game forever.
This dish isn’t just convenient; it’s genuinely comforting. Imagine pulling a hot, cheesy, savory dish from the oven on a busy weeknight. The smell of cumin and roasted tomatoes fills the kitchen, and suddenly, dinner feels like a treat rather than a chore. I first tested this recipe during a particularly chaotic month when I was working late and trying to stick to a budget. I needed something that tasted like a restaurant meal but cost pennies on the dollar. This casserole delivers on every single front.
What makes this recipe special is how it balances flavor with practicality. Most casseroles can get soggy or bland after a day in the fridge. But not this one. The layers hold up beautifully, making it the ultimate meal prep companion. Whether you are a busy parent, a college student, or just someone who appreciates a good shortcut, this chicken burrito casserole will win you over. It’s hearty, it’s flavorful, and it’s ridiculously easy to make. You’ll wonder why you ever struggled with individual burritos again.
Why You’ll Love This Recipe
I’ve tested this chicken burrito casserole at least a dozen times over the past two years. I’ve tweaked the spices, swapped the cheeses, and even tried different rice types. This version is the one that keeps coming back to the top of my list. It’s not just another Mexican-inspired dish; it’s a carefully balanced combination of textures and flavors that feels like a hug in a bowl. Here is why this recipe stands out from the crowd:
- Quick & Easy: You can have this dinner on the table in under an hour. It comes together in one pot, which means less cleanup. This is perfect for busy weeknights when you just want to eat and relax.
- Simple Ingredients: You likely already have most of these items in your kitchen. Chicken, rice, beans, cheese, and salsa. No fancy grocery trips needed. It’s pantry-friendly and budget-conscious.
- Perfect for Meal Prep: This is the star feature. The flavors actually get better after sitting in the fridge for a day or two. It reheats evenly and stays moist, making it ideal for lunch boxes or quick dinners.
- Crowd-Pleaser: Kids love the cheesy, familiar flavors. Adults appreciate the savory depth and the ease of preparation. It’s a dish that satisfies everyone at the table without any complaints.
- Unbelievably Delicious: The combo of tender chicken, fluffy rice, and gooey melted cheese is next-level comfort food. It hits all the right notes without being heavy or greasy.
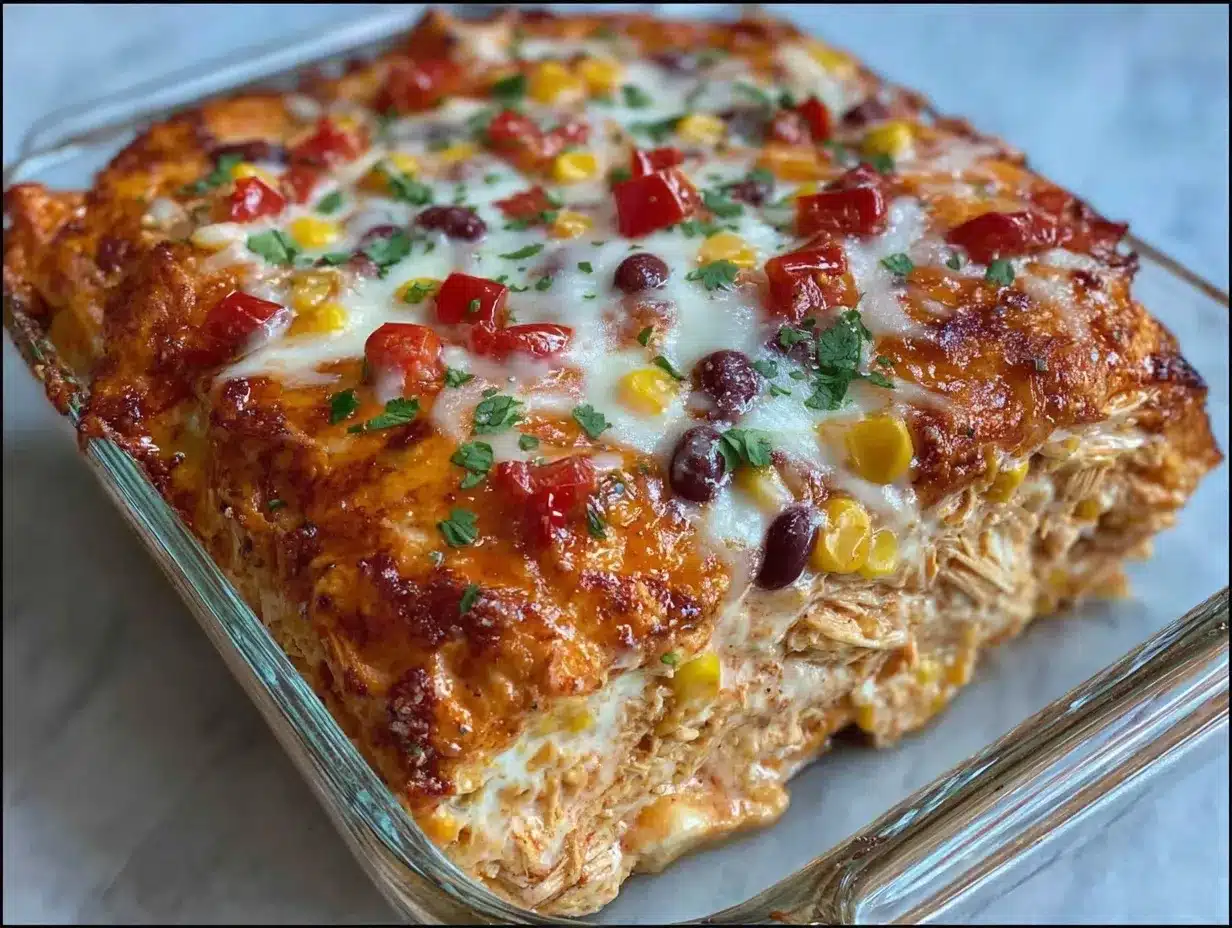
What really sets this apart is the texture. Unlike other casseroles that can turn mushy, this one maintains a distinct layer structure. The bottom gets slightly crispy while the top stays golden and bubbly. It’s that contrast that keeps you coming back. Plus, it’s the kind of dish that makes you feel like a hero in the kitchen, even if you did very little actual work. It’s comfort food reimagined for modern life—faster, easier, but with the same soul-soothing satisfaction.
What Ingredients You Will Need
This recipe relies on simple, wholesome ingredients to deliver bold flavor and satisfying texture without the fuss. The magic happens when these basic items come together in the oven. Most of these are pantry staples, which makes it easy to grab and go. If you don’t have everything on hand, most items are easy to swap out, but here is what I recommend for the best results.
For the Base
- Uncooked Long-Grain White Rice: About 1.5 cups. This absorbs the liquid perfectly without getting too sticky. Brown rice works too, but you will need more liquid and time.
- Chicken Breast or Thighs: 1.5 pounds, diced. I prefer thighs for extra juiciness, but breasts work fine if you don’t overcook them.
- Chicken Broth: 2 cups. Use low-sodium broth so you can control the salt level. It adds depth that water just can’t match.
- Black Beans: 1 can (15 oz), rinsed and drained. They add protein and fiber, making the meal more filling.
- Frozen Corn: 1 cup. No need to thaw. It adds a nice sweet crunch that balances the savory spices.
For the Flavor Profile
- Enchilada Sauce: 1 cup. I recommend using a store-bought sauce like Herdez or Old El Paso for consistency. It sets the authentic Mexican flavor tone.
- Taco Seasoning: 2 tablespoons. Homemade is great, but a good store-bought blend saves time. Look for one without excessive fillers.
- Onion and Bell Pepper: 1 medium onion and 1 bell pepper, diced. These provide the aromatic base that makes the dish smell amazing.
- Garlic: 3 cloves, minced. Don’t skip this. It brings the savory punch.
For the Topping
- Shredded Mexican Blend Cheese: 2 cups. A mix of cheddar, Monterey Jack, and queso quesadilla melts beautifully. I prefer pre-shredded because it contains anti-caking agents that help it melt evenly.
- Sour Cream: Optional, for serving. Adds a cool, creamy contrast to the hot casserole.
- Fresh Cilantro: A handful, chopped. Just for garnish. It brightens up the whole dish.
If you are watching your sodium, look for low-sodium beans and broth. For a dairy-free version, you can use a vegan cheese shreds, though the melt isn’t quite the same. In summer, I sometimes swap the frozen corn for fresh corn off the cob for a brighter flavor. The key is to keep it simple and let the ingredients shine.
Equipment Needed
You don’t need any fancy gadgets to make this chicken burrito casserole. A few basic tools are all you need. Start with a large skillet. I use a 12-inch non-stick skillet because it gives me enough room to cook the chicken and veggies without overcrowding. Overcrowding leads to steaming instead of browning, and we want that nice sear on the chicken.
Next, you’ll need a 9×13 inch baking dish. Glass or ceramic works best here because they distribute heat evenly. If you only have a metal pan, it will work, but keep an eye on it so the bottom doesn’t burn. A wooden spoon or silicone spatula is essential for stirring the mixture. I also recommend a measuring cup set for accuracy, especially for the rice and broth ratios.
If you are doing meal prep, consider using individual glass containers for storing portions. They are microwave-safe and easy to clean. Avoid plastic containers if you can, as they can sometimes retain odors from the spices. For maintenance, just wash your skillet immediately after use while the grease is still warm. It makes cleanup so much faster. If you are on a budget, a standard stainless steel skillet works just as well as a high-end non-stick. The technique matters more than the tool here.
Preparation Method
- Preheat and Prep: Start by preheating your oven to 375°F (190°C). This ensures the oven is hot when the casserole goes in. While it heats, gather all your ingredients. Have the rice measured, the chicken diced, and the veggies chopped. This is called mise en place, and it makes the cooking process smooth and stress-free. (Time: 5 minutes)
- Cook the Aromatics: Heat a large skillet over medium heat with a tablespoon of oil. Add the diced onion and bell pepper. Sauté them for about 3-4 minutes until they start to soften and become translucent. Add the minced garlic in the last minute so it doesn’t burn. The smell should be fragrant and sweet. (Time: 5 minutes)
- Brown the Chicken: Push the veggies to the side of the pan. Add the diced chicken to the empty space. Season it lightly with salt and pepper. Cook for 5-6 minutes, stirring occasionally, until the chicken is no longer pink in the center. You want it cooked through but still tender. (Time: 6 minutes)
- Add the Dry Ingredients: Pour in the uncooked rice. Stir it around with the chicken and veggies for about 1 minute. This toasts the rice slightly, which adds a nutty flavor. Then, add the rinsed black beans and frozen corn. Mix everything together evenly. (Time: 2 minutes)
- Combine Wet Ingredients: Pour in the chicken broth and the enchilada sauce. Stir well to combine. The mixture should look soupy at this stage. That is normal. The rice will absorb all that liquid as it bakes. Taste the liquid and add taco seasoning now. Adjust salt if needed, remembering that the cheese and sauce already have salt in them. (Time: 2 minutes)
- Assemble the Casserole: Pour the entire mixture from the skillet into your 9×13 inch baking dish. Spread it out evenly with a spatula. This ensures that every portion gets a bit of chicken, rice, and veggies. (Time: 1 minute)
- Add the Cheese: Sprinkle the shredded cheese evenly over the top. You want a generous layer, but don’t pack it down. The cheese will melt and create a delicious crust. (Time: 1 minute)
- Bake: Place the dish in the preheated oven. Bake for 20-25 minutes. You are looking for the cheese to be bubbly and golden brown, and the rice to be tender. If the cheese isn’t browned enough, you can broil it for the last 1-2 minutes, but watch it closely so it doesn’t burn. (Time: 25 minutes)
- Rest and Serve: Remove the casserole from the oven and let it rest for 5 minutes. This allows the rice to finish absorbing any excess liquid and the layers to set. It makes serving much cleaner. Garnish with fresh cilantro and serve with sour cream if desired. (Time: 5 minutes)
Cooking Tips & Techniques
I learned the hard way that rice ratios are everything. If you use too much liquid, you end up with mush. If you use too little, the rice stays hard. The 1.5 cups of rice to 2 cups of broth plus sauce ratio is the sweet spot. Also, do not skip the step of toasting the rice in the skillet. It adds a layer of flavor that you can’t get if you just dump it in raw. It’s a small step that makes a big difference.
Another common mistake is overcrowding the pan when browning the chicken. If you put too much chicken in at once, it steams instead of searing. Cook it in batches if your pan is small. This ensures you get those nice browned bits that add savory depth. I once tried to rush this step and ended up with pale, bland chicken. Don’t make my mistake.
When it comes to timing, multitasking is key. While the casserole bakes, you can chop the cilantro or set the table. Use that 5-minute rest time wisely. It also helps if you are meal prepping, as the casserole is easier to portion out after it has cooled slightly. For consistency, always use the same type of rice. Long-grain white rice is standard, but if you switch to jasmine, you might need slightly less liquid. Stick to what works for you.
If you find the casserole too dry after baking, you can stir in a splash of milk or extra broth before serving. Conversely, if it’s too wet, bake it for an extra 5 minutes uncovered. Trust your eyes and your nose. The aroma of melting cheese and toasted spices is a good indicator that it’s ready. Keep an eye on the edges; if they are browning too fast, cover them loosely with foil.
Variations & Adaptations
One of the best things about this chicken burrito casserole is how adaptable it is. You can easily tweak it to fit your dietary needs or taste preferences. Here are a few variations I love:
- Vegetarian Option: Simply swap the chicken for an extra cup of black beans or use a meatless crumble. You can also add diced zucchini or mushrooms for extra veggies. The flavor profile remains the same, but the texture changes slightly.
- Spicy Kick: If you like heat, add a diced jalapeño to the skillet with the onions. You can also use a spicy enchilada sauce or add a dash of cayenne pepper to the seasoning. This is great for those who enjoy a bold flavor.
- Gluten-Free: This recipe is naturally gluten-free as long as you check your taco seasoning and enchilada sauce labels. Most brands are GF, but always double-check to be safe. Serve with gluten-free tortilla chips on the side for extra crunch.
- Low-Carb Twist: Swap the white rice for cauliflower rice. You will need about 4 cups of riced cauliflower. Reduce the broth slightly, as cauliflower releases water. It’s a lighter option that still feels satisfying.
I once tried adding diced sweet potatoes to this recipe. I roasted them first, then mixed them in. It added a nice sweetness that paired well with the savory chicken. It was a hit with my kids, who usually shy away from veggies. Feel free to experiment with other ingredients like roasted poblano peppers or artichoke hearts. The base recipe is flexible enough to handle most additions.
Serving & Storage Suggestions
This chicken burrito casserole is best served hot and fresh from the oven. Garnish with fresh cilantro and a dollop of sour cream for a cool contrast. It pairs well with a simple green salad or some roasted Brussels sprouts. For beverages, a cold Mexican Coke or a light lager works nicely. It’s a hearty meal, so you don’t need much on the side.
For storage, let the casserole cool to room temperature before covering it. You can store it in the refrigerator for up to 4 days. For meal prep, divide it into individual containers while it’s still slightly warm. This prevents condensation from making it soggy. It reheats beautifully in the microwave. Just add a splash of water or broth to keep it moist, and heat for 2-3 minutes, stirring halfway through.
You can also freeze portions of this casserole. Wrap individual servings tightly in plastic wrap and then in aluminum foil. They will last for up to 3 months. Thaw them in the fridge overnight before reheating. The flavors actually develop and meld together over time, making it even better on day two. Just make sure to label your containers with the date so you know how fresh they are.
Nutritional Information & Benefits
This chicken burrito casserole is a balanced meal that provides good protein, complex carbohydrates, and fiber. Each serving contains approximately 450 calories, with 35g of protein from the chicken and beans. The rice provides energy, while the veggies add essential vitamins. It’s a filling dish that keeps you satisfied for hours.
The black beans are a great source of fiber, which aids digestion. Chicken breast is lean protein, perfect for muscle repair. If you use low-fat cheese and sour cream, you can reduce the saturated fat content. It’s a versatile dish that can fit into various dietary plans. Just be mindful of the sodium in the sauces and seasonings. You can always rinse the beans thoroughly to remove excess sodium.
From a wellness perspective, this meal is comforting without being overly heavy. It provides steady energy rather than a sugar crash. I often make this on Sundays for the week ahead because it helps me stay on track with my meal goals. It’s a practical choice for anyone looking to eat well without spending hours in the kitchen.
Conclusion
This easy chicken burrito casserole is more than just a quick dinner; it’s a solution for busy lives. It delivers big flavor with minimal effort, making it a staple in my household. Whether you are meal prepping for the week or just need a fast weeknight meal, this recipe has you covered. I hope you give it a try and see why it’s become my go-to comfort food.
Feel free to customize it with your favorite toppings or veggies. Cooking is all about making it your own. If you make this recipe, I’d love to hear how it turned out. Leave a comment below and let me know your favorite variation. Share your photos on social media and tag me. Happy cooking!
Frequently Asked Questions
Can I use leftover rice instead of uncooked rice?
Yes, you can use leftover rice. However, you will need to reduce the liquid in the recipe. Since the rice is already cooked, it doesn’t need to absorb as much broth. Use about half the amount of broth and sauce, and just heat it through for 10-15 minutes in the oven. This works well for quick lunches.
How do I make this casserole spicier?
To make it spicier, add diced jalapeños or serrano peppers when sautéing the onions. You can also use a hot enchilada sauce or add a teaspoon of cayenne pepper to the seasoning mix. For extra heat, sprinkle some red pepper flakes on top before baking.
Can I freeze the entire casserole?
Yes, you can freeze the entire casserole. Wrap it tightly in plastic wrap and then in foil. It will keep for up to 3 months. Thaw it in the fridge overnight before baking. You may need to add a few minutes to the baking time since it will be cold from the fridge.
What can I substitute for chicken?
You can substitute chicken with ground turkey, ground beef, or a vegetarian meatless crumble. Black beans or chickpeas are also great alternatives for a fully vegetarian option. Just adjust the cooking time slightly depending on the protein you choose.
Why is my casserole too dry?
If your casserole is too dry, it might be because the rice absorbed too much liquid. Next time, add an extra half cup of broth. You can also stir in a little milk or cream before serving to add moisture. Ensure you are using the correct rice-to-liquid ratio for your specific type of rice.
Pin This Recipe!
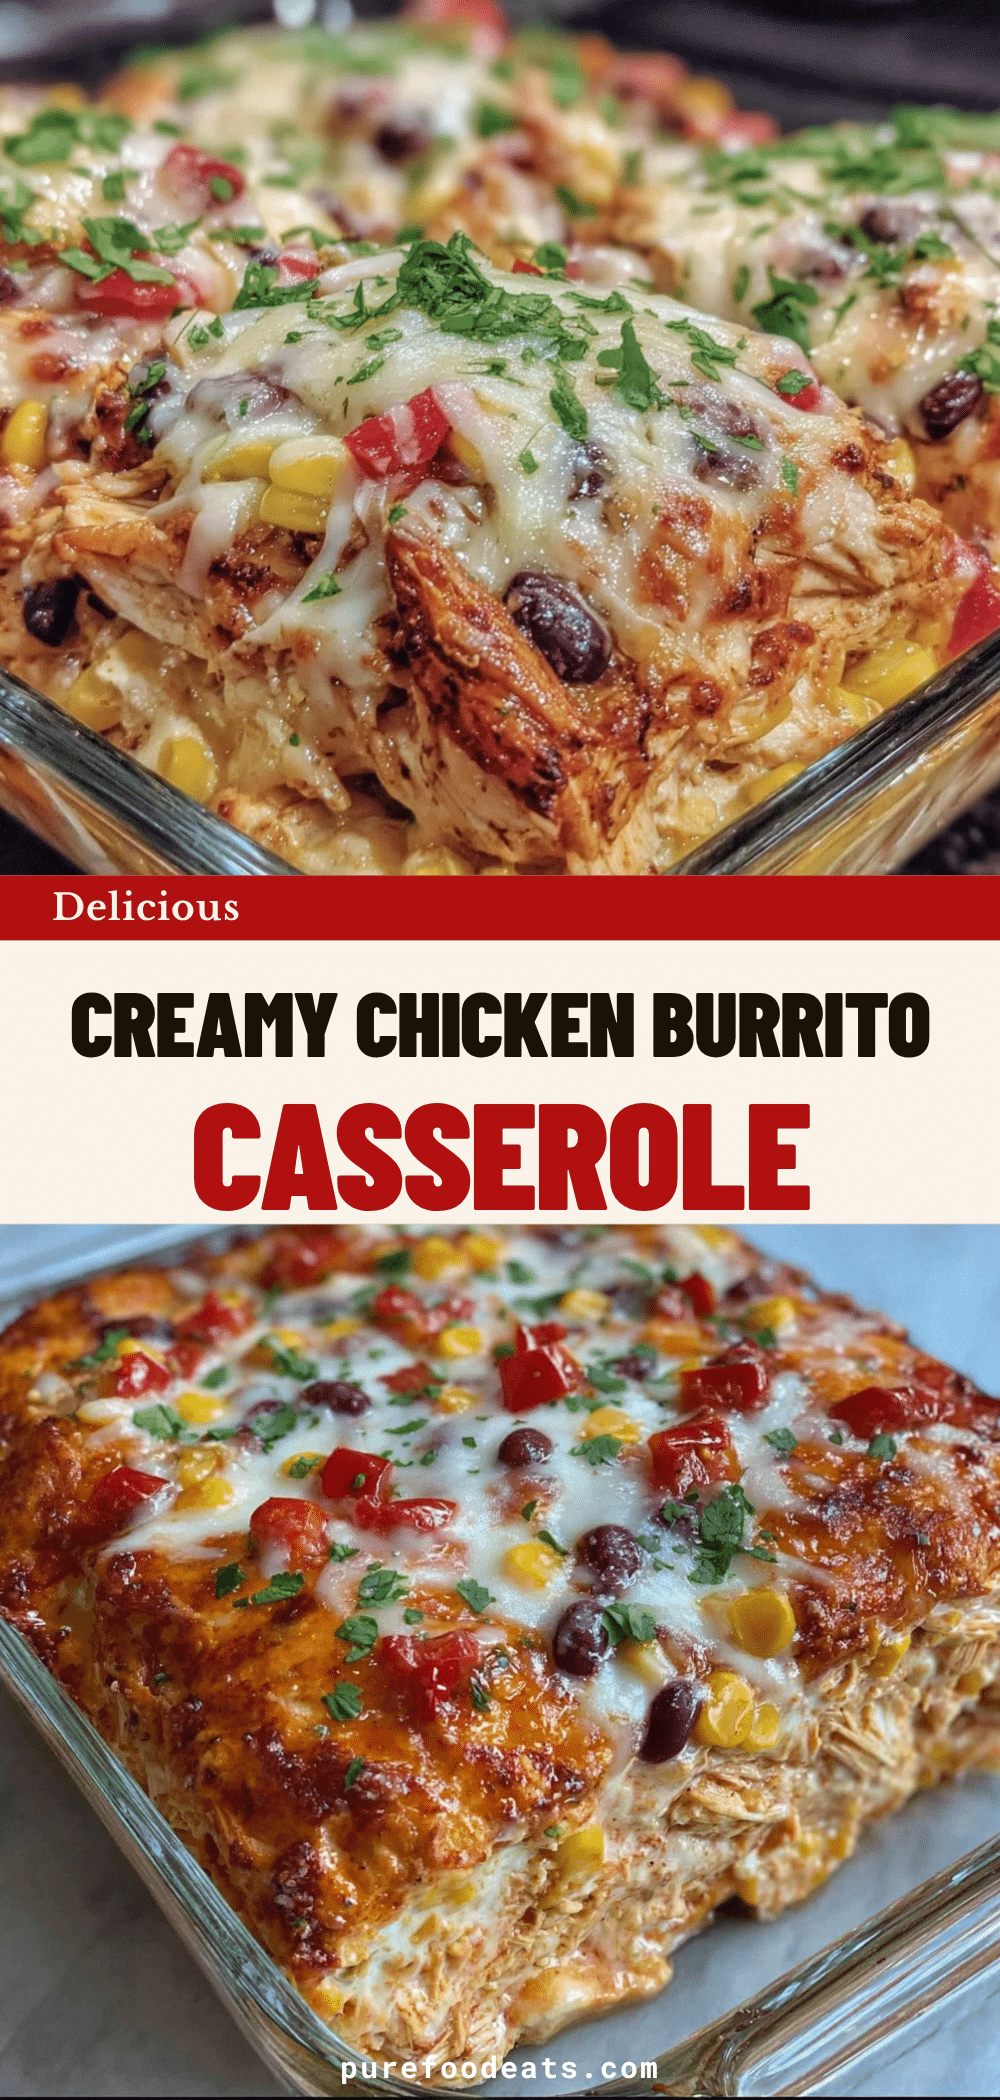

Easy Chicken Burrito Casserole: Best Meal Prep
- Total Time: 50 minutes
- Yield: 6 servings 1x
Description
A convenient, one-pot chicken burrito casserole that is perfect for meal prep. It combines tender chicken, rice, beans, and cheese for a comforting, flavorful weeknight dinner that reheats beautifully.
Ingredients
- 1.5 cups uncooked long-grain white rice
- 1.5 pounds chicken breast or thighs, diced
- 2 cups chicken broth (low-sodium recommended)
- 1 can (15 oz) black beans, rinsed and drained
- 1 cup frozen corn
- 1 cup enchilada sauce
- 2 tablespoons taco seasoning
- 1 medium onion, diced
- 1 bell pepper, diced
- 3 cloves garlic, minced
- 2 cups shredded Mexican blend cheese
- 1 tablespoon oil (for cooking)
- Salt and pepper to taste
- Fresh cilantro, chopped (for garnish)
- Sour cream (optional, for serving)
Instructions
- Preheat oven to 375°F (190°C).
- Heat oil in a large skillet over medium heat. Add diced onion and bell pepper; sauté for 3-4 minutes until softened. Add garlic and cook for 1 minute more.
- Push veggies to the side and add diced chicken. Season with salt and pepper; cook for 5-6 minutes until chicken is no longer pink.
- Add uncooked rice to the skillet and stir for 1 minute to toast. Add black beans and frozen corn; mix well.
- Pour in chicken broth and enchilada sauce. Stir to combine. Add taco seasoning and adjust salt if needed.
- Pour the mixture into a 9×13 inch baking dish and spread evenly.
- Sprinkle shredded cheese evenly over the top.
- Bake for 20-25 minutes until cheese is bubbly and golden, and rice is tender.
- Remove from oven and let rest for 5 minutes before serving. Garnish with cilantro and serve with sour cream if desired.
Notes
For best results, do not skip toasting the rice in the skillet. If using leftover cooked rice, reduce the liquid by half and bake for 10-15 minutes. To prevent burning, cover edges with foil if they brown too quickly. This dish stores well in the fridge for up to 4 days or can be frozen for up to 3 months.
- Prep Time: 15 minutes
- Cook Time: 35 minutes
- Category: Main Course
- Cuisine: Mexican
Nutrition
- Serving Size: 1 portion
- Calories: 450
- Sugar: 4
- Sodium: 800
- Fat: 18
- Saturated Fat: 8
- Carbohydrates: 45
- Fiber: 6
- Protein: 35
Keywords: chicken burrito casserole, meal prep, easy dinner, one pot meal, comfort food, Mexican inspired, weeknight dinner